Hello Lovelies,
How are your Christmas preparations going ? well I hope. All my shopping is done, except of course for the turkey and veggies, phew! such a relief, got my cards to write and pop in the post box and a couple of presents to wrap, not to mention putting up the tree and decorations lol!!
Tonight I have a tag to share with you. I made this for Sue and Harvey of Imagination Crafts and uses one of my favoutite stamp sets, the 'lily pad decoupage stamp set', it is such a pretty image and I do love to decoupage my stamped images. Ok. let's get started.
Make a tag shape from white card and punch out a hole in the top of the tag. Punch out a half inch white circle and then punch a smaller hole in the centre of the circle. Colour the tag with Imagination Craft's
Inkadinks, mica powders and a spritzer. Glue the punched circle over the hole in the top of the tag.
Using the diamond stencil, add diamonds with Versamark and mica powder. Stamp the image across the centre of the tag, using a black ink pad. Stamp three dragonflies on the tag, again with black ink. Stamp the leafy branch (from the Dragonflies decoupage stamp set) using the Versamark pad at the top right hand corner and heat emboss with copper embossing powder.
Die cut the Memory Box corner die and cover with Versamark and heat emboss with copper and gold embossing powder. Glue this to the bottom half of the tag. Fix some ribbon across the bottom of the tag.
Add a strip of white punched hearts using the Martha Stewart punch, across the bottom of the ribbon and glue in place.
Stamp the lily pad in grey ink. Colour with mica powders and cut out. Glue in place on top of the ribbon with silicone glue.
On another piece of white card, stamp the three dragonflies using Imagination Craft's gilding glue and cover with gilding flakes. Brush away the excess flakes. Paint the wings of the dragonflies with mica powders
and cut them out. Glue the dragonflies to the tag.
Lastly, add a piece of ribbon through the hole at the top of the tag. Well there we have it, one finished tag. I do hope you like it. If you have visited my blog and left a comment recently, I would just like to say a big thank you, I really appreciate it. Well that's all for now, I will be back soon with another creation for you.
Take good care of yourselves, see you soon my friends.
Love and rainbows,
Crafty Hugs Jennifer xx.
Followers
Tuesday, 9 December 2014
Saturday, 6 December 2014
Frilly Fuschias
Good morning Peeps,
How are all your Christmas preparations going? well I hope. I am as behind as ever lol! will probably start to panic when I realise just how few days are left lol!!
This evening I would like to share a card with you which I made for Sue and Harvey of Imagination Crafts in June of 2012. I have used one of their gorgeous Summer decoupage stamp sets called Fuschia. I love Fuschias, they are so pretty and come in quite a few different colours.
Begin by making a base card from light green card. Matt some pink card onto the base card. Take some dark green card and lay the trellis stencil onto it and put through an embossing machine.
Punch all four corners using the Martha Stewart rings corner punch. Wrap some pink ribbon around the bottom of the dark green card and secure on the reverse. Fix the dark green card to the pink card.
Using the Nellie Snellen, small oval slotted die, cut out the oval tag using a die-cutting machine. Colour this with distress inks and stamp the sentiment onto it using a black ink pad.
Using the Nellie Snellen small flower shaped die and green card, cut out forty flower shapes. Fit two flowers into each slot on the tag and glue in place on top of the ribbon at the left-hand side. Glue three green gemstones just above the tag.
Using the Nellie Snellen large oval slotted die and white card, cut out the oval. Emboss the oval with the trellis stencil and colour with distress ink. Fix the other thirty-six flower shapes around the edge of the large pink oval.
Using white card and the black ink, stamp the fuschia image five times and colour with Promarker pens. Cut out and 3D onto the large pink oval using silicone glue.
With a sanding tool, gently rub over the embossing on the dark green card a little so it shows up the trellis design. Glue the oval with the fuschias on, at an angle across the top right-hand corner of the green matt.
Well that's all from me tonight, enjoy your weekend, stay warm and above all, have fun.
Love and rainbows,
Crafty Hugs Jennifer xx.
How are all your Christmas preparations going? well I hope. I am as behind as ever lol! will probably start to panic when I realise just how few days are left lol!!
This evening I would like to share a card with you which I made for Sue and Harvey of Imagination Crafts in June of 2012. I have used one of their gorgeous Summer decoupage stamp sets called Fuschia. I love Fuschias, they are so pretty and come in quite a few different colours.
Begin by making a base card from light green card. Matt some pink card onto the base card. Take some dark green card and lay the trellis stencil onto it and put through an embossing machine.
Punch all four corners using the Martha Stewart rings corner punch. Wrap some pink ribbon around the bottom of the dark green card and secure on the reverse. Fix the dark green card to the pink card.
Using the Nellie Snellen, small oval slotted die, cut out the oval tag using a die-cutting machine. Colour this with distress inks and stamp the sentiment onto it using a black ink pad.
Using the Nellie Snellen small flower shaped die and green card, cut out forty flower shapes. Fit two flowers into each slot on the tag and glue in place on top of the ribbon at the left-hand side. Glue three green gemstones just above the tag.
Using the Nellie Snellen large oval slotted die and white card, cut out the oval. Emboss the oval with the trellis stencil and colour with distress ink. Fix the other thirty-six flower shapes around the edge of the large pink oval.
Using white card and the black ink, stamp the fuschia image five times and colour with Promarker pens. Cut out and 3D onto the large pink oval using silicone glue.
With a sanding tool, gently rub over the embossing on the dark green card a little so it shows up the trellis design. Glue the oval with the fuschias on, at an angle across the top right-hand corner of the green matt.
Well that's all from me tonight, enjoy your weekend, stay warm and above all, have fun.
Love and rainbows,
Crafty Hugs Jennifer xx.
Thursday, 4 December 2014
Acetate Daisies.
Hi there Peeps,
First of all, I would like to welcome my newest Follower, Caroline. I do hope you enjoy your visits to my blog and thank you for following me and to my other Followers, I would just like to thank you for all your comments and continued support, this means a great deal to me.
Using some black card, the Spellbinders Grand Labels One, cut out and emboss one of the labels. Fix this to the centre of the pink paper. Again, using the slightly smaller Grand Labels die and cream card, die-cut and emboss a cream label. Glue this to the black label on the base card.
Take a piece of acetate and cut out and emboss it as you did for the cream label. Colour one side of the acetate using the wild plum, cranberry and denim alcohol inks and the blending tool leaving a few places free of ink. When you are happy with the results, cover the inks with a Versamark pad and dust with gold mica powder. Brush off the excess powder.
Turn the acetate over and lay the daisies stencil over it. Spread the black stars Sparkle Medium over the design. Remove the stencil and leave the image to dry.
Whrn the Sparkle Medium is dry, fix this to the cream card. Last of all fix a gold peel off to each corner of the pink matt on the base card.
I do hope you like this card. Using alcohol inks on the acetate background means, that no two cards will ever be alike. This could be made using totally different colours, to give a totally different look. A very quick and easy card to make.
Well, that's all for tonight my friends, I'll be back soon with another card, until then take care of yourselves, stay snug and warm during this cold spell.
Love and rainbows,
Crafty Hugs, Jennifer xx.
First of all, I would like to welcome my newest Follower, Caroline. I do hope you enjoy your visits to my blog and thank you for following me and to my other Followers, I would just like to thank you for all your comments and continued support, this means a great deal to me.
I thought I would steer away from Christmas cards tonight and show you a card which, hopefully will remind you of those balmy Summer days , which now seem so long ago lol This is a card I made for Sue and Harvey of my favourite craft Company, Imagination Crafts. I made this in May 2012. For this card I have used the beautiful 'butterfly and daisies' stencil and of course my most favourite product, Sparkle Medium. Without more ado, let's get started.
Make a base card from black card stock, matt cream, then black onto this, leaving tiny borders of each colour showing. Next, matt some pink paper onto the black matt.
Using some black card, the Spellbinders Grand Labels One, cut out and emboss one of the labels. Fix this to the centre of the pink paper. Again, using the slightly smaller Grand Labels die and cream card, die-cut and emboss a cream label. Glue this to the black label on the base card.
Take a piece of acetate and cut out and emboss it as you did for the cream label. Colour one side of the acetate using the wild plum, cranberry and denim alcohol inks and the blending tool leaving a few places free of ink. When you are happy with the results, cover the inks with a Versamark pad and dust with gold mica powder. Brush off the excess powder.
Turn the acetate over and lay the daisies stencil over it. Spread the black stars Sparkle Medium over the design. Remove the stencil and leave the image to dry.
Whrn the Sparkle Medium is dry, fix this to the cream card. Last of all fix a gold peel off to each corner of the pink matt on the base card.
I do hope you like this card. Using alcohol inks on the acetate background means, that no two cards will ever be alike. This could be made using totally different colours, to give a totally different look. A very quick and easy card to make.
Well, that's all for tonight my friends, I'll be back soon with another card, until then take care of yourselves, stay snug and warm during this cold spell.
Love and rainbows,
Crafty Hugs, Jennifer xx.
Monday, 1 December 2014
Christmas Joy.
Good evening my Lovelies,
Hope your week has got off to a good start. Just in case you have not made all your Christmas cards yet, I have another card for you tonight, which may give you some inspiration. I made this for Sue and Harvey of Imagination Crafts in September 2011. I decided to make it using traditional Christmas colours of red and green.
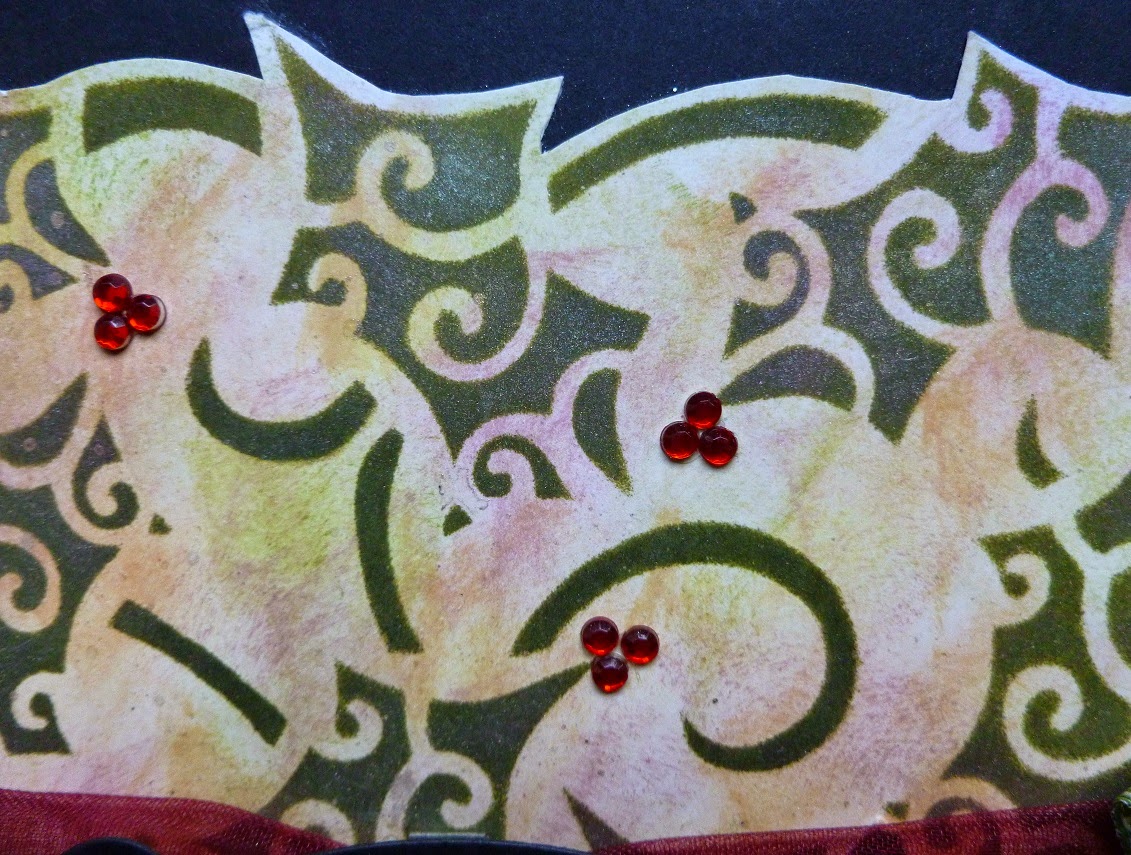
Take a piece of white card and colour it using the distress inks and a piece of cut n' dry foam. I used dried marigold, victorian velvet, scattered straw and peeled paint. When dry, lay the stencil on top and dab forest green distress ink through the design, using a stencil brush.
When the ink is dry, lay the stencil back on the design and dab Versamark through the stencil. Carefully remove the stencil and brush gold, pink and the green interference mica powders from the pastel set over the Versamark. Remove the excess powder and trim around the outside edge of the design with some scissors. Matt this onto some black card. Fix a piece of red organza ribbon around the black card, securing on the reverse.
Die-cut a label using the Spellbinders fancy tags, from black card and one from cream card. Run the gingham ribbon through the slots on the black label and fix on top of the organza ribbon and secure on the reverse. Cut out the oval from the cream label and stamp 'Joy' in the centre using a black ink pad and colour the cream label using a small part of the stencil, with distress inks and mica powders. Glue the cream label to the black.
Matt the black card onto a slightly larger piece of gold mirror card and then onto a cream base card. Make two ribbon bows from the green gingham ribbon. Glue one on each end of the ribbon. Glue fifteen red rhinestones to the card front in groups of three for the holly berries.
Well that's it folks Unfortunately. the sheen from the mica powders does not show up very well on the photos. Thank you so much for visiting my blog and if you have left a comment, thank you, It means a great deal to me to know your thoughts on my creations. It would be fabulous if you could join my blog, a girl can't have enough crafty friends lol !!
See you all again soon. Hope you don't get too stressed out doing all that Christmas shopping ! Take care.
Love and rainbows,
Crafty Hugs, Jennifer xx.
Hope your week has got off to a good start. Just in case you have not made all your Christmas cards yet, I have another card for you tonight, which may give you some inspiration. I made this for Sue and Harvey of Imagination Crafts in September 2011. I decided to make it using traditional Christmas colours of red and green.
Take a piece of white card and colour it using the distress inks and a piece of cut n' dry foam. I used dried marigold, victorian velvet, scattered straw and peeled paint. When dry, lay the stencil on top and dab forest green distress ink through the design, using a stencil brush.
When the ink is dry, lay the stencil back on the design and dab Versamark through the stencil. Carefully remove the stencil and brush gold, pink and the green interference mica powders from the pastel set over the Versamark. Remove the excess powder and trim around the outside edge of the design with some scissors. Matt this onto some black card. Fix a piece of red organza ribbon around the black card, securing on the reverse.
Die-cut a label using the Spellbinders fancy tags, from black card and one from cream card. Run the gingham ribbon through the slots on the black label and fix on top of the organza ribbon and secure on the reverse. Cut out the oval from the cream label and stamp 'Joy' in the centre using a black ink pad and colour the cream label using a small part of the stencil, with distress inks and mica powders. Glue the cream label to the black.
Matt the black card onto a slightly larger piece of gold mirror card and then onto a cream base card. Make two ribbon bows from the green gingham ribbon. Glue one on each end of the ribbon. Glue fifteen red rhinestones to the card front in groups of three for the holly berries.
Well that's it folks Unfortunately. the sheen from the mica powders does not show up very well on the photos. Thank you so much for visiting my blog and if you have left a comment, thank you, It means a great deal to me to know your thoughts on my creations. It would be fabulous if you could join my blog, a girl can't have enough crafty friends lol !!
See you all again soon. Hope you don't get too stressed out doing all that Christmas shopping ! Take care.
Love and rainbows,
Crafty Hugs, Jennifer xx.
Saturday, 29 November 2014
Pretty Poinsettia.
Good afternoon my Lovelies,
How is your weekend going, well I hope, at least the sun is shinning a little here today ! so much nicer than the foggy damp days we have been having recently. I would like to welcome my two newest followers of my blog Anjas and Brawny, I do hope you enjoy your visits, I will be popping over to see your creations too. Have you finished making your Christmas cards yet ? if not here is another idea for you. Today's card was made for Sue and Harvey of Imagination Crafts and uses their pretty poinsettia decoupage stamp set.
Here is the card we will be making, hope you like it.
Make a base card from white card. Matt a piece of red card, cut slightly smaller than the white, onto the white base card. Take another piece of white card and using the trimmer with the scalloped blade, trim all four edges.
Colour the background with peeled paint and weathered wood distress inks. Stamp the swirl stamp from the set, randomly over the card using the green distress ink. Cut two slits at either end of the stamped card, centrally. Colour some white ribbon with the pear green Promarker pen and thread through the slits and secure on the reverse of the card. This ensures that the ribbon matches the side panel perfectly. Rub the edges of the scalloped card with a gold pigment ink pad and heat emboss with gold embossing powder. Matt this onto the base card.
Fix some white lace across the top edge of the green ribbon.
Take another piece of white card and stamp the main image of the poinsettia four times, using a Versamark pad and heat emboss with gold embossing powder. Colour this with the Promarker pens and 3D the poinsettia and the side panel with the scrolls on.
Fix this to the centre of the base card using either silicone glue or sticky foam pads. The last thing to be done is to glue some gold seed beads to the centre of the poinsettia. The Promarker pen colours I used for this card were pear green, coral, crimson and gold.
Hope you like it. This is a very simple and easy card to make. Well that's all my friends, stay happy and healthy. See you all again very soon.
Love and rainbows,
Hugs Jennifer xx.
How is your weekend going, well I hope, at least the sun is shinning a little here today ! so much nicer than the foggy damp days we have been having recently. I would like to welcome my two newest followers of my blog Anjas and Brawny, I do hope you enjoy your visits, I will be popping over to see your creations too. Have you finished making your Christmas cards yet ? if not here is another idea for you. Today's card was made for Sue and Harvey of Imagination Crafts and uses their pretty poinsettia decoupage stamp set.
Here is the card we will be making, hope you like it.
Make a base card from white card. Matt a piece of red card, cut slightly smaller than the white, onto the white base card. Take another piece of white card and using the trimmer with the scalloped blade, trim all four edges.
Colour the background with peeled paint and weathered wood distress inks. Stamp the swirl stamp from the set, randomly over the card using the green distress ink. Cut two slits at either end of the stamped card, centrally. Colour some white ribbon with the pear green Promarker pen and thread through the slits and secure on the reverse of the card. This ensures that the ribbon matches the side panel perfectly. Rub the edges of the scalloped card with a gold pigment ink pad and heat emboss with gold embossing powder. Matt this onto the base card.
Fix some white lace across the top edge of the green ribbon.
Take another piece of white card and stamp the main image of the poinsettia four times, using a Versamark pad and heat emboss with gold embossing powder. Colour this with the Promarker pens and 3D the poinsettia and the side panel with the scrolls on.
Fix this to the centre of the base card using either silicone glue or sticky foam pads. The last thing to be done is to glue some gold seed beads to the centre of the poinsettia. The Promarker pen colours I used for this card were pear green, coral, crimson and gold.
Hope you like it. This is a very simple and easy card to make. Well that's all my friends, stay happy and healthy. See you all again very soon.
Love and rainbows,
Hugs Jennifer xx.
Thursday, 27 November 2014
Butterfly Dreams.
Hi there Followers, Friends and Visitors,
Welcome to my blog, I hope you enjoy your visit. Today I have a card for you which involves butterflies. I think most people like butterflies as they are so delicate and pretty. I definitely have not seen as many butterflies this year as I have in the past, which is a bit of a worry.
When out craft shopping a few days ago I bought a few things and amongst them were this butterfly die and a set of line painter pens, wasn't sure how I'd use the pens as I had not seen them before ! anyway, this is my first attempt at using them. Now just to put you in the picture, I'm not in my comfort zone when using vibrant colours. I much prefer to use the more subtle pastel shades lol! I would love to hear what you think of my attempt, not really sure what I think of this one lol ! Ok enough chit chat, let's get started shall we !
This is the finished card.
Make a base card from black card stock and matt a slightly smaller piece of white card onto the black. Take another piece of white card approximately 4" x 4" and colour with the pens, outlining the shapes with a black pen.
Matt this coloured card onto a slightly larger piece of black card. Glue this to the centre of the base card. Glue three sets of two tiny pearls to the coloured card. Try to glue them to a darkish colour, so that they show up as they are quite small and may not be seen on a light colour.
Die-cut three butterflies from black card. Take one of the butterflies and draw around it with a pencil and cut it out. Do this twice more, then glue the black butterflies to the white. Add these to the base card.
Glue two pearls to the bodies of each butterfly.
Last of all, glue three red 'nail heads' to the bottom left of the base card. Well that's it finished folks, a quick and easy card to make. Take care of yourselves and stay warm and snug in this chilly damp weather. See you all again soon. Happy Crafting !
Love and rainbows,
Crafty Hugs Jennifer xx.
Welcome to my blog, I hope you enjoy your visit. Today I have a card for you which involves butterflies. I think most people like butterflies as they are so delicate and pretty. I definitely have not seen as many butterflies this year as I have in the past, which is a bit of a worry.
When out craft shopping a few days ago I bought a few things and amongst them were this butterfly die and a set of line painter pens, wasn't sure how I'd use the pens as I had not seen them before ! anyway, this is my first attempt at using them. Now just to put you in the picture, I'm not in my comfort zone when using vibrant colours. I much prefer to use the more subtle pastel shades lol! I would love to hear what you think of my attempt, not really sure what I think of this one lol ! Ok enough chit chat, let's get started shall we !
This is the finished card.
Make a base card from black card stock and matt a slightly smaller piece of white card onto the black. Take another piece of white card approximately 4" x 4" and colour with the pens, outlining the shapes with a black pen.
Matt this coloured card onto a slightly larger piece of black card. Glue this to the centre of the base card. Glue three sets of two tiny pearls to the coloured card. Try to glue them to a darkish colour, so that they show up as they are quite small and may not be seen on a light colour.
Die-cut three butterflies from black card. Take one of the butterflies and draw around it with a pencil and cut it out. Do this twice more, then glue the black butterflies to the white. Add these to the base card.
Glue two pearls to the bodies of each butterfly.
Last of all, glue three red 'nail heads' to the bottom left of the base card. Well that's it finished folks, a quick and easy card to make. Take care of yourselves and stay warm and snug in this chilly damp weather. See you all again soon. Happy Crafting !
Love and rainbows,
Crafty Hugs Jennifer xx.
Monday, 24 November 2014
Blue and Silver Beauties.
Hi Folks,
I'm back again with another card for you. Please note - another early post from me.....again, my goodness, three in a row ! I do hope I can keep this up lol!! and not revert back to my midnight posts!
The card I am sharing tonight was made for Sue and Harvey of Imagination Craft's in May of this year. Anyone who knows me, knows I adore anything to do with fairies, pixies, angels, deer and butterflies, so tonight it is butterflies. I have made it so it looks like two of the butterflies are flying. Hope you like it.
Make a base card from white cardstock Take the patterned card and lay the stencil on top and spread the sparkle mediums over the stencil, using the metal spatula.
Remove the stencil and leave the image to dry. Whilst that is drying, use the small stencil and the sparkle mediums and make two small butterflies on white card. Cut them out when dry and glue one above the other on a narrow strip of acetate. Using the corner punch, punch out a butterfly circle in the bottom left corner and back with a piece of holographic card.
Glue the top end of the acetate strip over the top of the card and secure at the top on the back of the card. Matt this stencilled card onto the base card, cutting down slightly in order to fit the base card, leaving a narrow border of white showing. That's it finished. Thanks for stopping by my blog, hope you have enjoyed your visit. Please pop back again, would love to see you.
See you all again soon, take good care of yourselves until my next post and stay warm. Happy crafting.
Love and rainbows,
Crafty Hugs Jennifer xx.
I'm back again with another card for you. Please note - another early post from me.....again, my goodness, three in a row ! I do hope I can keep this up lol!! and not revert back to my midnight posts!
The card I am sharing tonight was made for Sue and Harvey of Imagination Craft's in May of this year. Anyone who knows me, knows I adore anything to do with fairies, pixies, angels, deer and butterflies, so tonight it is butterflies. I have made it so it looks like two of the butterflies are flying. Hope you like it.
Make a base card from white cardstock Take the patterned card and lay the stencil on top and spread the sparkle mediums over the stencil, using the metal spatula.
Remove the stencil and leave the image to dry. Whilst that is drying, use the small stencil and the sparkle mediums and make two small butterflies on white card. Cut them out when dry and glue one above the other on a narrow strip of acetate. Using the corner punch, punch out a butterfly circle in the bottom left corner and back with a piece of holographic card.
Glue the top end of the acetate strip over the top of the card and secure at the top on the back of the card. Matt this stencilled card onto the base card, cutting down slightly in order to fit the base card, leaving a narrow border of white showing. That's it finished. Thanks for stopping by my blog, hope you have enjoyed your visit. Please pop back again, would love to see you.
See you all again soon, take good care of yourselves until my next post and stay warm. Happy crafting.
Love and rainbows,
Crafty Hugs Jennifer xx.
Subscribe to:
Posts (Atom)