Followers

Saturday, 3 February 2018

A Blast From the Past, Spring Pansies.

Hello there,

Hope you are all enjoying your weekend whatever you are doing.   It is rather dull here today with the odd light snow shower here and there, mustn't complain , as it could be a lot worse.  I have to keep reminding myself we are still only in February lol!

Thank you so much for your lovely comments on my last blog and for taking the time to check out my blog.   I do hope you enjoyed your visit.   Today I would like to share a card with you which I made for Sue & Harvey of Imagination Craft's, way back in 2011,  seems so long ago now.   I used one of their very pretty Decoupage stamp sets which unfortunately are no longer available.   Some of you may have purchased this stamp at the time.   Hopefully this card will remind us of the beautiful Spring days ahead.

     
Using some blue card, make a five and a half inch square base card.   Matt a square of lemon card onto the base card, leaving a narrow border of the blue showing.   Next, matt a slightly smaller square of blue glitter card onto the lemon.   Lay the summer blossom stencil onto a smaller square of white card and using a blending tool or piece of cut 'n' dry foam, and the Milled lavender, Forest moss and Yellow straw Distress Inks colour the white card through the design.   Remove the stencil and glue this card to the blue glitter card, using Magi-bond glue.

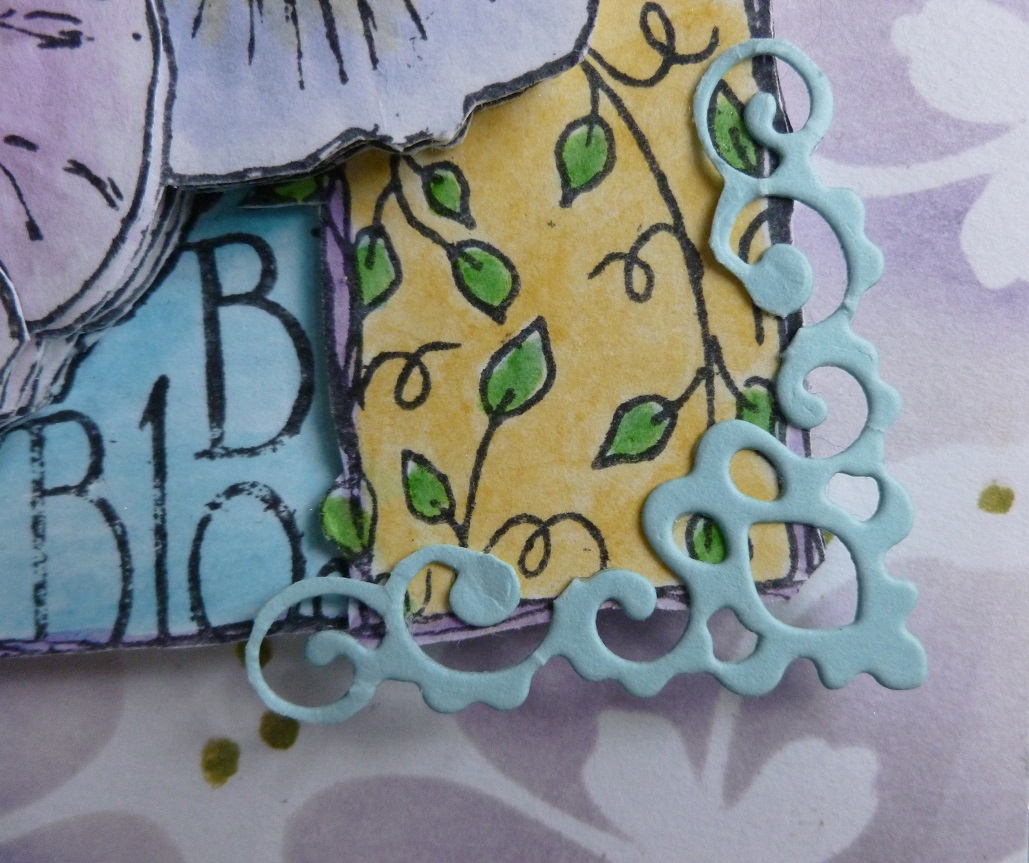
Cut a narrow strip of white card and colour with a yellow Promarker pen.   Stamp the leaf spray from the pansy decoupage stamp set, onto the yellow strip, using a black ink pad.   Glue this to a slightly larger strip of blue card and fix to the left-hand side of the base card.   Colour the leaves with a green Promarker pen.

  
Next stamp the main pansy image 7 times onto some white card using a black ink pad.   Colour with Promarker pens,  leaving one image whole,  cut out and 3D the others. 


3D the other cut- out images onto the whole image, using sticky foam pads or silicone glue.


Fix the 3D image at an angle, to the front of the base card.   Next die-cut a corner from blue card, using the Nellie Snellen set of Multi frame dies no. MFD 027.   Glue this corner to the bottom right corner of the main image.
  
Add a ribbon bow to the top left corner of the pansy image and this card is now finished.    

    
Thanks so much for stopping by my blog, enjoy the rest of your weekend and I will be back again soon

                                                             Love & Rainbows,

                                                              Hugs   Jennifer xx.


Sunday, 28 January 2018

Hearts and Flowers Thank You.

Hi there Peeps,

Hope everyone is having a good weekend whatever you are doing, despite the windy, dreary wet weather.   I do hope the sun is shinning where you are as it certainly isn't here lol!    Thank you so much for your feedback on my last blog post, I really appreciate those visits and comments.

Today I am sharing a 'Thank You' card I have made for my friend's 11 year old daughter, who made us a beautiful decoupaged Christmas card.   I do love to hear of young people who enjoy crafting and I feel they should definitely be encouraged to keep their hobby going.   As she is getting older I decided a more grown up card would be appropriate,  she loves pretty things,  hope you like it.

The card below was made using  an embossing folder and stamp set given free with the Papercraft Essentials Magazine - issue 154    so I only had to supply the card, ink pad, gems, Distress inks and ribbon, which I already had in my crafty stash! so an economical card to make for me lol!

     
Using white linen card, make a 6" square base card.   Put the front of the card into the embossing folder and then through an embossing machine to emboss.

Colour the hearts top of the card with the Wild honey,  Tattered rose,  Fired brick,  Squeezed lemonade & Mowed lawn Distress inks, using a blending tool or a piece of cut 'n' dry foam.

        
Next colour the bottom half of the card with the Tattered rose and Mowed lawn Distress inks.

Using the wild seed head  stamp (given free with the Craft Stamper Magazine) and a black ink pad, stamp the seed head along the bottom of the card.

    
Using the black ink pad once again, stamp 'Thank You,' the hearts and the butterfly along the centre of the card.   Add some Black soot Distress ink around the card edges to frame the design.


Put a further piece of white linen card into the embossing folder and emboss.   Colour the flowers with the Tattered rose and Fired brick and the leaves with the Mowed lawn Distress inks.   Cut out each flower head and bud and all the leaves.

    
Fix these on top of the original embossing using sticky foam pads or silicone glue.

   
Glue the large holographic green  gem  to the left, on the wavy embossed line and the two tiny gems to the right, again on the wavy line.

   
Glue an organza ribbon bow to the top left of the card and that is it finished.   I did of course make an insert for this card adding a personal message.

Thanks once again for stopping by my blog.   Have a good week and I'll be back soon.

                                                          Love and rainbows,

                                                           Hugs   Jennifer xx.


Thursday, 25 January 2018

Flower Fairy.

Good afternoon Fellow Bloggers, Friends and Visitors,

The weather here is a little better today with the odd shower, can't complain as this is better than snow lol!      As you will no doubt know by now that I very rarely use ready made toppers but when these flower fairy designs were given free with the Cardmaking & Papercraft magazine last year and I love fairies, I just couldn't resist making this card.  The background papers were also in the pack, along with other fairy toppers.   Hope you like what I have done with them.

    
Take  an A4 piece of white card and  trim  a half inch from one long edge.   Fold this in half portrait style.

Matt a smaller rectangle of grey card onto the base card, leaving a border of the white showing.   Cover the grey card with two of the patterned papers, I chose pink and green to match the fairy topper.

    
Die-cut two corners from white card using the Intricut flourishes die and glue one to the top left corner and the other to the bottom right corner.

   
Matt the flower fairy topper onto a slightly larger piece of white card, then matt this onto the base card, nearer to the top than the bottom of the card.

  
Put a small piece of white card into a small design,  embossing folder and emboss.   Cut one flower from this.   Next die-cut two flowers from the patterned pink paper.   Die-cut the leaves from grey card and die-cut three flower centres from gold card.   I used  a free die for the flowers, leaves & stamen which were given free with a craft magazine.   Glue the stamen to each flower centre.

  
Glue these to the bottom left of the base card, adding a green ribbon bow to the bottom left of the topper.

    
Die-cut an oval from white card using the oval from the Nellie Snellen oval die set.   Using a black ink pad, stamp 'Happy Birthday' onto the centre of the oval and thread some green ribbon through the slots and secure on the reverse with sticky tape.

   
Glue this oval to the top right corner and that is this card finished, a quick, easy card to make, especially if you need a card in a hurry.

That's all from me for the moment.   Enjoy your weekend and take care of yourselves.

                                                            Love and rainbows,

                                                             Hugs   Jennifer xx.


Monday, 22 January 2018

My Orchids Canvas.

Hi there Fellow Bloggers, Friends and Visitors,

Thank you so much for your kind comments on my last project, much appreciated.   Tonight I would like to share a canvas I made for  the Imagination Craft's shows on the Hochanda T.V. Channel last November.   For this canvas I have used one of their very pretty Rice paper designs.

   
Using the decoupage glue, fix the rice paper sheet to the canvas, sanding any excess rice paper away from the edges using a sanding block.

Spray the canvas with the yellow and brown mixed media spray inks, keeping the centre mainly yellow and the brown around the edges.

    
When dry, lay the large Art stencil MA-24 onto the canvas and stipple some rich gold Starlight paint through the design on all four corners and a little on the edges, using a stencil brush.

Take the second piece of rice paper (exactly the same design) and glue onto a piece of white card, using the decoupage glue.   When dry, cut out the stems, leaves and flowers and glue them to the original image on the canvas, using Magi-bond glue, adding  silicone glue under some petals.   Cover the flowers with some watered down gold Starlight paint.


When that is dry, lay the small circles stencil on the top left and add some white structure paste through the design using a metal spatula.   Repeat again but this time, in the bottom right corner.   Remove the stencil and leave the images to dry.


When dry, add a small amount of the festive berries Distress Ink to the circles and a thin layer of watered down gold Starlight paint.   This just tones down the white of the  structure paste and also blends with the colour of the orchids, bringing the design together.

    
Die-cut the letters 'O R C H I D'     and  'B L O O M'   from black card, using a set of alphabet dies by X-Cut.   Glue 'ORCHIDS' down the left-hand side of the canvas.

  
                               Glue the word BLOOM down the right - hand side of the canvas.

Well that's this canvas finished, I was quietly pleased with the end result and I hope you like it too.  Thanks for stopping by my blog, I will be back soon.

                                                                Love and rainbows,

                                                   Happy Crafting,  Hugs   Jennifer xx


Wednesday, 17 January 2018

My Daisy Delight MDF Wall Hanging.

Good evening Followers, Friends and Visitors,

Thank you all for your visits and comments on  my last blog, I really do appreciate them.   Hope everyone is safe and warm during this cold spell, roll on the Spring is all I can say lol!

Tonight I thought I would share an MDF wall hanging I made for Sue and Harvey of Imagination Craft's, way back in October 2014 and uses my favourite combination of colours.      Seems like a long time ago now lol !

     
This MDF set consists of a square back board, a square front frame plus the cut out square.   I only used the back and front of this set for this hanging.

Paint the backing board and the front frame with a base coat of white chalk MDF paint.   Next paint with a coat of the pretty Sage Chalki paint.   Leave this to dry.

Paint a square on the inside of the backing board in the same colours, so this will show through the square aperture  when the front frame is in position.   Using the edge of a piece of card or a ruler, rub it along the seedless preserves Distress Ink pad and make lines across the painted square.

   
Lay the daisy delights stencil over the painted square on the back board and spread the silver Sparkle Medium over the square only, using the metal spatula.   Remove stencil and leave the image to dry.

Using the front frame, lay the cleaned stencil onto it and rub some Victorian velvet Distress Ink over the left side only of the frame.   Lift off the stencil and lay it back on the frame, moving the stencil a little to one side, then rub some seedless preserves Distress ink through it.

Again, lay the stencil back on the frame and using the Claret Sparkle Medium, spread it over the right hand- side of the stencil only, using the metal spatula.

     
Add a ribbon down the left-hand side of the frame and glue a twine loop to the inside top of the backing board.   Glue the backing board to the frame using Magi-bond glue.   

      
Glue a ribbon bow to the top left and some diamond mesh just below the bow.   Using the seedless preserves D.I. and some cut 'n' dry foam, add the ink around the edges of the MDF hanging.

Well that's all from me folks, enjoy the rest of your week.   I'll be back soon with another project.

                                                                    Love and rainbows,

                                                                     Hugs   Jennifer xx.


Sunday, 14 January 2018

Midnight Rendezvous.

Hi there Friends, Followers and Visitors,

Thank you so much for your comments and visits on my last blog, I do love to hear your feedback.   Hope everyone is well and managing to stay clear of the horrendous flu virus.

Tonight I thought I would share a card I made for one Imagination Craft's T.V. shows on the Hochanda T.V. Channel last November.   I have used two stencils for this card,  'Three Cats' and 'Brick Wall' and of course some fabulous Sparkle Medium.   Below is the finished card, hope you like it.   I love this cat stencil, wonder what they are thinking lol!

   
Take a rectangular piece of grey card and lay the brick wall stencil onto it.   Spread the Crackle Paste over the stencil, using the metal spatula.   Remove the stencil and leave the image to dry.   (as this paste dries, it will crack, which is what it is supposed to do.)   When the brick wall is dry, rub some Tea Dye and Victorian Velvet Distress Inks over it to look like red bricks and trim to size to fit the base card then  put to one side for the moment.

   
Take the ivory 7" x 7" base card and using the Faded Jeans and Black Soot  Distress Inks and a blending tool, or a piece of cut 'n' dry foam, colour the evening sky, leaving a border of the ivory card showing.

Lay the 'Create a scene' stencil onto the sky and using a stencil brush, dab some platinum Starlight paint through the moon and clouds only.   Remove the stencil.


Glue the wall to the bottom of the base card, again leaving a border of the ivory card showing.

   
Die-cut four corners from black card, using the Diesire die and glue one in each corner of the base card.

        
Lay the Three Cats Stencil onto a piece of black card and spread the Black Stars Sparkle Medium over the stencil, using the metal spatula.   Remove the stencil and leave the image to dry.

  
Cut out the cats, leaving a tiny border of black card around each cat.   Glue the cats to the top of the wall so their tails hang down the wall,  using sticky foam pads.

That's this card finished.   Hope you like it.   Thanks once again for popping by my blog, much appreciated.   I'll be back soon, take care of yourselves.

                                                                Love and rainbows,

                                                                 Hugs   Jennifer xx.


Tuesday, 9 January 2018

Paradise Bird Thank You Card.

Good afternoon Fellow Bloggers, Friends and Visitors,

Slightly warmer here today but because it is warmer, we have some fog, can't have it all our own way lol! but some blue skies and sunshine would have been nice!   ah well there's always tomorrow.   At least the temperature is not as low as our friends across the pond.   It is so sad to see the creatures trapped under the ice and the turtles whose muscles are seizing up with the cold!  hope the temperature rises for them soon.   My card today was made in October 2015 and uses one of Imagination Craft's Gilding Stamp sets, which are unfortunately, no longer available but some of you may have purchased one back then.


Working on a white 7" x 7" base card, colour the front of the card with the Tumbled glass Distress ink and a blending tool or a piece of cut 'n' dry foam.

Stamp the corner stamp  (this was  given free with a craft magazine some time ago, so sorry cannot remember which one)   in each corner using a Veramark pad and heat emboss with black embossing powder.

 
Paint the flowers with the Imagination Craft's paints from their Pearly paint palette and water.   Stamp the Bird of Paradise mesh from the set, onto the front of the base card using the Versamark pad and heat emboss as before, with black embossing powder.

 
Stamp the bird to the top right of the mesh using Imagination Craft's Gilding glue and add the gilding flakes.   Brush away the excess flakes.

   
Stamp the 'Thank You' stamp onto a piece of self stripped pearl card with a Versamark pad and heat emboss with black powder as before.    (This was also a free stamp)   Cut this out and glue to the bottom right of the card, using silicone glue, bending the label slightly.   Glue two black gemstones at either side of the label.


Die-cut some flowers and a leaf, using the Marianne Design dies, from pearl card and colour with the paints from the Pearly paint palette.

 
3D the flowers and glue in the top left of the card.   Make some stamen for the pink flower by painting a long narrow strip of card and snipping along one edge with scissors but leaving the other  long edge uncut, then roll up and glue in position, spreading the stamen out a little and glue to the centre of the pink flower.

Hope you like this one.   Many thanks once again for stopping by my blog.   Thank you to those who have left me a comment, as I do like to read your feedback.    Catch you all again very soon.

                                                                    Love and Rainbows,

                                                        Happy Crafting,   Hugs   Jennifer xx.