Hope you are all enjoying your weekend. Sue and Mandy's shows on the Hochanda T.V. today were just so inspiring. Fabulous techniques with great products and the design team made some gorgeous samples and there are more programmes tomorrow Sunday 29th. April at 10am. & 2pm. hope you can tune in.
I would like to share my large fairy canvas with you all tonight. Please bear with me as there are quite a lot of stages and photographs. I really enjoyed myself decorating this canvas, as fairies are one of my favourite subjects to work with.
Using the canvas in a portrait style, paint it with the mint, lilac blue and pink sunset Starlight paints, making stripes across the canvas, blending the colours as you go.
When dry, lay the A4 fairy rose stencil onto the canvas securing it with masking tape or Crafter's Companion Stick & Spray. Spread the Dark Orchid Texture paste over the design, using the metal spatula.
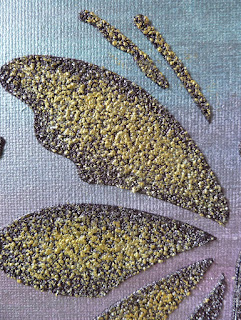
Remove the stencil and leave the image to dry. Clean and dry the stencil and lay it back on the dry image. Mask off the parts of the fairy nearest to her wings, then spread a thin layer of the Platinum Texture Paste over her wings only using the metal spatula. Remove the stencil and wash it.
Lay the stencil onto a piece of white card and once again, spread the Dark Orchid Texture Paste over the fairy's body and her right leg only. Remove the stencil and leave image to dry.
When dry, cut her out and glue her onto the original image on the canvas, using silicone glue.
Colour some white card with the White Gold Starlight Paint and when dry. die-cut five flourishes from it using the JustRite die. Glue two to the right and two to the left sides of the canvas, the ones on the right slightly lower down than the ones on the left, put the fifth flourish aside for the moment.
Die-cut seven roses from maroon coloured card, roll up and glue, then add some White Gold Starlight Wax on the tips of the petals.
Glue three roses to both sets of flourishes, using Magi bond glue. Lay the Weather Wash stencil over the bottom of the canvas and spread a little silver glitter Texture paste over the stencil to look like sparkling water.
Spread the white Texture Paste across the bottom of the canvas, higher at each side than in the middle. Add some Artsy Stones whilst the Texture Paste is still wet.
When dry, add some Malahit Texture paste over the White Texture Paste and Artsy Stones, using a stencil brush.
When dry rub some White Gold Starlight Wax over the surface of the Artsy Stones.
Glue the fifth flourish and and the 7th. rose to the bottom of the canvas.
Die-cut four corners from some maroon card, using the Crafter's Companion corner die and colour these with White Gold Starlight Wax.
Glue one in each corner of the canvas. Rub a little of the Silver Glitter Texture paste over the fairy's wings and the canvas is now finished. I do hope you are still with me lol! I do realise this is a very long blog but I do like to show you all the different stages. Thank you for taking the time to read this to the end. Enjoy the rest of your weekend and please don't forget to tune in tomorrow (Sunday) to see Sue again at 10am. & 2pm. I will be back again with another project soon.
Love and rainbows,
Hugs Jennifer xx.


Absolutely stunning Jennifer, loving the colours and design. I must invest in the Art Stones, they give fab texture, have a lovely day, Kate x
ReplyDeleteStunning Jennifer, I do love the textures and wonderful design. I can't wait for my goodies to arrive to have a play :)
ReplyDeleteHugs
Linda xxx