Followers

Showing posts with label Menthol. Show all posts

Thursday, 15 February 2018

Flower Arch Cottage.

Hi there Followers, Friends and Visitors,

Thank you so much for your visits and comments on my last blog, much appreciated.   Hope you are well,  if not,  I hope you will soon feel a lot better.   Hopefully, the Spring is just around the corner, which is a nice thought lol!

The card I'd like to share with you tonight was made in December 2016, using a new stamp I purchased from Lavina Stamps.   As most of you will now know, I adore their stamps, such beautiful fairy designs.   I have also used an Imagination Craft's stencil and Starlight paints, another favourite of mine.  O.K. let's get started lol!

       
Cut a square of white card, just slightly smaller than the white  6" x 6" scalloped base card  and colour with the distress inks.   Lay the flower arch stencil on top of the coloured card and dab the distress inks through the design.   Add some watered down orange oxidized Starlight paint to the flowers.   Glue this to the base card.

  
Using white card, die-cut a large scalloped oval and whilst the die is still on the card, colour the grass and sky with distress inks.   Remove the die.

Stamp the pixie cottage onto the coloured oval using a Versamark pad and heat emboss with black embossing powder.     Colour the house and parts of the grass with Starlight paints and glue the oval to the base card.

   
Using the Sizzix flower die,  die-cut 5 flowers, (2 large, 1 medium and 2 small) from card coloured with watered down orange oxidized Starlight paint.

  
Die-cut some leaves and colour with the green Starlight paint.   Glue the flowers and leaves around the cottage.

  
Add some rich gold Starlight paint to the dots around the flower arch.


The above photograph shows how the rich gold Starlight paint shimmers in the light.   Well that is this card finished.   Many thanks for taking the time to visit my blog, take care of yourselves until next time.

                                                                    Love & Rainbows,

                                                                    Hugs   Jennifer xx.


Monday, 27 March 2017

Thoughtful Fairy Tag.

Hi there Everyone,

What a glorious few days we are having, wall to wall sunshine.   Hope you have enjoyed some sunshine too,  wherever you are.   Today I spent some time in my craft room preparing some samples for Imagination Craft's next shows on Hochanda T.V.  bur the gorgeous sunshine was a great pull lol!   Rather than just sit outside in the sun,  I washed all the paintwork on the house, which was much nicer in the sun than a cold windy day!    so I enjoyed the sunshine and my paintwork is gleaming lol! - killed two birds with one stone so to speak!

Tonight I have another of my tags to share with you.   This one was made using Imagination's very pretty  'mushroom fairy' stencil, black shiny card and Starlight paints.   The colours do not show up as well as I had hoped, due to the light reflecting on the beautiful sheen of the Starlight paints.

   
Cut out a large tag shape from white card.   Matt an oblong piece of black shiny card onto the tag.
Take a piece of white card and colour it with  the Hibiscus, Lilac mist, white gold and menthol Starlight paints, blending the colours together across the card, on an angle, using a paint brush.

   
Leave to dry, which will not take long, as this paint dries almost instantly.   Lay the 'mushroom fairy' stencil onto the coloured card and using a  black  fine liner pen, draw around the outline of the fairy and mushroom.   Remove the stencil and fill in the design with patterns of your choice, using the black pen.

Cut the coloured card to fit the black matt but leaving a tiny black border showing.   Cut around the outline of the mushroom, so it protrudes beyond the tag.   Fix this to the black matt.

Stamp some stardust beside her legs using a black ink pad.   (This stamp,  the 'fairy wishes' and 'make a wish'  stamps were given free with  a craft magazine.)  

      
Stamp the sentiment to the top of the tag, plus some stardust, using the black ink pad.   Take some lilac ribbon and using a black ink pad, stamp 'Make a wish' onto the ribbon.

   
Make a hole in the top of the tag and insert a black  eyelet, using the Cropodile.   Thread the ribbon through the hole.    Glue 3 tiny pink star gems to the sky.     Make a stand and glue to the back of the tag, so it can be stood up if wished.

Well that's all for now my friends,  I will be back in a day or so.   Have a good week.

                                                                    Love and rainbows,

                                                                     Hugs   Jennifer xx.


Monday, 15 August 2016

Forest Fir Trees card. A 'Sneaky Peek.'

Hi there again Followers, Friends and Visitors,

What a beautiful day it has been here today, in more ways than one lol!  Hubby said he would take me out to lunch and visit all  three  craft shops in and around our area !   yeah !!   bought quite a few things to go with my ever growing crafty stash.     Going to have a play with them sometime tomorrow.   I am also working on some new Imagination Craft's products for their next shows on the Hochanda T.V Channel on the 26th August, the times I will tell you nearer the show.   Well onto tonight's sneaky peek.    I have used two of Imagination's fabulous Art stamps,  Christmas Text and Fir Trees.   Fir trees is a negative stamp, meaning, that the ink goes on the background, leaving the actual image  ie: the fir trees,  unstamped.   The text is a positive stamp, ie: the actual image is stamped, leaving the background unstamped.   It did  take me a little time to get my head around the positive/negative thing but  they are beautifully designed stamps.   The trees can be stamped on all sorts of backgrounds and that background will form the trees.


(1)    Fold the white base card in half down the crease line, making a 7"x7"  card to work on.

(2)    Using the Versamark pad, stamp the text down the left-hand  side of the base card and heat emboss
         with detail gold embossing powder.


(3)    Wrap a piece of cream organza ribbon across the centre of a piece of lavender paper, approximately
         6" long by one and a half inches deep., securing on the reverse.   Glue this across the centre of the
         base card.

     
(4)    Take some white card  and colour it with the Amethyst, Cyclamen, Menthol, Antique gold & Topaz     
         Starlight paints, using a brayer if you have one, if not use a paintbrush.   When this is dry, which will
         not take long, stamp the fir trees onto it, using a Versamark pad, then heat emboss with black
         embossing powder.  

      
(5)    Trim the image down, leaving a tiny border of the coloured card showing, then matt this onto a
         piece of white card, again leaving a tiny border of the white showing.

(6)    Next, matt the image onto a slightly larger piece of lavender paper.
       

(7)    Glue this to the right-hand side of the base card and add a ribbon bow to the  left of the image.

   
Well that's all for now my friends.   Please pop back tomorrow when I will have another 'sneaky peek.'  this time it will be an MDF creation for Christmas.    Please do not forget to tune in, or set your recorders for Imagination Craft's shows on the Hochanda T.V Channel on the 16th August 2016 at 10am.  1pm  and 5pm. when our lovely Sue and Lisa B will be demonstrating different  techniques.   Catch you all tomorrow.

                                                                   Love and rainbows,

                                                                  Crafty Hugs to you all.  

                                                                         Jennifer xx.


Tuesday, 26 July 2016

Pimpernel Petals Card.

Good evening Followers, Friends and Visitors,

Hope your week is turning out the way you hoped it would..   The card I have for you tonight was made using an Imagination Craft's stamp set, designed for them by Lisa B. Designs, a really pretty set, which can be purchased from the  Imagination Craft's web site.

Fold the cream card down the centre crease line, making a 7"x7" base card on which to work.Take a smaller square of deep jade  card and put into the  Tattered Lace embossing folder and then run through an embossing machine, matt this onto the base card. 


Cut two pieces of terracotta card (both the same size) and stamp 'Thinking of you'  in the top left corner of
one and 'With Love' in the bottom right of the other using a Versamark pad and heat emboss with gold embossing powder.  Glue these terracotta squares to the top left and bottom right corners of the jade card.


Die-cut a large scalloped  oval from cream card, using the Spellbiuder's die set,   stamp the large stamp from the Pimpernel stamp set onto it, using the multi-coloured, Autumnal colour pigment  ink pad, then heat emboss with clear embossing powder.  

    
Glue the oval, on an angle to the centre of the base card.    Colour the image with well watered  down Starlight paints, to match the colours on the embossed image.


Glue an orange ribbon bow to the top right corner of the jade card.    That's this card finished.   I will be back again soon.   Thanks for stopping by my blog, hope you enjoyed your visit.   Enjoy the rest of your week.

                                                                    Love and rainbows, 

                                                                      Hugs   Jennifer xx.


Thursday, 14 July 2016

Snowflake Crescent Card,

Hi there Followers, Friends and Visitors,

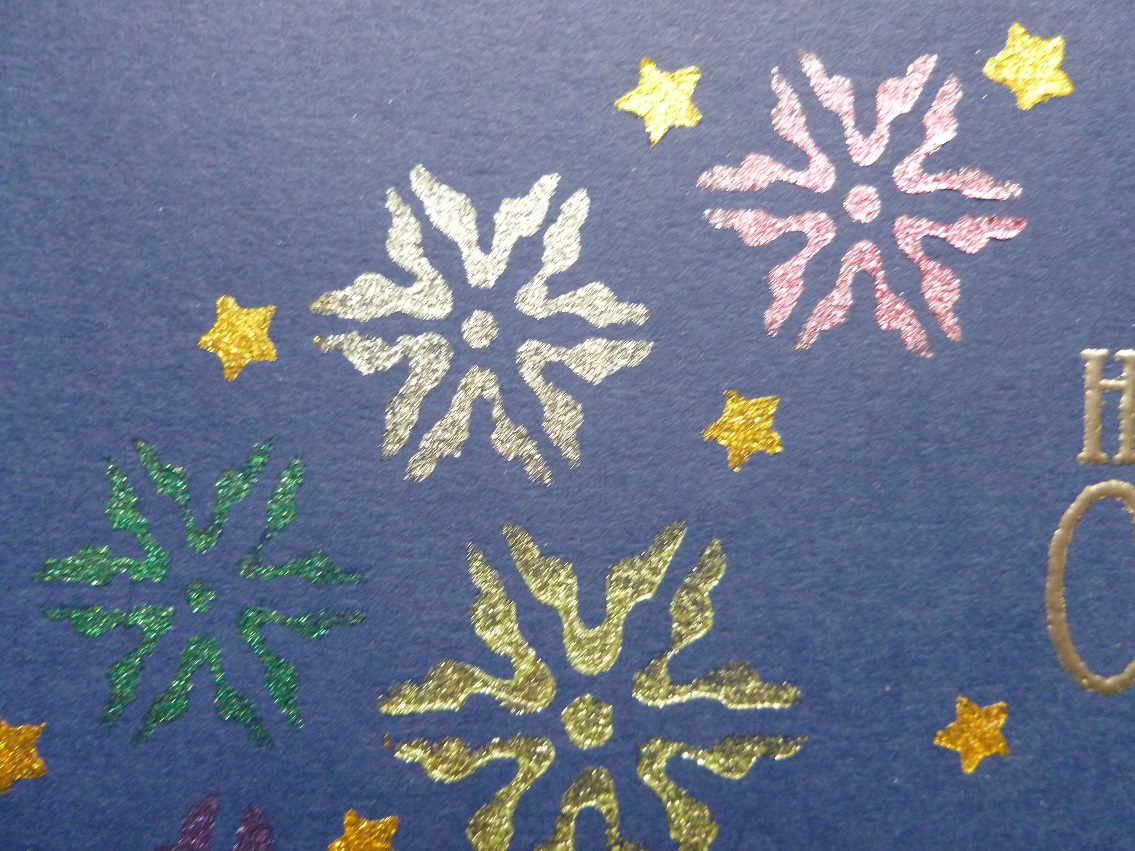
Hope you have all had as nice a day as we have had here.   Blue skies  and the sun was  really quite hot.   The  blackbirds are enjoying themselves in our strawberry bed lol!  so we have put up the fruit nets to protect them!    We had  strawberries and ice cream after dinner tonight and they were yummy!  picked and eaten within half an hour lol!!  can't beat it!    Well,  on to tonight's card,  this was made using Imagination Craft's very pretty 'snowflake crescent' stencil, Starlight paints and Sparkle Medium and was made for their show on the Hochanda T.V. Channel on 5th./6th. July 2016.
  
     
Matt a smaller square of gold mirror card onto the white ready creased 7"x7" base card, leaving a quarter inch border of the white base card showing.


Take a slightly smaller piece  of navy blue card and lay the snowflake crescent stencil onto it.   Using the stencil brushes stipple the Starlight paints through the design.   Remove and clean the stencil

      
Lay the stencil back in position on the design, having first  masked off the area around the largest snowflake, with masking tape.   Spread the Diamond Sparkle Medium over the largest snowflake, using the metal spatula.   Remove and clean the stencil and spatula.

      
When the image is dry, stamp 'Happy Christmas' from the 'Holly' decoupage stamp set. just  inside the top of the crescent, using a Versamark pad and heat emboss with silver embossing powder.   Matt this onto the gold mirror card. 


I will be back soon with another creation, so hope you will be too!   Thank you very much for your interest in my blog.    Have a good Friday.

                                                                Love and Rainbows,

                                                                  Hugs   Jennifer xx.


Tuesday, 12 January 2016

'Sneaky Peek' at one of my Projects for the Hochanda TV Show.

Good evening everyone,

Hope this post finds you all well, if not, here's a (((hug))).   Tonight I would like to share one of my creations I have made for Imagination Craft's next shows  on the Hochanda TV channel this Thursday at 8pm and on Friday at  9am.   12pm.   4pm.   and  7pm.     There are some fabulous new products for you and of course Sue's  great demonstrations to inspire you.    My project uses their beautiful MDF boxes and the gorgeous  new rice paper, Alchemy wax  and of course, my favourite product, Sparkle Medium.

   
Paint the MDF box with soft moss MDF paint, inside and out.   I used some white MDF paint as an undercoat before painting with the green but, this is not strictly necessary but I feel it shows the true colour of the green paint.   These paints cover very well.   Below is the inside of the box.


Take a small piece of sequin waste and dab some of the dried rose Starlight paint through it, using a piece of cut n' dry foam.   Do this around all the sides of the box.


Decide which part of the design on the rice paper you would like on the top of your box, cut it out and spread some PVA  glue on the top of the box.   Lay the paper on it and smooth out, making sure there are no wrinkles and leave to dry.   The photo  below  shows  the top of the box.

    
Lay the droplets stencil on each side of the box, separately, waiting for each side to dry, before doing the next and  spread the golden green Sparkle Medium over the design,  using the metal spatula, remove the stencil and leave to dry.   When all sides are done and dry, rub some sherbert Alchemy Wax around all the edges on the box.

    
On the top of the box, glue a white feather to the bottom right corner.   Paint the MDF heart with the dried rose Starlight Paint and glue on top of the feather.  

   
Colour a piece of white card using the Dried rose and the Inca gold Starlight Paints, then make three different sized roses from it.     Paint the cream angel hair with the Menthol  and Green Starlight paints.

   
Glue the angel hair and the roses to the top left of the lid.   Well that's the box decorated, I do hope you like it.   I will be back with another 'sneaky peek' very soon, so watch this space lol!    See you soon and please make a note in your diary about Imagination Craft's shows on Hochanda TV this Thursday and Friday.

                                                                 Love and rainbows,

                                                                    Hugs   Jennifer xx.


Tuesday, 4 August 2015

Birthday Flowers.

Hi there Peeps,

I'm back again lol!    What a dull and dreary day it has been today!   Sunshine popped out for all of 5 minutes lol!   and tomorrow doesn't sound like it's  going to get better any time soon.     Well my card tonight makes me feel brighter, hope it brightens up your day too.   I have used Imagination Craft's gorgeous Starlight paints,  I know I'm always saying they are gorgeous but they really are, I adore the colours and the beautiful effect they have.

Fold the white card in half down the centre crease line, making a 7"x7" base card.     Die-cut the butterfly from black card which has been  die- cut with the Memory Box contempo circles die.   Rub  the Inca gold Alchemy Wax over the butterfly.


Die-cut another panel of the contempo circles, from black card.   Rub the Inca gold wax over the panel.   Next die-cut another butterfly from this panel and glue  this butterfly on top of the other, then glue to the top left of the base card.

    
Tear small pieces from the left-over contempo circles   (different shapes)  and glue a piece in each of the four corners of the base card.


Colour four pieces of white paper with each of the Starlight Paints and when dry, die-cut the flowers and leaves from them, using the Memory Box dies.

    
Glue the small flowers to the large and glue a left-over black  circle  onto each flower centre,( after die-cutting the contempo circle). .   Glue the flowers and leaf stems to the bottom right of the card.

    
Die-cut a butterfly circle, using the Spellbinder's die and stamp 'Birthday Wishes' onto the centre , using a black ink pad.   Colour around the edges of the circle with the Inca gold Alchemy Wax and Black Soot Distress ink pad.

    
Glue this to the left of the card.   Add a cream ribbon bow to the top right-hand corner and the card is finished.

Thanks ever so much for visiting my blog, hope you have enjoyed your visit and if you leave me a comment, thank you, I appreciate them all and I endeavour to visit your blogs too in return.   I love to see what you are all doing.    See you all soon.


                                                                 Love and rainbows,

                                                                  Hugs    Jennifer xx     


Sunday, 2 August 2015

Christmas Snowflake.

Hello there Followers, Friends and Visitors,

Hope this post finds you all well.   Tonight I would like to share a Christmas card with you.  For this card I decided to use Imagination Craft's  beautiful new Starlight Paints, which Sue tells me, have been so....popular,  they are bringing out some gorgeous new colours .   The one I use most of all at the moment is the White Gold, which looks quite spectacular, especially on die-cuts.   For this card I have used Platinum, Menthol,  Green,  Dark Orchid and  the very pretty Cyclamen, hope you like it.

   
Fold the ready creased card down the centre, making a 7"x7" base card.   Matt a slightly smaller piece of black card onto the base card.   I do like using black card as it makes the colours  show up better.   Cut a smaller piece of striped white card and paint  around  all four edges with the Cyclamen Starlight Paint.   Matt this onto the black, leaving a small border of the black showing.   Next matt a smaller piece of green card onto the white painted card with the cyclamen edge.

     
Cut a smaller piece of black card and lay the diamond stencil onto it and using a piece of cut n' dry foam, dab all the starlight paint colours through the design.   Matt this onto the green card.

   
Take another piece of green card and stamp the snowflake border stamp onto it using the Versamark pad and heat emboss with black embossing powder.   Do this a further three times.   Colour with the Starlight Paints.   Matt the original image onto a square of the white striped card, the edges painted with the cyclamen, to match the previous matt.

    
Fix this to the centre of the base card.   Dot small amounts of the cyclamen paint around the scrolls and some Platinum around the edges of the design.

      
Cut out the other images and 3D them onto the original image, using silicone glue.

   
There we are, card finished.   Unfortunately the gorgeous sheen from the Starlight paints do not show up too well , best to be seen in person so to speak     See you all soon, and thanks for stopping by, hope you have
 enjoyed your visit.

                                                                   Love and rainbows,

                                                               Crafty Hugs   Jennifer xx.



Thursday, 16 July 2015

A Sneaky Peek at one of my creations for the next Imagination Craft's T.V. show.

Good evening Followers, friends and visitors,

I'm back again with another creation, a sneaky peek of a card I have made for Sue and Harvey of Imagination Crafts for their next show on Create & Craft T.V.  on Friday 24th July at 11am.   Hope you can
all tune in to see Sue do some great demos and see some fabulous new products.   All my samples are now finished.   I just need to pack them up and pop them in the post tomorrow.   They have a brilliant new product called Art Cutz and I have used some of these on this card, to make an evening scene.   I have also used their very exciting new paints - Starlight paints, they are just gorgeous and give an amazing effect.


                                                   This is card we will be making, hope you like it.

   
The gorgeous shimmer from the paints, unfortunately doesn't show up so well in the photograph, ah! well, you can't win em all lol!   Ok let's get started.

Fold the ready creased white card down the crease line, making a 7" x 7" base card.   Matt a smaller piece of black card onto the base card, then a smaller piece of terracotta card.   Die-cut four corners from black card and glue one in each corner.

   
Cut a black square and glue to the centre of the terracotta card.

Take another piece of black card and colour with the Menthol Starlight paint with touches of the Orange Oxide paint.   Cut out a hill shape along the top edge and cut to fit the black card.   Glue in position with Magi-Bond Glue.

  
Colour another piece of black card with the White Gold paint, adding touches of Orange Oxide and cut into two cloud shapes.   Cut out and colour a circle with the Orange Oxide paint.   Glue this to the top right of the black card. 

  
Glue the clouds in position.   Punch out some stars using the coloured card left over after cutting out the clouds.   Glue the stars in the sky.

  
Paint two of the wild flowers from the Art Cutz set, with black Gesso.   Dab small amounts of the Orange Oxide Starlight paint onto parts of the flowers.

Fix these to the base card using black sticky foam pads so they are not seen against the black card.   Well that's it finished.

I will be showing a 'sneaky peek'  every day until the Create & Craft show on Friday 24th July, time allowing lol!    Have a great Friday everyone, I will be back with another creation tomorrow night.   Until then, take care of yourselves.

                                                                    Love and rainbows,

                                                                       Hugs   Jennifer xx.