Followers

Friday 30 January 2015

Butterfly Time.

Hi there Followers, Friends and Visitors,

Hope you are all managing to keep warm during this cold snowy spell of weather.   We woke up to 8 inches of snow on Wednesday lol!   No more snow today but the temperature has not risen, so there is no thaw.   Ah well, we'll see what tomorrow brings lol!   Thought you might like to see a couple of photos I took, they are both views from our front door.


Well onto tonight's card.   I made this for Sue and Harvey of Imagination Crafts    for their most recent  show on Create and Craft TV.   Hope you like this one.

   
This is the finished card.   Sorry for the reflection of light, the black card is a shiny black card and reflects the camera flash.      Make a base card from white card stock.   Take a smaller piece of red co-ordinations card and emboss it with the small clock face stencil.   Remove stencil and sand the clock face using a sanding block.   Fix this to the base card, leaving a small border of the white showing.

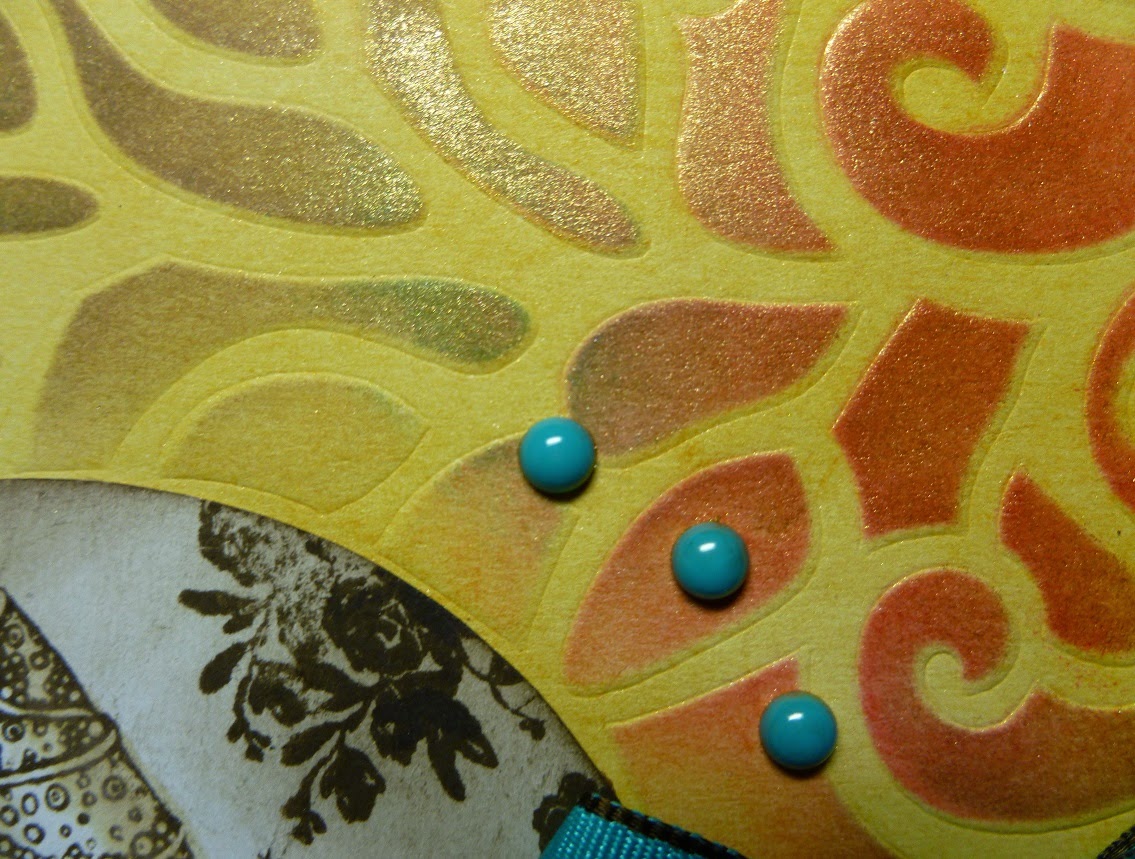
Take the black shiny card and lay the patterned stencil onto it and dab some Versamark through the design, using a piece of cut n' dry foam.   Remove the stencil and heat emboss with red/gold embossing powder.

Cut around the outer edge of the stencilled design and fix to the red card.

Take a piece of white card and stamp the cogs four times,  the butterflies four times and the small clock face once, using a black ink pad.   Cut out and glue a cog in each corner of the card. 


Colour the butterflies with mica powders and glue to the card front.   Glue the clock face to the centre of the embossed design.

Stamp the text 'Time Flies' onto white card, using a black ink pad.     Cut out and fix to the card front.

  
Well that's it finished, another quick and easy card to make.   Thank you all for popping by my blog and if you have left a comment, thank you again.   Your comments make me a very happy bunny lol!   and I read each and every one of them.   Take care of yourselves, stay safe and warm.   See you all again very soon.

                                                                   Love and rainbows,

                                                                Crafty hugs    Jennifer xx.


Tuesday 27 January 2015

Tick Tock, Time Flies.

Hi there Peeps,

It's me back again, hope your week is going well so far.    First of all, I would like to welcome my newest follower Sue,  thank you for following and I do hope you enjoy your visits.

Yesterday was a quiet day for me with a little time spent doing my favourite thing - crafting lol!   Today has been  brilliant, my 'happy post' from Imagination Crafts  arrived at lunch time,  whoopee!   got started right away after lunch lol!  lots of samples to make for Imagination Craft's next Create and Craft's tv shows in February.  Well enough  chit chat, my card for tonight was made for Sue and Harvey of Imagination Crafts for their latest tv show on Saturday 24th. Jan. 2015 , hope you like it.

Make a base card from white card stock.   Matt a slightly smaller piece of black card onto the white, leaving a small border of white showing.

Take a piece of white card, slightly smaller than the black and lay the stencil on top.   Colour the design with a piece of cut n'dry foam and distress inks.

    
Remove the stencil and when the ink is dry, lay the stencil slightly to the right, and   using a black pen, draw around the shapes of a few of the hexagons and colour one half of each hexagon with the black pen.

    
Add a couple of black lines down the other half of the hexagons.   Do this at the top and the bottom of the card.

Fix this to the base card. cut a narrow black strip and glue across the centre of the card.   Cut out a black oblong and glue this down the centre of the card.

Stamp the watch using a black ink pad, onto white card and colour the clock case with distress ink and fix to the bottom half of the black oblong, using sticky foam pads.

   
Stamp out the smaller butterfly onto white card, using black ink, colour with distress inks and cut out.   Glue to the top right of the black oblong.   Add pearls to the head and body of the butterfly.   

Die-cut two black cog-wheels using the X-Cut die.   Stamp the clock face only, twice onto white card.   Cut them out and glue onto the black cog-wheels.   Fix these at either side of the watch on the black oblong, using sticky foam pads.

    
Stamp out  'Time Flies' onto white card, cut out and matt onto a piece of black card, then fix to the bottom right corner of the base card, using sticky foam pads.   Add small adhesive flat-backed pearls to dot the letter 'i'  s.

    
Add a folded ribbon to the top left of the card  and glue two pearls to it.   Dot a small amount of Detail Sparkle to the butterfly's wings.

That is it finished.   Thank you so much for taking the time to visit my blog, hope you have enjoyed your visit.
Stay warm and snug and above all be happy lol!    Until my next post.

                                                                   Love and rainbows,

                                                                 Crafty Hugs   Jennifer xx.


Saturday 24 January 2015

Time Flies.

Good evening Followers, Friends and Visitors,

Well I hope you all managed to watch Sue from Imagination Crafts and Lisa  on Create and Craft TV today.   What  great shows !   such inspiration, makes you want to get out your craft goodies and start crafting right away lol!    Fabulous demonstrations and lots of lovely samples.   Tonight I would like to share one of my cards which I'm delighted to say, was shown on the show.   It uses Imagination Craft's new clock stencil and the beautiful new stamp sets which were designed for Sue by Lisa.

Make a base card from pink card stock.   Open up the card and lay the clock stencil on the front face of the card, just about a little further than halfway across the card front.   Draw around the outside edge of the clock and cut this out, you should now be left with a rounded edge to the front of your card.   Lay the clock stencil back in position over the front of your card and spread the golden green Sparkle Medium over the circle lines and minutes, having put some masking tape over the numbers, so as not to get any green Sparkle Medium on them.   Remove stencil and leave to dry.

   
When dry, place the stencil back on your clock face and spread the silver rose Sparkle Medium over the numbers only, being careful not to get any on the circles  and the minutes.   Remove stencil and leave to dry.

     Cut a circle to fit the centre of the clock face from the  dark crackle jade patterned card and glue in place, cutting away the excess beside the fold of the card.   Die-cut a flower and leaf stem, using the Memory Box die  from lavender paper and glue to the centre of the green circle.

   
Take some white card and stamp the watch twice,  seven of the large  and eight of the small butterflies and the text  'Time Flies'  using a black ink pad.    Cut out and  glue the text to the bottom right corner.


Paint the butterflies and the two watches  with distress inks and water.   Cut out, matt a smaller butterfly onto each of the larger ones and glue around the edge of the green circle.   Glue the last small butterfly to the top right of the card.

  
Take another piece of the crackled jade patterned card and glue to the back, inside of the base card and trim to the size of the card.    Cut out the watches and 3D the case and winder only.   Glue to  the bottom of the card.   Add some Jade detail Sparkle to the flower centre.

Well that is that folks, card finished.   This card does take a little bit more time but I feel it is worth it, I hope you do too.   Until my next post, take care of yourselves.

                                                                Love and rainbows,

                                                                 Hugs   Jennifer xx


Thursday 22 January 2015

In the Pink.

Hello Everyone,

Well it's time again for another post.   Hope your weeks is going well and you are managing to keep warm and snug.   We still have snow here and because the temperature has been soooo....cold, it has not melted at all.     The countryside looks really pretty though but I have to say, I will be glad when it melts away lol!   O.k. onto tonight's card.    This was made for Sue and Harvey of Imagination Crafts at the beginning of 2013, hope you like it.

                              This is the card we are going to make this evening.

 
Make a base card from white card stock.   Next take a piece of white shiny card and colour it using distress inks and a blending tool.   Lay the stencil on top and using some cut n' dry foam and the forest moss distress ink, dab the ink through the design on the stencil.   Remove the stencil and leave the image to dry.

Lay the stencil back on the card again but move the stencil to one side a little of the previous image and spread the blue sapphire sparkle medium over it, using the metal spatula.   Remove the stencil and leave

 
the image to dry.     Using a die-cutting machine and a scalloped circle die,  cut out a large circle from white card and colour the edges of the scalloped circle with  antique pink promarker pen.   Onto this matt a slightly smaller , plain white circle.   Take another piece of white card and colour it with the distress inks.

     
Using the forest moss ink, stamp the bird of paradise onto it.   Using sparkle medium, stamp the bird again on top of the first image.   Leave to dry.   When dry,  cut out the image using a smaller scalloped die.   Glue this onto the white circle.

 
Take the stencilled card and trim to fit the white base card, leaving a small border of whie showing.   Colour some white ribbon and three lace flowers,  using the antique Promarker pen so they all match the pink around the scalloped edge of the circle.   Lay the ribbon across the middle of the card and secure on the reverse.    Glue the flowers around the bird.     Matt the stencilled card onto the base card.

 
Take a small piece of the coloured ribbon and stitch a  row of stitches along one edge and draw up the ribbon and secure the thread to make a flower and glue to the ribbon on the left-hand side.

Fix the bird of paradise circle to the centre of the card, using sticky foam pads to raise it up slightly from the base card   .   

Well that's it finished my friends.  Adding the sparkle medium slightly to one side of the inked image creates a shadow effect which I think looks good, hope you think so too.

Take care of yourselves until my next post in a few days.

                                                             Love and rainbows, 

                                                       and crafty hugs,   Jennifer xx.


Sunday 18 January 2015

A Bear that Cares.

Good evening Followers. Friends and Visitors,

Hope your weekend has been a good one.   The dreadful winds we have been experiencing of late,  have at last, calmed down but they have been replaced with snow here lol!!    brrr.... so cold!   We woke up to three inches of the white stuff on Saturday much to our Grandson's delight lol!   enough of the right kind of snow to build a snowman!    It has been snowing on and off most of today and more is forecast overnight.

Well onto tonight's card.    I have just learned that my very good friend of 45 years has fallen and fractured her pelvis, so this card was made to cheer her up.   I do hope you like it.

This is the finished card.   I just love this little bear, he is so cute holding those flowers for my friend.


Make a base card from white card stock.   Put the card front into the daisy chain embossing folder and run through an embossing machine.   Remove the card from the folder and lightly rub the distress inks over the embossed card.

Die-cut a white square, using the Spellbinder's die.   Stamp Bently Bear in the centre using a black ink pad.   Colour him using Promarker pens.

     
Matt this onto a slightly larger piece of green leaf patterned paper.   Glue this to the centre of the base card.


Stamp the bear once more onto white card  and colour him, cut him out and glue to the original bear image.   Die-cut the flowers and the leaf stems, colour them with Promarker pens and  add a small amount of red glitter gel pen onto the flower petals.

 
Fix these to the base card and add a red gemstone to each flower centre.   Glue a ribbon bow to the left-hand edge of the base card.

 
Well that's it finished my friends, quite a quick and simple card to make.    Until my next post, look after yourselves, stay safe, warm and snug in the expected very cold weather.   Many thanks for stopping by my blog and if you have left me a comment - 'thank you,'   I appreciate each and every one and I will endeavour to return the compliment.

                                                             Love and rainbows,

                                                          Crafty Hugs,   Jennifer xx.


Thursday 15 January 2015

Butterfly Trio.

Good evening Lovelies,

Hope you are all safe and well, isn't this weather dreadful, it's so dull, dreary and cold.   We woke up to snow yesterday and this morning hey presto it had all gone!  thankfully,  although our Grandson doesn't feel the same way,   he was hoping to build a snowman lol!!    The wind  is still with us, gusts of 100mph were recorded very close to us !   We lost our electricity for a few seconds a couple of times last night , then it came back on at a very low voltage, at least we had a little light, unlike the poor people in Scotland.   We must just remember, Spring is just around the corner.   Well I think we should get on with tonight's card.   This was made for Sue and  Harvey of Imagination Craft's   Create & Crafts T.V.  show in January 2014.

                                                   This is the card we will be making.

     
Make a white base card and matt a smaller piece of silver holographic card onto the white base card.   Next matt a smaller piece of black shiny card onto the holographic card.

Using a piece of silver satin card,  lay the  heart swirl stencil onto it.   Spread  old rose, pastel green and aqua sea sparkle mediums over the stencil, with a spatula and leave the image to dry.   When dry, cut around the outside edge of the design.

   
Cut out four white swirl borders, using the Memory Box die and a die-cutting machine.   Glue these to the back of the trimmed silver card and wrap a ribbon down the left-hand edge of the card and secure on the back of the card.   Fix this to the base card and add a ribbon bow to the top left.

   
Die-cut the flower and leaf stem  (Marianne Design)   from white card and colour with shabby shutters distress ink.   Glue these to the bow on the top left and add a clear gem stone to the centre of the flower.

   
Die-cut three butterflies using black and holographic card and glue to the base card.    Well that's it my friends, card finished.

Until next time take care of yourselves, stay safe and warm and I hope you all have a great weekend. 

                                                                Love and rainbows,


                                                               Big Hugs    Jennifer xx.

Monday 12 January 2015

A Touch of Spring.

Good evening Lovelies,

Thought I'd share a little piece of Spring with you tonight.  The card I have for you uses one of Imagination Craft's gorgeous Spring decoupage stamp sets.   They are very versatile as they can be used  as a flat image or because of their design, can be used for decoupage.   I really enjoy doing decoupage especially as I love  colouring  too.   For this card, I have used it as a flat image but have cut away a small section of the image.   I hope you like it.

                                                               This is the finished card.

   
Begin by making a base card from light green card stock.   Take the patterned card,   'Bubble Lilac' which can be purchased from Imagination Crafts , and cut it slightly smaller than the green base card.   Lay the 'Flourishes' stencil onto the patterned card and spread the sage green Sparkle Medium over it, using a spatula.   Carefully remove stencil and leave to dry.  

When dry, wrap a lilac satin ribbon down the left-hand side, securing on the reverse of the card.   Matt this onto the base card.   Stamp the snowdrop image onto some white card, using a Versamark pad and heat emboss with moss green embossing powder.   Cut part of the background away from the image.   Cut a  slightly larger piece of green card and fix the stamped image onto it, using sticky foam pads to add a little dimension.

   
Paint the swirls and the snowdrops with the green mica powder and water.   That's it finished, quite a quick, easy card to make.     Once again, many thanks for stopping by my blog, hope you've enjoyed your visit.   Until my next blog, stay safe and warm as weather forecasters say some Wintery  showers are on the way.   See you all again soon.

                                                             
                                                                Love and rainbows,

                                                             Crafty Hugs,   Jennifer xx.

Thursday 8 January 2015

The Golden Bird of Paradise.

Good evening Followers, Friends and Visitors,

Well it's time for my blog again.   Hope your  week is going well,  nearly time for the weekend.   Tonight I have a card for you which uses Imagination Craft's   beautiful gilding stamp set - Bird of Paradise.    This is my very first attempt at using the now infamous Brushos - powder paints.   I can remember using something similar at school when I was about 7 years old, a very long time ago!!

To begin with make a base card from black card stock.   Onto this matt a slightly smaller piece of white card.   Take a piece of blue paper approximately 5" x 5" and die-cut the Memory Box scroll die from it.   Put this die-cut aside for another project and use the negative left over after die-cutting the scroll.   I don't like to waste anything lol!!   fix this to the white card, leaving a wider border of the white showing down the left-hand side.

   
Using the Memory Box die, die-cut the panel from white card and glue down the right-hand side of the blue paper,  leaving a  tiny border of the white showing.

Die-cut the scalloped square from black card, using the Spellbinder's die and fix to the centre of the base card.

Using the Brusho paints and water, colour a piece of white card.   When dry, stamp the bird of paradise onto ir, using a Versamark pad, then heat emboss with gold embossing powder.

    
Using the slightly small die from the die set, cut out the next smallest die from the coloured, stamped card, making sure that the bird is in the centre.    Glue this to the black die-cut.  

Take the small flower stamp from the set and using a black ink pad, stamp the flowers just below the bird, so it looks as though the bird is sitting on the flowers.

   
Glue the beads down the left-hand side of the card.   Well my friends, that is that, we are finished!   I do hope you like it.   Thank you for visiting my blog and any comments you leave are very much appreciated by me, thank you.   Enjoy your weekend, see you all again in a few days time.

                                                                Love and rainbows,

                                                              Crafty Hugs   Jennifer xx.


Monday 5 January 2015

Pixie House.

Hi there Lovelies,

It's me back again with a card I made as a 'thank you'  for a special friend.   I have used Imagination Craft's   vine leaf stencil and mica  powders, along with a Lavinia stamp, which I adore.   I just love anything to do with pixies, fairies and angels.   Hope you like it.

Make a base card from brown card stock.   Onto this, matt a smaller piece of white card.   Take another piece of white card, again, cut slightly smaller than the white matt.

     
Colour this card with distress ink, scattered straw.   When this is dry, put through an embossing machine, along with the vine leaf stencil and emboss.

  
Rub the Versamark pad over the surface of the embossed card, then brush with mica powders.   Matt this onto the white card.

   
Stamp the Lavinia stamp onto a piece of white card. using  a brown distress ink pad.   Colour around the edges with a blending tool and the brown ink.   Cut out using   a circle die, making sure the image is in the centre of the circle.   Fix this to the centre of the base card.

   
Using the Spellbinders flower die,  die-cut the flowers and colour with distress inks.   Layer the three different sizes of flowers using silicone glue and glue to the left of the circle.   Add a large turquoise bead to the centre of the flower.

   
Add three smaller turquoise beads to the top right of the circle.    Lastly, add a ribbon bow.

Well that's it for tonight folks, I do hope you like it.   Take good care of yourselves until my next blog.

                                                                  Love and rainbows,

                                                               Crafty Hugs,   Jennifer xx.


Friday 2 January 2015

Peacock Perfection

Hi there Followers, Friends and Visitors,

Well, here we are, yet another year lol!  We no sooner seem to begin a year, then it ends!   I would like to wish you all A Very Happy New Year and wish you Good Health, Happiness and Prosperity for 2015.  I would also like to thank you all for your continued support during 2014,  I really enjoy reading  your comments,  they mean a great deal to me, so thank you.

Tonight I have a card for you which I made for Sue and Harvey of Imagination Crafts    in July 2013. and uses the foiling technique.   I do hope you like it.   I have to say, this is one of my favourite cards that I have made,    I just love this Imagination Craft's peacock stencil.   I have also used the fabulous Imagination Craft's Sparkle Medium,  the colours I have used are just perfect for this particular stencil design.

                                                  This is the card we will be making tonight.


  The foiling technique is achieved by laying the stencil on the card, securing it to your worktop with masking tape so it does not move, then rubbing the sparkle medium into the open sections of the design on the stencil, using a piece of cut n' dry foam,  or as I do,  my finger lol!  I find that works better for me !

   
The Memory Box die corners and scalloped border and the peacock are all done using the same technique.

   
The peacock is cut out by hand after foiling and fixed to a white scalloped  oval, coloured with distress inks   and fixed  with  sticky foam pads or silicone glue.    Small circles are punched out from foiled card and added to each scallop.   This is then fixed to a slightly larger white scalloped oval.   Next this is added to another slightly larger blue scalloped oval.

The base card is made from white card stock and a scalloped blue aperture is then fixed to the front of the base card.   The foiled zig-zag is added  around the inside of the aperture, then the other scallops with the main image of the peacock on,  is added to the centre.
 
    
                                                     A bow is added to the top left corner.


Well that's  the card finished,   this card is quite time consuming to make but worth it in the end.   I do hope you like it.   That is all from me for tonight.   I'll be back soon.   Have a good weekend.

                                                                Love and rainbows,

                                                            Crafty Hugs,   Jennifer xx.