Followers

Monday 26 February 2018

Mosaic Circles Card.

Hello Fellow Bloggers, Friends & Visitors,

Thank you for your comments and visits on my last blog post, I do enjoy hearing your thoughts on my projects.    Hope you are all keeping safe and well during this very cold spell we are having at the moment.   We have only had a dusting of snow here but I suspect it will get much worse in the next few days.   Maybe this will be Winter's last fling lol!   I do hope so, roll on the Spring is all I can say lol.

My card for tonight was made for Sue & Harvey of Imagination Crafts and was  for their shows on the Hochanda T.V. Channel in  February 2017.    I was given a stencil and some Sparkle Medium to work with.   I did use some distress inks also.   Hope you like what I did with the stencil.

  
I do tend to look at stencils to see how else they can be used, turning them upside down,  maybe cut out some parts etc.,   In this case I decided to 3D certain parts of this stencil.   Below is a photo of the 'Mosaic sun' stencil.

   
Matt a square of blue paper onto a 7" x 7" white base card, leaving a quarter inch border of the white showing.

Take a slightly smaller square of white card and lay the mosaic stencil on top.   Dab the Victorian Velvet Distress ink over the top half of the stencil, then the Stormy sky and finally, the Dusty concord, using a piece of cut 'n' dry foam.

Wash and dry the stencil, then lay it back on the now coloured white card, moving it slightly to the right (off-setting it a tiny amount, in order to create a shadow effect.)   Spread the Antique Pink Sparkle Medium over the top of the stencil, using the metal spatula and the Diamond Blue across the centre and the Diamond Quartz across the bottom of the stencil, blending the colours together as you go.

  
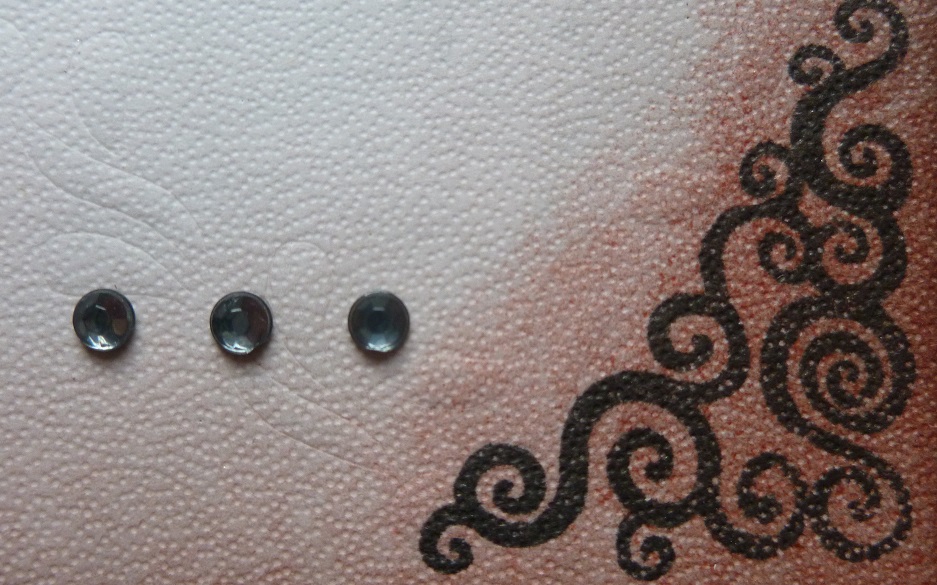
Remove the stencil and leave the images to dry.   Fix this to the base card.   Repeat this once again onto a spare piece of white card, using only the Sparkle Mediums this time, only doing the overlapping patterns, ie; 2 large and 2 small Antique Pink circles and 2 large blue (with a touch of Diamond Quartz).

   
Cut these circles out and fix to the original images using sticky foam pads with a touch of Magi-bond glue on each pad  (I find this helps the foam pad stick to the Sparkle Medium better).

 
Die-cut a circle from white card and colour with a little Stormy Sky distress ink and stamp ' Happy Birthday' in the centre using a black ink pad.   Fix this to the right-hand side of the card using sticky foam pads, to balance the design.

 
Well that's this card finished.   Thank you once again for your comments and visits they are much appreciated.    Stay safe and warm in this bitter cold weather.   See you all again soon.   Have a good week.

                                                                 Love and rainbows,

                                                                  Hugs   Jennifer xx.


Thursday 22 February 2018

'Tulips With Love.'

Hi there Followers, Friends and Visitors,

Well, we have had another fine sunny day here today, although a little chilly.   Hope you have seen the sun too.   A little sunshine really does make you feel better,  the birds were singing  and I felt  that  Spring was in the air today.    Hopefully it is just around the corner lol!    Thank you once again for your lovely comments and visits on my last post, I really love to read your feedback.

My card tonight is a very quick and easy card to make.   I have used  one of a set of stamps by Penny Black and an Art stencil by Imagination Crafts, a border stamp which was given free with a craft magazine.


Using a black ink pad and the border stamp, stamp around all four edges of a white square base card.   Stamp 'with love' in the top right-hand corner, again with the black ink pad.  


Cut a narrow strip of black card which will fit between the left and right-hand borders and fix some pink ribbon to it using double sided sticky tape, centrally on the black strip.

  
Glue this across the bottom of the base card, approximately 1" up from the bottom of the base card.

Die-cut a large black oval with the slots already in the die.   Die-cut 18 flower edges from white card which has been previously coloured with the Festive Berries Distress Ink and fix each flower into the slots on the black oval, securing on the reverse, using sticky tape.   Glue the black oval to the centre of the base card.

   
Die-cut a smaller oval from white card and colour with the Festive Berries Distress Ink, using a blending tool or piece of cut 'n' dry foam.   Lay the Art stencil on top and rub the same Distress ink through part of the design on the stencil.   Remove the stencil and wash it.

   
Using the black ink pad, stamp the tulips onto the centre of the coloured oval.   Fix this oval to the centre of the black oval.

    
Punch out three tiny black circles and glue to the bottom right corner of the base card.

Glue a pink ribbon bow to the left of the oval.

   
That's all from me for the moment.   Thanks so much for stopping by my blog.  Happy crafting.

                                                              Love and rainbows,

                                                               Hugs   Jennifer xx.


Monday 19 February 2018

A Ring of Flowers.

Hi there Everyone,
            I hope this post finds you well, for those of you who feel a little under the weather, I send some healing  ((( hugs))).   The snow has at last gone from here but I'm not convinced we have seen the last of it for this year lol!    All our beautiful little snowdrops are now flowering and the daffodils have emerged from the soil, we are always behind most places, as we live in the hills and tends to be much colder.   Roll on the Spring, I love  the spring when everything springs back into life.    I would just like to thank you for leaving some feedback for me  and for all your visits to my last blog, each and everyone is appreciated.

It is time once again for me to share another card with you all.   I do hope this one makes you think of the Spring and Summer.


Make a square base card from some white linen card.   Matt a smaller square of purple paper onto the base card.   Take a smaller square of lavender card and put this into the embossing folder and emboss.

Cut away the inner circle of the embossed ring of flowers then matt this onto the purple paper matt.   Stamp 'Happy Birthday' down the left-hand side of the base card, using a Versamark pad and heat emboss with the purple embossing powder.

        
Using the flower, stamen and leaf dies (which were given free with Issue 173 of the Simply Cards & Papercraft Magazine )  die-cut the flowers from white card and 3D them.  Glue the stamen to each flower centre.  

    
Glue the leaves and flowers around the circle using Imagination Craft's Magi-bond glue.


Using the butterfly die (given free in the same set as the flowers) die cut a plain butterfly from white card.   Next die cut the open butterfly from a piece of the lavender card.   Glue the open butterfly to the plain butterfly,  then glue in position in the bottom right corner.

  
Glue two medium lilac gems to the body of the butterfly and three to the bottom left of the card.   Glue a small gem to each flower centre and one to the base of the butterfly's body.

Well that's it for now, have a good week and I'll catch you all again quite soon.
    
                                                             Love and Rainbows,

                                                              Hugs   Jennifer xx.


Thursday 15 February 2018

Flower Arch Cottage.

Hi there Followers, Friends and Visitors,

Thank you so much for your visits and comments on my last blog, much appreciated.   Hope you are well,  if not,  I hope you will soon feel a lot better.   Hopefully, the Spring is just around the corner, which is a nice thought lol!

The card I'd like to share with you tonight was made in December 2016, using a new stamp I purchased from Lavina Stamps.   As most of you will now know, I adore their stamps, such beautiful fairy designs.   I have also used an Imagination Craft's stencil and Starlight paints, another favourite of mine.  O.K. let's get started lol!

       
Cut a square of white card, just slightly smaller than the white  6" x 6" scalloped base card  and colour with the distress inks.   Lay the flower arch stencil on top of the coloured card and dab the distress inks through the design.   Add some watered down orange oxidized Starlight paint to the flowers.   Glue this to the base card.

  
Using white card, die-cut a large scalloped oval and whilst the die is still on the card, colour the grass and sky with distress inks.   Remove the die.

Stamp the pixie cottage onto the coloured oval using a Versamark pad and heat emboss with black embossing powder.     Colour the house and parts of the grass with Starlight paints and glue the oval to the base card.

   
Using the Sizzix flower die,  die-cut 5 flowers, (2 large, 1 medium and 2 small) from card coloured with watered down orange oxidized Starlight paint.

  
Die-cut some leaves and colour with the green Starlight paint.   Glue the flowers and leaves around the cottage.

  
Add some rich gold Starlight paint to the dots around the flower arch.


The above photograph shows how the rich gold Starlight paint shimmers in the light.   Well that is this card finished.   Many thanks for taking the time to visit my blog, take care of yourselves until next time.

                                                                    Love & Rainbows,

                                                                    Hugs   Jennifer xx.


Saturday 10 February 2018

Butterflies and Poppies.

Hello again Friends, Followers and Visitors,

Hope you are enjoying your weekend and you are feeling well.   Sending special (((Hugs))) to those who are feeling under the weather.   Our snow is disappearing quite quickly I'm pleased to say, very pretty but also very disruptive, especially when you live in the beautiful countryside lol!

Today I have decided to share another 'oldie' with you.   This was made for Sue & Harvey of Imagination Craft's in February 2013 for the many craft shows they visited back then.   Although you may not be able to see from the photographs, I have stamped the poppies onto acetate and surrounded them with butterflies.

    
Matt  a gold shiny card from Imagination Crafts onto a 6" x 6" white base card, leaving a narrow border of the white showing.   Next matt s smaller square of black shiny card onto the gold.   Take a strip of white card and put through an embossing machine with the butterfly blossom stencil to emboss it.    Colour through the stencil with Black soot Distress ink and colour parts of the background with the Stormy sky Distress ink.   Glue this to the left side of the black matt.   Glue a narrow strip of gold card from top to bottom on the right-hand side of the embossed strip.

   
Cut out an oval from white card and one from acetate using an oval die.  Using a black Stazon ink pad   (best for use on acetate), stamp the main poppies image onto it.   Colour the poppies with a blue Promarker alcohol pen (works brilliantly on acetate).   Emboss the white oval with the swirls stencil and glue the acetate oval to the front of the white oval.   Glue the oval to the black matt.


Take a spare piece of shiny black card and stamp seventeen butterflies using  the butterfly from the stamp set, using Gilding glue, then cover with the Forest glade Gilding Flakes.   Remove the excess flakes and cut out each butterfly.   Glue them around the poppies oval, lifting their wings up a little.

   
Add a blue bow to the top of the gold strip.   Glue a further three gilded  butterflies to the white embossed strip, along with two tiny and one medium punched out and gilded butterflies.

  
Glue one medium and one tiny gilded butterflies to the top and bottom right of the base card and that is this card finished.   


Well that's all from me for the moment.   Thanks for taking the time to visit my blog, I really appreciate it.   Take care of yourselves and I'll be back again quite soon.   Enjoy the rest of your evening.

                                                               Love and rainbows,

                                                     Happy crafting, Hugs   Jennifer xx.


Friday 9 February 2018

Pretty Poppies.

Hello Friends, Followers and Visitors,

Thank you for your comments and your visits  on my last post, they are much appreciated.   Tonight I would like to share a card I made for Imagination Craft's in March 2013, for their craft shows they attended around the country.   This is made using a very pretty poppy stamp set.   I adore poppies so anything which features poppies I just gave to have lol!

     
Make a square base card using black shiny card from Imagination Crafts.   Cut a square of white card slightly smaller than the base card and colour this with the  Fired brick, Yellow straw and Black soot Distress inks, using a blending tool.

Next, put the card and the Trellis stencil through an embossing machine and emboss.  

     
Using a black ink pad, stamp the corner design from the set, in all four corners.   Glue this to the base card.  

    
Fix a strip of black card one inch wide and glue just off centre, on the embossed card and add an adhesive lace border down the centre of the strip.

   
Using the label die and white card, die-cut the label and emboss.   Colour this with the Distress inks.   Stamp the main poppy image onto it, using a Versamark pad and heat emboss with black embossing powder.   Lay the die onto a spare piece of black card and draw around the outside edge of the label die and cut this out.   Matt the white label onto the black and fix to the centre of the base card, using double sided sticky pads.

    
Stamp  the butterfly onto some spare white card using a black ink pad, then colour with the distress inks and cut out.   Bend two small pieces of wire and glue to the back of the butterfly.   Glue the butterfly to the top of the label die-cut.   Add three small gems to the body of the butterfly.

   
Glue three small gems to the bottom right of the base card.

   
Add two larger gems to the top and bottom of the lace strip.


Well that's this card finished.    Take care of yourselves until next time.   See you again soon.

                                                              Love and rainbows,

                                                               Hugs   Jennifer xx.


Thursday 8 February 2018

Freesias on Your Special Day.

Hello again Fellow Bloggers, Friends and Visitors,

Thank you all for your visits and comments on my last post.   I do appreciate the time you have taken to visit my blog.    I hope you enjoyed your visit.

Tonight I am going back in time to May 2011 when I made this card for Sue & Harvey of Imagination Crafts.   Some of you may have seen it at the many craft shows they attended back then.   This is a very pretty stamp set which unfortunately is no longer available but I thought it was a very pretty set and I do love Freesias, such pretty colours.

     
Make a square base card using lilac coloured card.     Onto this matt a smaller square of green card.   Take a smaller square of cream card and  stamp the Freesia image onto it using a black ink pad.

  
Colour the Freesias with Pro marker pens.   Cut out the oval, around the flowers on the inside of the oval.   Add a piece of lilac card behind the cut out oval.

Stamp the Freesias once again onto white card, colour and cut out the flowers.   3D them onto the original image using silicone glue.

   
Stamp the border from the set onto some spare cream card and again on white.   Colour both images   with Pro marker pens to match the flowers.   Cut out the twisted ribbon shape and adhere to the stamped coloured panel, using silicone glue.
  
   
Add some lace below the panel and glue in position.

    
Stamp 'Just for You' in the top left corner, using a black ink pad.

   
Stamp 'On Your Special Day' in the bottom right corner,  again using a black ink pad.

   
Colour a piece of satin ribbon to match the flowers, using Pro Marker pens, make a bow and glue to the top right of the oval aperture.

    
Glue three oval pearls to the top right of the cream card.    Then matt this onto the green card.


The colours I have used for this card are my favourite combination of colours, so pretty together.   That's all from me for the moment.   See you all again soon.

                                                              Love and rainbows,

                                                               Hugs   Jennifer xx. 


Monday 5 February 2018

Golden Crackle Christmas Trees.

Good evening  my Crafty Friends,

Hope you all enjoyed your weekend.   I know Christmas 2017 has been and gone but this card was made for Imagination Craft's shows on the Hochanda T.V. Channel last November but didn't get an airing because some of the products used were sold out so quickly, so I thought I would show it now, in good time for this Christmas lol!    I do know some of my crafting friends like to start making their Christmas cards early, not leaving them  untill the last moment, unlike myself lol!

    
Matt a square of gold mirri card onto an ivory 7" x 7" base card, leaving a half inch border of the ivory card showing.

Take a smaller square of black card and lay the fir tree stencil onto it and spread the white crackle paste over the design, using the metal spatula.   Remove the stencil and leave to dry.   Repeat this once more but this time, the smaller tree only, onto a spare piece of black card.

     
Lay the starry trail stencil onto the black card with both trees on it and dab the gold Starlight paint through some of the stars, between the trees, using a stencil brush.   Matt this card onto the base card.   Stamp Happy Christmas along  the bottom  of the base card, using a black ink pad.

   
Using the single tree, gently rub a little gold Starlight paint over the surface of the tree.   Cut this image in the shape of a tall triangle, then matt this onto a spare piece of ivory card, also cut in the same shape but slightly larger.

    
Glue this to the base card, positioning it slightly to the right of centre, using sticky foam pads.   Glue some gold sequins to the triangular tree using Magi-bond glue.

Add a narrow gold bow to the larger of the trees and glue three black gems to the top left and bottom right corners of the base card.


Glue a gold sequin star to the top of the golden tree.   Add a small amount of pearl Starlight Wax to the two outer trees.

   
That's all for now my friends, take care of yourselves and have a good week.    I'll be back again soon with another project.

                                                                  Love and rainbows,

                                                                   Hugs   Jennifer xx.