Followers

Thursday 31 October 2019

'I've Got My Eye On You! '

Good afternoon  and Happy Halloween  Lovelies,  dry here but it is very cold once again and  the sun  is shinning.    Thank you once again for all your comments and visits to my last blog post, I hope you enjoyed your visit.

Today I would like to share another of my samples, made for the Sue Baker Presents shows on the Create & Craft T.V. Channel recently.    This is made using the Dark Angel Collection along with Cadence copper metallic paint.   It is another long post  I'm afraid lol, so prepare yourself ha ha!   O.K. off we go!


Matt a light green square of card onto the 7" x 7" white base card, leaving a border of the white showing.


Take a smaller square of white card and colour it with the Cadence light sage acrylic paint and add some touches of the Cadence Malahit metallic paint, (add the Malahit whilst the light sage paint is still wet, so they blend in together.)

Lay the A4 stencil (bottom right of the design), onto the painted card and using a stencil brush, stipple the malahit paint through the design, omitting the word 'hope,' which can be covered with masking tape if wished.     Remove stencil and leave to dry, this will not take long.


Stamp the eye in the centre using a copper pigment  pad.

        
Add some copper embossing powder and shake off any excess and pop it back into the jar.

      
Heat emboss using a heat gun.


Paint the design with watered down Cadence copper metallic paint.  

       
Cut out the eyeball from inside the eyelid.

   
Take a piece of white card, the same size as the coloured card and stamp the eye once again, onto the white card, using the Copper pigment pad  and then heat emboss with copper embossing powder.


Matt this white card onto the green matt on the base card then,  the coloured card with the cut out eyeball,  onto  the base card but this time, use sticky foam pads to add some dimension to the card.


Cut out and glue the Iris from the original painted green  card onto the white pupil.


Paint some Cadence copper metallic paint onto a piece of white card and stamp the eye image onto it, using the copper pigment pad.


Heat emboss this with the copper embossing powder.

   
From this, cut out the eyelashes and the eyelids, then glue in position on the image on the base card using silicone glue.


Cut out and glue the 2 pieces from under the eye and glue to the original images, again using silicone glue.

Die-cut   3 cogs  using one of the dies from the Dark Angel collection, paint with the copper paint and glue to the original images.


Die-cut and paint 4 smaller cogs and glue one in each corner of the base card.   The products I have used can be purchased from www.crafting.co.uk 

Phew lol!  that is this card finished,  sorry this post is so long but once again, there are many elements to the making of this card, I just hope you're still with me ha ha!   Thank you if you are.  There are a lot of photos but sometimes I find it helps to see them and the other point is......I don't have to explain in writing lol!   Hopefully, the picture says it all!     Enjoy the rest of your week and I'll be back soon with another project to share with you all.

                                                                  Love and rainbows,
                                           
                                                                   Hugs   Jennifer xx.


Sunday 27 October 2019

'Be Brave.'

A very happy Sunday Lovelies,  thank you for your visits and comments on my last blog post.   Hope you've all had an enjoyable weekend.    Yesterday began dull here but the sun did put in a brief appearance later in the afternoon.    Today it has been quite sunny with blue skies but very cold lol!  can't have it all ways can we lol!     Today I would like to share another of my samples which was shown on the 'Sue Baker Presents' shows on the Create & Craft T.V. Channel recently.   This has been made using the amazing 'Dark Angel Collection.'   If you love Steampunk, you will just love this collection.   I have to admit Steampunk was not my first choice but, having worked with this collection, I have definitely changed my mind, absolutely love it!!!


Matt a slightly smaller square of black card onto a 7 " x 7" white base card, then a slightly smaller square of turquoise blue card onto the black matt.

    
Cut a slightly smaller square of white card and using the Fiskar's circle cutter, cut out a five and a half inch diameter circle from the square of white card.    I used my circle cutter because I do not have a large plain, circle die.

 
Stamp the clock pointers in the centre of each side of the square, using a black ink pad.

Take another square of turquoise blue card, the same size as the white card with the aperture.   Lay the stencil onto it and mix some  Cadence cameo metallic paint, with a touch of the copper, through the brick design, using a stencil brush.   Remove the stencil and leave the image to dry (which will not take long).


Matt the aperture onto the stencilled turquoise blue card and then onto the base card.

                 
Stamp the steampunk basque onto some black card, using a Versamark pad and heat emboss with silver embossing powder.

   
Using the basque die from the collection, die - cut the basque.   Glue this to the right-hand side of the base card using silicone glue.

    
Die-cut the hanging chains from black card and colour using the Cadence silver finger wax.

  
Glue this to the top left of the card.

 
Stamp the word 'Brave' onto a piece of white card using a black ink pad.   Round off the corners with a corner rounder punch.   Rub some black ink around the edges of the label.   Glue this on top of the chains, using silicone glue.


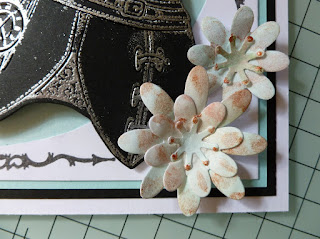
Colour some white card with the light blue and pale pink MDF paints and from this, punch out 3 large flowers and five smaller ones, plus 5 stamen.

  
Colour parts of the petals with watered down  Cadence copper metallic paint.   3D. the large flowers, adding the stamen to the centres.

  
Glue 2 large and 1 small flowers in the bottom left corner.


Glue 1 large and 1 small in the bottom right corner.


Finally, glue the last small flower to the top of the basque and the card is now finished.


Hope everyone has a good week and thanks again for your visits and comments, each and every one is appreciated.   Take care of yourselves and I will be back again quite soon.

                                                               Love and rainbows,    


                                                                Hugs   Jennifer xx.


Tuesday 22 October 2019

The World of Reality.

Hi again Lovelies,

Hope you enjoyed the Sue Baker Presents show at 11am. today when she launched the stunning 'Dark Angel' collection.   Wow! such breathtaking samples!  absolutely  fabulous. and the good news was.....Sue would  be on Create & Craft later tonight from 7pm.-9pm.  instead of just one hour at 8pm  whoo hoo!    More time.....meant  more demonstrations !    Hope you were able to tune in at 7pm. for the whole 2 hours, a very inspiring 2 hours I would add lol!

I would like to share another of my card samples which was shown on the 11am. show today.   I decided to keep to black and white only for this card,  not adding any colour .   I used the fabulous zip die,  I just love this die and I thought to myself, what can I do with this,  other than having images emerging from the top of the zip!      I die cut 3 zips and just kept playing around with them and the following card just evolved lol!   Hope you  like it.   I have to admit,  steampunk is not my thing but having played around with this stunning collection, my thoughts have changed completely lol,    I  have really enjoyed this challenge.    This collection lends itself, not only to mixed media/canvas/MDF  work but cards too.     Once again, please bear with me...lots of photos....but not much reading involved  lol!!    O.K. let's get started shall we.....


Begin by cutting 4 strips from black card, approx half an inch wide and from these punch lots of small circles from it randomly, until you are happy with the results.   Glue one of these strips to each edge of a 7" x 7" white base card.

     
Using the zip die from the collection, die-cut 4 zips from black card.   Glue these


to the white base card connecting the tops and bottoms ( almost  Gothic in style).


Cut off any overhanging zip teeth.

 
Using a black inkpad, stamp the large bee 5 times, cut out and 3D (5 layers) using silicone glue.


Glue the bee to the centre of the base card.   Stamp the sentiment onto some spare white card using a black inkpad, trim and matt onto a slightly larger piece of black card.   Glue this to the bottom of the card, using sticky foam pads.

 
Colour a small piece of white card with the black Starlight paint.   From this,   die-cut  a small flower.   Glue this to the bottom of the black zips.


Add a small white circle to the flower centre (left- over after die-cutting a white zip.)

Stamp the smaller bee 18 times using black ink.

 
Cut out and 3D the bees using sticky foam tape, making each bee up to 3 layers.   (6 bees in total.)


Glue the 6 bees to the base card.

      
Phew lol!  that's this card finished.   Thanks for staying the course but there are so many elements to this card,  I wanted to show them all to you.   I do hope you feel inspired, like myself, to have a go at steampunk crafting.     Thank you for your comments and visits to my last blog post, much appreciated.
Take care of yourselves and I will be back again quite soon.   Please don't forget, there will be one more show tomorrow at 4pm.  (that is...if there is anything left to buy lol! ).   This collection has been very popular so far lol!   Bye for now.

                                                                  Love and rainbows,

                                                                   Hugs   Jennifer xx.