Followers

Tuesday 31 March 2015

Gerbera Wall Plaque.

Good evening Peeps,

Well it's time again for me to share another of my creations with you all.  The reason I say 'creation' is, tonight I am not sharing a card with you, but a hanging wall plaque.   I tried to keep the background  fairly light, so your eyes are drawn to the gerberas.    This was made for Sue and Harvey of Imagination Crafts for their show on Create and Craft t.v. in October 2014.   I have used their gorgeous Gerbera stencil, Chalkies and of course the fabulous Jade Sparkle Medium.

                                                       Below is the finished wall plaque.

      
Take two back boards from two MDF Charm kits and paint one side of each of the boards using the Chalk White MDF paint.      One will be the front and the other the back. Next paint the backing board with the Agean and Cornflower Chalkies.     Paint the front board the same as the back. 

Stamp the text randomly over the front board.   Do the same with the sequin wastes dabbing the ink through the sequin waste  and by using the  Lavender distress ink and stamping the bottle top onto  the plaque.

  
Lay the gerbera stencil on the front board and dab the evergreen bough through the stencil design, using some cut n' dry foam.   Remove the stencil and leave to dry.

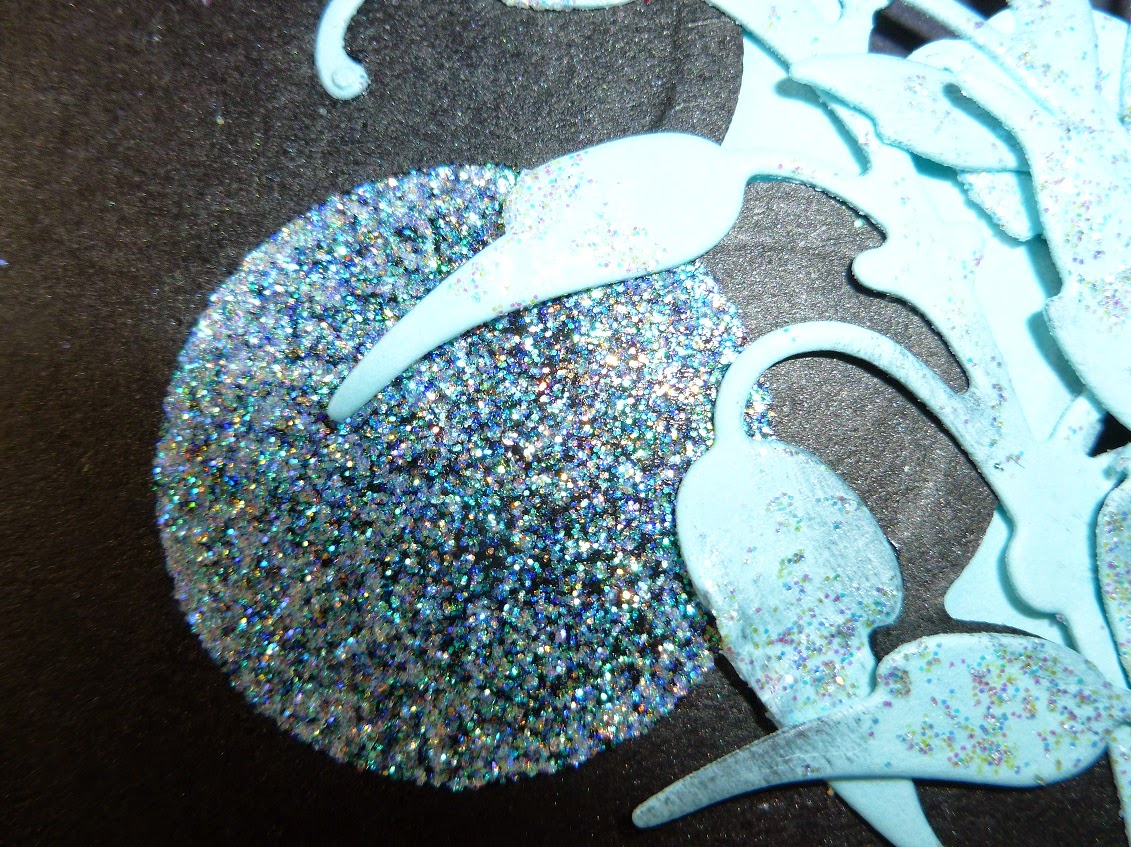
When dry, lay the stencil onto the front board again, but slightly further to the right of the distress ink image.   Spread the beautiful Jade Sparkle Medium over the stencil using the metal spatula.   Remove stencil and leave the image to dry.   Colour around the edges of the board with the evergreen bough distress ink.

Fix some ribbon across the bottom of the board, adding a piece of twine wrapped around the front board and glue in place on the reverse of the front board.

 
Add a ribbon bow to the bottom left.   Using a' Cropodile,'  punch two holes in the top of each board, then glue the unpainted sides together with a strong glue. 


Last of all, thread a piece of twine through the holes to act as a hanger.   Well that's it finished, I hope you like it.   I will be back in three days time, so I will see you then.   Take care of yourselves and I hope you all have a lovely Easter, not sure what the weather will be like lol!   I do hope we see some sunshine as the gardens are in bad need of attention!   See you all soon.

                                                                  Love and rainbows,

                                                                   Big Hugs    Jennifer xx.


Saturday 28 March 2015

Rainbow colours.

Hi there Peeps,

Hope everyone is well and having a good weekend.   The card I would like to share with you tonight, was made for Sue and Harvey of Imagination Crafts   in July 2011.   For this card I have used their pretty heart leaf stencil, Glitzies, Chalkies and  the heart leaf stamp set.  

Begin by making a base card from black card.   Take a piece of light green card approximately half an  inch smaller than the black.   Punch all four corners using the EK Success heart punch and matt this onto the black base card.

   
Trim a piece of black/green co-ordination card smallere than the green card.   Lay the heart leaf stencil on top of the black card and put through an embossing machine.   Remove the stencil and sand the embossed surface, so a little of the green backing shows through the black.


Take a white satin ribbon and colour it, using Imagination Craft's Glitzies and Chalkies and a piece of cut n' dry foam.   Using a black Stazon ink pad, stamp 'Happy Birthday' onto the ribbon and fix across the black card, securing on the reverse.

Next, colour a piece of white card with the Chalkies and the Glitzies,   the  Chalkies give a matt finish and the Glitzies leave a subtle glitter effect, really pretty!    Use a piece of cut n' dry foam to add the colours to the card.   Using the Rollagraph holder and Rollagraph 'crackle' stamp, run the stamp over a Versamark pad, then run it over the coloured card.   Heat emboss this with gold embossing powder.  (Just a small tip, please make sure your coloured card is properly dry, or the embossing powder will stick to the card, not just the Versamark lol!)

   
Cut both the long edges of this piece of card, following the gold lines.  

Fix the black co-ordinations card into the punched out corners.   Next, fix the coloured card onto the left-hand edge of the base card, using sticky foam pads.

Stamp the butterfly onto a piece of white card, using a black ink pad and colour with the Chalkies and Glitzies.  

  
Using the spare left-over coloured card, trace around three medium heart leaves from the stencil, using a pencil.   Cut them out and fix to the card front using sticky foam pads.

Fix the butterfly to the piece of coloured, embossed card using sticky foam pads.

Well that's all from me tonight, hope you like tonight's card.   Enjoy the rest of your weekend.   Take care of yourselves.   See you again in a few days.

                                                                  Love and rainbows,

                                                             Crafty Hugs   Jennifer xx.


Wednesday 25 March 2015

In the Mists of Time.

Good evening Lovelies,

Well here we are again, time for another  project,   time does fly by lol!    Talking of time, tonight I would like to share another project with you.   This time I have one of the smaller clocks for you.   These beautiful MDF clock kits can be purchased from Imagination Crafts and  the mechanism is so easy to fit.    I made this clock for Sue and Harvey of Imagination Craft's  last show on Create and Craft T,V. shown  in January this year.    These clocks make a lovely, useful present for that special person and you can decorate them in any way that appeals to you.    I do  hope you like it.

First of all, paint the back and front of the clock with  chalk white MDF paint.   When dry, colour with  distress inks, creating a little scene with clouds in the sky, by using the clouds from the beach hut stencil.

 
Lay the allium stencil on the clock face and spread the diamond Sparkle Medium over it, using the metal spatula.   Remove the stencil and leave the image to dry for  about an hour.

When dry, replace the stencil in the correct position and use distress inks and a piece of cut n' dry foam to
add the allium stalks.


Stamp the pocket watch, butterfly and the text 'Time Flies' onto the scene using the green distress ink.   Use some cut n' dry foam and the green distress ink and dab through a spare piece of sequin waste  to create some hills.


Add the stick- on gems,  large ones for the    12    3   6   and    9    and the smaller ones for inbetween the larger ones.


Well that is that my friends,  all that remains to be done is to fit the clock mechanism, which couldn't be easier lol!    then last of all, fit a battery and hey presto your clock ticks away silently,  keeping good time and ensures you won't be late again for an appointment, as well as looking pretty!

   
I do hope this may just inspire you to give this clock a go, such a useful item to have.   Until my next blog in a few days, please take good care of yourselves.

                                                              Love and Rainbows,
         
                                                     Happy Crafting,  Hugs   Jennifer xx.


Sunday 22 March 2015

Heart Leaves and Butterflies.

Hi there Followers, Friends and Visitors,

Welcome to my blog, hope you enjoy your visit.   Hasn't the weather been beautiful the last couple of days!   sunshine, blue skies and the birds are singing their little hearts out lol!   The sun makes our hearts sing!   Long may it last.

I would like to welcome my two newest followers, Kroda Crafts and Elaine.   Thank you for following my blog, hope you find your visits interesting.

Tonight I have a card to share with you which I made for Sue and Harvey of Imagination Crafts  in July 2011.   I have used their gorgeous 'heart leaf' stencil and  Glitzies, beautiful colours with a hint of glitter, they give a lovely effect.

   
Make a base card from an A4 piece of dark blue card folded in half landscape style.   Take a piece of white card and trim all four edges, using a trimmer and a scalloped blade.   Colour the edges with faded jeans distress ink.   Take a piece of turquoise card and stamp butterflies over it using the blue distress ink (2nd stamping), just enough to create a faded effect.   Glue the turquoise square onto the left-hand side of the scalloped card, leaving a   2" wide strip of white card on the right-hand edge.   Cut off the 2" strip.   Glue the larger piece to the left-hand side of the blue base card.

  
Take the 2" strip and stamp small circles onto it using the blue/purple end of an 'Inkbox' pigment pad, then heat emboss with clear embossing powder.   Fix a narrow ribbon down the centre of this card and glue it next to the turquoise card, leaving a narrow border of the dark blue showing between the two.

Using the Martha Stewart heart border punch and a piece of white card, punch a border down one long edge.   Next punch out three butterflies using the tonic punch, down the centre of this white strip.

   
Colour the edges of this white strip using the blue distress ink.   Glue this to the right-hand edge of the turquoise card.   Punch out 5 leaf fronds from turquoise card,  using the Martha Stewart punch.   Glue four of these leaf fronds  down the centre of the butterflies.     Add a blue paper rose to the centre of each butterfly.   Glue a leaf frond to the ribbon.   Punch out a small tag  using the Woodware punch and colour as before and stamp small circles and 'Happy Birthday' onto it.

  
Add a bow to the top of the tag and glue to the ribbon strip..

    
Lay the heart leaf stencil onto some white card and spread  some stencil paste over it.   Remove the stencil and leave the image to dry.   When dry, paint 2 large, 2 medium and 6 small heart leaves using the Glitzies.   Cut these out and glue to the card front, using silicone glue.

  
Punch out six small white hearts and glue to the card front.   Add a little Glitzies to the blue paper rose petals.

Well that's it finished, I do hope you like it.   Have a great week.   See you all again in a few days.

                                                                  Love and rainbows,

                                                               Crafty Hugs   Jennifer xx.


Thursday 19 March 2015

Tick Tock, Time Flies.

Hi there Peeps,

Well it's that time again lol!   where do these days go !      Firstly I would like to say a big welcome to my two newest followers,  Marianne and Naomi, I do hope you enjoy your visits, thank you for following my blog.   Tonight I decided to share one of my MDF clocks.   This was made for Imagination craft's  January 2015 Create and Craft T.V show.   This  is one of the larger clocks but there are also  smaller clocks available.   These clocks actually work and use  a battery. 

Paint the front and back of the MDF  clock with the MDF white paint.     When dry, colour with distress inks of your choice, using a blending tool.   When dry, paint over with more white MDF paint and  then crackle effect and whilst the crackle effect is still wet, paint more white paint on top of the crackle medium.   Leave to dry. 

  
When dry, gently rub a black inkpad over the surface of the clock face.   Colour some white card with  the distress inks and leave to dry.   When dry brayer some gold shine Sparkle Medium over the coloured card, leaving some parts uncovered..   When this is dry, die-cut the central pattern, using the Marianne Design die.   Glue this to the centre of the clock face. 

   
Lay the large clock face stencil onto the MDF and spread the black stars Sparkle Medium over it, using the metal spatula.   Carefully remove the stencil and leave to dry.

Punch out 12 small hearts from the left over coloured,  Sparkle Mediumed card and glue one between each set of numbers on the clock face. 

  
Using a black ink pad, stamp 'Time Flies' around the centre of the clock.   The only thing remaining to be done, is to add the clock mechanism to the back of the clock and the pointers on the front.   Add a battery, and hey presto your clock is ticking lol!   The ticking of the clock is silent.   These mechanisms can be purchased from Imagination Crafts. web site.

 
I do hope you have enjoyed your visit and that you will feel encouraged to make a clock for yourself or as a lovely gift for a friend.    That's it from me tonight, see you again very soon.   Many thanks for visiting, for  your support and your encouragement, it is much appreciated.   Take care of yourselves.

                                                                    Love and rainbows

                                                                       Happy Crafting,

                                                                      Hugs   Jennifer xx.


Tuesday 17 March 2015

Paisley Swirls.

Good evening Followers, Friends and Visitors,

We actually saw some sunshine this afternoon for a short while, makes you  feel so much better doesn't it!   Hope your week has got off to a good start.

Tonight I have a card I made for Sue and Harvey of Imagination Craft's in April 2010.  The background was made using a Crafter's Workshop template, which can be found on the Imagination Craft's website, in their bargain basement sale.   It was £4.00 reduced to only £2.00!   a bargain not to be missed lol! a very useful background stencil!

Begin by making a square base card from rust coloured card, using the trimmer and the scalloped blade.   Matt a piece of cream card onto the rust, also with a scalloped edge, leaving a border of rust showing.

      
Next cut a piece of dark blue card  slightly smaller than the cream.   Lay the paisley swirls stencil/template on the card and dab some Versmark through the design on the stencil, using a piece of cut n' dry foam.   Carefully remove the stencil/template and brush some mica powder over the Versamark.   Brush off the excess powder.

    
Fix this panel to the to the cream card using double sided sticky tape.   Punch out five small cream flowers using the Woodware flower punch and five small circles from the rust coloured card.   Glue these circles  to the flower centres and glue the flowers in position on the base card.   Punch out a further three circles and glue to the base card.  

   
Punch out four large flowers using the EK Success punch.   Cover them with Versamark and brush them over with the orange mica powder.   Cover them again with Versamark and heat emboss using the Diamond Clear Magi-Boss embossing powder.   Repeat this a further three times.   When the flowers are cool to the touch, glue them to the base card.

  
Last of all, add some glue to the large flower centres and sprinkle some seed beads on top and leave to dry.
Well that's all from me for the moment.   Have a good week and happy crafting.     See you again in a few days.

                                                               Love and rainbows,

                                                             Crafty Hugs   Jennifer xx.


Saturday 14 March 2015

Lily Flourish Hanging plaque.

Hi there Peeps,

A very happy Saturday evening.   Hope you are enjoying your weekend so far.  I've had a lovely relaxing day in my craft room, making sample cards for the next Create and Craft shows and listening to my cd s.
Tonight I have something a little different for you, an MDF hanging plaque.  MDF items are really big at the moment, hope you like it.   I made this for Sue and Harvey of Imagination Crafts in October 2014.

Use two backing boards from two MDF charm kits.   Paint one side of each backing board using the black MDF paint and leave to dry.  This paint dries quite quickly.

   
Take the front board and on the painted side, lay the lily flourish stencil on top and spread the diamond sparkle medium over the stencil, using the metal spatula.   The sparkle medium will 'take on' the background colour, making it have a  'bluey' tinge, which is very pretty.   Remove the stencil and leave the image to dry.

   
Glue a cream satin ribbon loop to the top of the inside of the front board and glue the two unpainted sides of the boards together, sandwiching the ribbon loop.   Add a ribbon bow to the bottom right hand corner.

  
Using the Tonic lily punch, punch out 18 petals and 3 centres from cream embossed paper.   Make these into 3 flowers.   Colour the petals with blue  mica powder and the centres with gold mica powder.  

    
Glue the flowers in position on the front of the plaque, adding  a blue gemstone to each flower centre.   All that remains to be done, is find somewhere to hang the plaque.

Many thanks for visiting my blog and for your continued support and lovely comments, I really do appreciate your interest.   Take care of yourselves until my next blog in a few days.

                                                                    Love and rainbows,

                                                                Happy crafting my friends.

                                                                    Big Hugs   Jennifer xx.


Wednesday 11 March 2015

A Hint of Crystal.

Good evening Peeps,

How are you all?   well I hope and if not here is a ((Hug)).  The last couple of days I've been really busy, and have had no time to spare for my crafting but I hope to make up for lost time during the next few days.    I would just like to welcome my newest follower, Marianne, thank so much for following,  hope you enjoy your visits.    Tonight's card was made for Sue and Harvey of Imagination Crafts  in April 2011 and uses their diamond stencil,  their very pretty stamp set Hibiscus, which unfortunately I think, is no longer available and Silkies.     A similar flower stamp could be used in place of the hibiscus.


Make a base card from black card stock.   Onto this matt s smaller piece of white card, then another smaller piece of black card.   Take a smaller piece of white card and colour it with the Silkies.   When dry, put this through an embossing machine, along with the diamond stencil to emboss.   Leaving the stencil still in position, dab some Versamark through the design, using a piece of cut n' dry foam.


Remove the stencil and heat emboss with crystal embossing powder.   Stamp the hibiscus oval onto some white card using a black dye ink pad.    Colour  the flowers using promarker pens.     Cut out and glue to the centre of the diamond card.   Cut out the  oval, following the inner line of the stamped image.   Stamp 'Good Luck' on the black card, so it will show through the oval, using  Versamark and heat emboss with crystal powder.      Punch four holes and add black/silver brads to the diamond card and fix the card to the base card, using sticky foam pads.

  
Glue some small yellow beads to the flower stamen.

  
Card finished, hope you like it.   Take care of yourselves until my next post.

                                                                Love and Rainbows,

                                                   Happy Crafting.  Hugs   Jennifer xx.


Sunday 8 March 2015

From Dusk Til Dawn.

Hi there Followers, Friends and Visitors,

Hope you are all having a lovely weekend.   I have had a really relaxing weekend and managed to fit in some quality crafting time, whilst listening to my  Katie Melua, Eva Cassidy and Simply Red cds.   In a little crafty world all of my own lol!  thoroughly enjoyed it.   Well onto today's card.  This card was made for Sue and Harvey of Imagination Crafts and uses their very lovely Dusk til Dawn stencil.   I decided to make this into an easel card.   Hope you like it.

   
Using a die-cutting machine, the blue card and the Spellbinder's scalloped oval dies, cut out one large oval.   Next take a piece of blue A4 card and fold in half to make an A5 card.   Lay the large nestie onto folded card leaving the fold clear of the die and put through a die-cutting machine. 

Fold the front of the card in half.   Using black card and the next smallest die, cut out a single oval.   Fix this black oval onto the front half of the folded card and trim off the excess along the fold line.

   
Cut out another black oval and lay the stencil onto it and spead the Diamond Sparkle Medium over it, using the metal spatula.   Remove the stencil and leave the image to dry.   When dry, glue this oval onto the large blue oval, which you cut out earlier and glue to the front of the folded card.

  
Using a black ink pad and the swirl stamp from the Crocus Spring Decoupage Stamp Set,  stamp the swirls around the outside edge of the base card.   Rub the Black Soot Distress ink pad around the scalloped edges.   Using a smaller die still, cut a scalloped oval from black card and glue to the centre of the base card.

Take a chipboard star and cover with the Diamond Sparkle Medium.   When dry, glue to the centre of the base card, this will hold the easel card in place.

  
Cut two small notches from the bottom of the large scalloped card, so this fits snuggly around the top of the star to hold the easel in place when open.

Take some blue card, the Marianne Design Leaf Die and cut out  3 sets of leaves and glue to the right-hand side of the oval.


Cover the leaves with the Diamond Sparkle Medium.   Add some tiny rhinestone stars to the night sky.

  
This card can be folded flat to send through the post.   Below is a picture of what it looks like when folded flat.

        
Well that's it my friends, this card does take a little time to make but I hope you think that extra time is worth it!   I just love the owl sitting there whilst everyone is in bed and fast asleep.   We have owls in our garden which hoot at night, I  love to hear them.   So nice to know they are around.

Well that's all from ne for now, see you all again in a few days.   In the meanwhile, look after yourselves.

                                                                   love and Rainbows,

                                                         Happy Crafting,  Hugs   Jennifer xx.


Thursday 5 March 2015

Butterfly Circle

Hi there Peeps,

Well how are you all, I hope your week has been good for you, mine has been an uneventful week but nonetheless a relaxing week.     The sun managed to show itself for all of 10 minutes lol!    mustn't grumble, we can't  have everything we want lol!    Tonight I'd like to share a card with you which I made for Sue and Harvey of Imagination Crafts   in May 2013 and is made with their fabulous 'Frilly Butterfly' stencil.


Make a base card from cream card stock.   Matt some dark green card onto the cream, leaving a small border of cream showing.   Take another piece of cream card approximately a quarter inch smaller than the green.   Lay the stencil onto the cream card and blend the green distress ink through the stencil, using a piece of cut n' dry foam.      Remove the stencil.

                
Glue two pieces of ribbon across the front of this card and secure on the reverse of the stencilled card.   Glue this to the dark green base card.

   
Die-cut a scalloped circle from dark green card.   Using the Nellie Snellen die, die-cut another circle, this time from cream card.   Stamp the 'butterfly fronds' onto the centre of this circle using a Versamark pad and heat emboss with detail clear embossing powder.   Blend the  green distress ink over the image so the design 'pops' and it can be seen clearly.


Bend back the 'V' shapes around the edge of the circle.   Glue this to the centre of the dark green card circle, then glue to the centre of the base card.  

   
Add a green rhinestone to each corner of the card and one in each flower centre.   That's it finished.   Many thanks for stopping by my blog and thank you for your continued support and interest in my crafty makes.   That is all from me tonight, I'll be back again on Sunday, hope you will too!   Have a wonderful weekend.

                                                               Love and rainbows,

                                                             Crafty hugs   Jennifer xx.


Monday 2 March 2015

Alliums in the Mist.

Hi  there Peeps,

Well the first day of a whole new week is nearly over and we are into March already, the Spring is getting closer and closer.   We awoke to snow again this morning !  just when we thought we had seen the last of the white stuff for this year lol!!   should have known better!  

Tonight I would like to share a card with you which I have made for Sue and Harvey of Imagination Crafts.   I have used one of my all time favourite Imagination Craft's stencils - the beautiful Allium,   I just love this stencil.    I have also used some  Antique Rose Sparkle Medium and Inkadinks.   Hope you like it.

Make a base card from pink card stock.   Matt a piece of grey card onto the base card, leaving a small border of the pink showing.  

    
Cut a square of white card, slightly smaller than the grey,   punch each corner using the EK Success corner punch.   Take another piece of white card and colour it with the Inkadinks and leave to dry.   When dry, stamp diamonds over all of the card, using shaded lilac distress ink and the Diamond Stamp from the 'Harlequin'  Stencil Stamp Range.

    
Take the two sizes of circle dies and place on the card and using a piece of cut n' dry foam, dab some Imagination Craft's  MDF Chalk paint through the circles.   Do this around the card, leaving some brighter areas showing.   Leave to dry.

Lay the allium stencil on top of the dry card and spread the Antique \Rose Sparkle Medium over the design, using the metal spatula and then leave the image to dry.

   
Fix this card into the punched corners of the white card and glue this to the base card.   Well there we have it, one finished card.   Thank you so much for visiting my blog and if you have left a comment, 'Thank you' I appreciate every one.   See you all again soon.

                                                                Love and rainbows,

                                                             Crafty Hugs   Jennifer xx.