Followers

Friday 13 January 2017

Fairy Wishes Just for You.

Good evening Friends,

Thought I would share a card with you all tonight.   This card was made for Imagination Craft's One Day Special shows on the Hochanda T.V. Channel on the 7th. & 8th. January this year.   This is a very quick card to make.

   
Begin by using a 7" square white base card.   Matt a smaller square of lavender paper onto the base card.   Take a smaller square of white card and colour it using the Starlight paints, watered down.

   
Lay the butterfly fairy stencil on top of the painted background and spread the Sparkle Mediums through the design.   Remove the stencil and leave the image to dry.

Using the Martha Stewart corner punch, punch each corner of the coloured card.  

    
Stamp 'Fairy wishes' in the top left corner and   'Just for you' in the bottom right corner, using a black ink pad.

   
Glue this image to the base card  using double sided sticky tape, adding some Magi-bond glue also, as I find it sticks really well and also gives you a little 'wriggle time' if you don't get it in the correct position first time.

 That's all for now Folks, enjoy your weekend whatever you have planned.

                                                                Love and rainbows,

                                                                 Hugs   Jennifer xx.


Thursday 12 January 2017

Treasures of the Deep.

Hello there Followers, Friends and Visitors,

Well we awoke to the white stuff this morning, not a great deal but enough to make the roads very slippery.   We went out shopping and we  had our car parked at the bottom of quite a steep hill and we looked up to see a lorry, slithering sideways down the hill !   the driver fortunately kept the vehicle under control, thank goodness and he reached the bottom of the hill safely.     There is more snow forecast tonight.    Grandson will be pleased, as that may mean the school closing for the day lol!   depends how bad it is.

Enough chit chat lol!  time to get down to more important things, like crafting lol!   I am having fun making tags at the moment, makes a change from making cards.   I just have to think 'smaller.'    My tag tonight was made for Imagination Craft's   One Day Special shows on the Hochanda T.V. Channel on the 7th. & 8th. January 2017.    I have used Imagination's really beautiful 'Mermaid' stencil, Sparkle Mediums, Rusty Patina, Starlight paint  and Alchemy Waxes.


Make a tag shape from white card and paint it with the Duck Egg Rusty Patina, Starlight paint and Alchemy Waxes.

Using two different sized plastic lids from old bottles, dip them into some white Gesso and stamp these onto the coloured tag, to represent bubbles.   Glue this tag onto a slightly larger tag, made from white card.


Lay the mermaid stencil onto a piece of white card and spread all three Sparkle Medium colours over the design, using a metal spatula.   Remove the stencil and leave the image to dry.

Cut out the mermaid, leaving a narrow border of white card showing around the edges.


                                 Glue her onto the tag with her fins over the edges of the tag.

 
Add some blue ribbon through the hole in the top of the tag.   The last thing to do, is to make a stand and glue it to the back of the tag, so your tag will stand.


That's all my Friends, thank you for taking the time to check out my blog.   I will be back again very soon, possibly with another tag lol!!   so catch you all then.   Stay snug and warm during this cold spell.

                                                                  Love and rainbows,

                                                                   Hugs   Jennifer xx.


Tuesday 10 January 2017

Fairy Dust Tag.

Hello Followers, Friends and Visitors,

Hope you are all fit and well, for those who are not, here's a big (((Hug))) from me, I hope that helps.   Tonight I am not sharing a card but a tag.    I have only made four tags during my many years of crafting, I am at the moment 'into tags' lol!     Tonight's tag was made for Imagination Craft's One Day Special shows on the Hochanda T.V. Channel on the 5th January 2017  and was shown on the show, so I thought I would explain how I made it.    I just love fairies etc., so this stencil is right up my street lol!!!

    
Cut a tag shape from white card.   Take another piece of white card and lay the Fairy Dust stencil onto it and using a black fine liner pen, draw around the outline of the fairy.   Remove the stencil and fill in the shape with doodles or patterns of your choice.    Cut out the fairy.

Do the same  again but this time, cut out the nearest wing, the fairy's left arm and her nearest leg.   Fill the wing with doodles or patterns as  before, leaving the arm and legs plain.   Cut them out and 3D them onto the original fairy, using silicone glue.   Cut out and colour her bodice, black and glue it to the original image.   Cut out her skirt and  cover with doodles or patterns with black pen.   Shape the skirt  into folds and glue to the original image using silicone glue.


Spread some gold stars Sparkle Medium over a piece of white card and when dry, die-cut 9 small stars, then stamp the fantasy stamp onto some white card, using a black ink pad.

    
Die-cut a slightly larger star from this stamped card.   Glue this onto a piece of black shiny card and trim around the star, leaving a tiny border of the black card showing.   Glue a tiny red star gemstone to the star.


Glue the white tag to a slightly larger  tag made from black shiny card.     Glue the 3D fairy to the  to the white tag.   Glue the gold Sparkle Mediumed stars around the fairy (as though she is trying to catch the stars).   Glue the larger star to the bottom left, using sticky foam pads to add some dimension to the tag.  


Thread some red ribbon and gold cord through the hole in the top of the tag and then add a red ribbon bow.   Make a stand from white card and glue to the tag back so it stands up.  

Well that's it for tonight my friends. thanks for stopping by my blog, much appreciated.   I'll be back soon, so in the meantime stay safe and warm and above all, be happy.

                                                                  Love and rainbows,

                                                                    Hugs   Jennifer xx.


Monday 9 January 2017

Golden Birds.

Hi there Folks,

Just a quick post from me tonight as it is already getting rather late and I also have some commenting to do, plus adding this to my Pinterest page.

My card tonight was made for the recent Imagination Craft's shows on the Hochanda T.V. Channel yesterday.   I don't think this card received an airing, so I thought I would show you now.   One of the A5 embossing folders I was asked to use was the birds on a branch.   At first I wasn't sure just what I was going to do with it, other than embossing it,  then I had a light bulb moment and the decision was made.   I have also used one of Imagination's Art stamps - fantasy script, gold  and black shiny card.

   
Begin with a 7" square white base card and onto this, matt a piece of black shiny card, leaving a half inch border of the white showing.   Next, matt a smaller square of the gold shiny card onto the black, leaving a small border of the black showing.

Take a smaller square of white card and repeat stamp the 'Script' stamp over it, using a black ink pad.   This stamp has been designed so you can match up the script when covering a large piece of card.   Matt this onto the gold card.

    
Take a piece of matt black card and put it into the birds embossing folder and emboss.   Take out of the folder and fussy cut around the birds,  branch and leaves.   Glue this across the base card, using Magi-bond glue, adding a little silicone glue under a few of the leaves, just to raise them up a little.

    
Emboss a piece of gold shiny card, using the embossing folder and cut out the birds only, cutting them slightly smaller around the edges, than the black birds, which will leave a tiny border of black showing, this will help the birds stand out more.

   
Glue the gold birds onto the black birds.   Glue tiny black dots to the birds eyes.

    
Glue a gold ribbon bow to the centre top of the base card.

   
That's all for now Folks, thanks so much for taking the time to visit and comment on my blog, I really do appreciate each and everyone of you.   Please pop back soon as I will be sharing another creation very soon.

                                                              Love and  Rainbows,

                                                                 Hugs   Jennifer xx.


Sunday 8 January 2017

Day Dreaming Fairy.

Hi there  Followers, Friends and Visitors,

Today began quite bright, sunny and warm but by lunchtime that had changed to dull, damp deary lol! but quite warm!   at least we do not have 8 inches of snow as they have in some parts of America !  such low temperatures, makes me shiver just thinking about it lol!   Hope my American friends are keeping safe and warm indoors.

Brilliant shows on Hochanda T.V. of Imagination Craft's fabulous products, well done again Lisa and Kerri-Ann, you are amazing.    One more show to go this evening at 7pm.

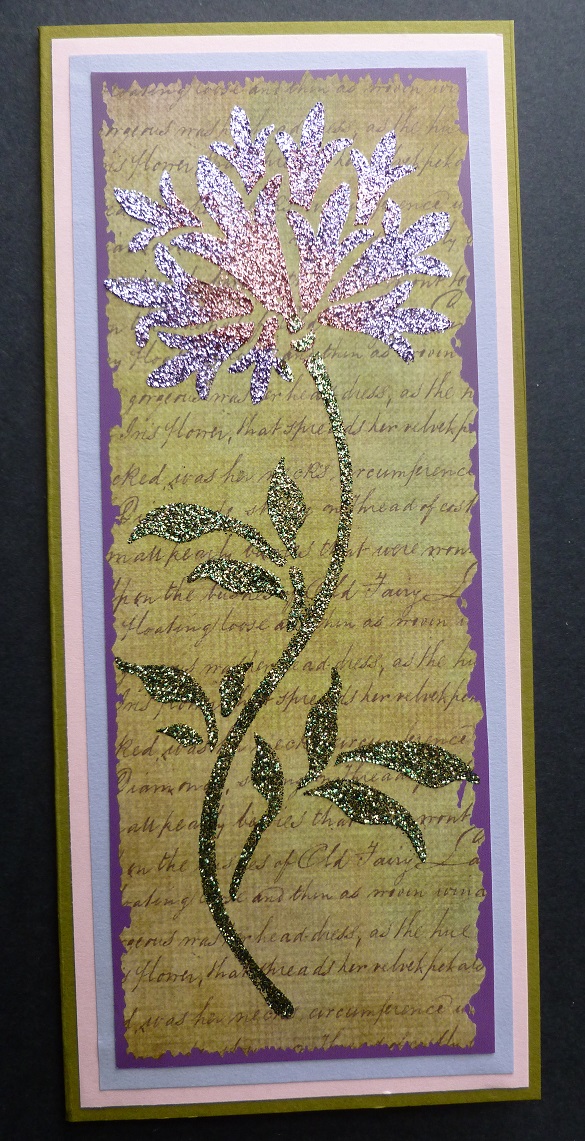
My card tonight has not yet been shown on the shows so I thought I would share it with you now.   I have used  five of the new Starlight paint colours on this card, along with the gorgeous Topaz from another show.

  
This card is made using a 7" square white base card.   Matt a square of black shiny card onto the base card, leaving a half inch border of the white showing.

Take a slightly smaller square of white card and using the daisies  A5 embossing folder, emboss the daisies onto it.   As this folder is an A5 size and the card much bigger, you will need to put the card into the folder twice to cover the whole square, just remember to match up the design when putting it into the folder for the second time.

     
Colour the card with the Starlight paints and then matt onto the black shiny card.

   
Lay the 'Mushroom Fairy' stencil onto a piece of white card, securing with masking tape, so the stencil does not move.   Dab the Starlight colours through the design, using a stencil brushes.   (as you dab the paint, the beautiful mica comes to the surface, giving a lovely sheen.)      Remove the stencil and tape.   You will need to wash your stencil and brushes quite soon as the paint will dry on them and is difficult to remove, especially the brushes!   or you could just steep them in water, until you have more time.

   
Die-cut the fairy design, using the Spellbinder's scalloped oval die.   Glue this to the embossed card, I used Magi-Bond glue to do this, as I find it sticks really well to the painted surface.

      
                                                         Glue a bow in the top left corner.

     
Colour some white card with the Starlights and  dry emboss using the folder, then die-cut a flower from this card  and glue to the right of the oval.   Die-cut 2 leaves from card coloured with the Misty Green Starlight paint and glue to the flower.

   
Well that's all for now my friends, I will be back very soon with more creations, so catch you all then.   Please don't forget to tune in to Hochanda this evening at 7pm.  to see lots more demonstrations from Lisa and Kerri-Ann.

                                                                 Love and rainbows,

                                                                    Hugs   Jennifer xx.


Saturday 7 January 2017

Flower Oval - A 'sneaky Peek.'

Good evening All,

Well I hope you managed to watch  Lisa B. and Kerri-Anne on the Hochanda T.V Channel tonight on  behalf of Sue & Harvey of Imagination Crafts.  Wow! so many demonstrations, well done Ladies, a fabulous show.   Looking forward to tomorrow's shows.   Some of my sample creations were shown tonight, so I would like to share one of them with you.   The colours on this card are so vibrant, I hope you have your sunglasses on lol!   I used two of the new Starlight paint colours, Canary yellow and the gorgeous Hibiscus.   ok let's get started.

I began by using a 7" square white card as a base card on which to work.   Cut a square of white card, slightly smaller than the base card.

    
Paint all the outside edges of this card with the Hibiscus Starlight paint, no need to paint the whole card as only the outside edges will be on show ( don't want to waste any of my precious paint where it won't be seen lol!! )   Matt this onto the base card.


Cut a smaller  piece of white card and paint all over with the canary yellow Starlight.   Matt this onto the base card.   Cut a smaller piece of white card leaving the side edges slightly narrower than the top and bottom edges , (which will show more of the canary yellow card underneath, when the white card is matted onto the yellow.)   From this piece of white card, die-cut an oval from the centre.   Lay this onto the yellow card and lay the stencil  on top so that the leaf stem shows through the oval and lightly mark with a pencil where the stem will be.  Remove the white card.   Put the stencil in the correct position and dab the hibiscus paint through the leaf stem, using a piece of cut 'n' dry foam.   Remove the stencil.

  
Add a leaf stem to the top left and right corners, again using the hibiscus Starlight paint, onto the white card.


Fix this white card with the oval aperture, onto the yellow card, using sticky foam pads to raise it up off the
yellow card.

Lay the large flower from the stencil onto some white card and dab the hibiscus paint through it.   Do the same with the smaller flower, the dragonfly and the hearts.   Cut these images out and glue in the correct positions, as on the stencil, using Magi-bond glue. 


3D the large flower using silicone glue under the petals.


That's all for tonight my friends, so I'll  wish you all goodnight.   Please remember to tune into Hochanda tomorrow for more demonstrations.    I'm sure the new Starlight colours  won't last the day!  so don't miss out on them, I know you will love them, so lush and vibrant.    I will be back tomorrow  with another creation to share with you, so see you then.

                                                              Love and rainbows,

                                                                Hugs   Jennifer xx.


Friday 6 January 2017

'A Touch of Spring' a Sneaky Peek.

Hi there Followers, Friends & Visitors,

I thought I would stop by again tonight to share  a 'sneaky peek'  at one of my creations which I have made for Sue & Harvey of Imagination Crafts.   They have a One Day Special show on the Hochanda T.V. Channel on Saturday 7th. and Sunday 8th of January 2017.   I do hope you can tune in.   

My card is made using Imagination's very pretty  'Spring Blossom' stencil and of course, the fabulous sparkly,  Sparkle Medium.

     
Working on a 7" square lilac pearlised base card, matt a six and a half inch square of lavender paper onto the card but first, wrap a piece of lavender organza satin edged ribbon across the centre of the paper, securing on the reverse.

Take some white card and lay the Spring blossom stencil onto it and spread the Sparkle Mediums over the design, using the sage green for the stems and leaves,   a little gold shine for the stamen in the centres and lavender for the blossoms, using the metal spatula.

    
Remove the stencil and leave the image to dry.

   
Matt this to the left of the base card and glue a ribbon bow to the right of the blossoms.   Well that is my card completed.     Another very quick and easy card to make.


  Please pop back again tomorrow as I will be sharing another 'sneaky peek' at another of my creations.   Thank you so much for taking the time to visit, I do appreciate each and every visitor.   See you tomorrow, enjoy the rest of your evening.

                                                                   Love and rainbows,

                                                                     Hugs   Jennifer xx.


Thursday 5 January 2017

Meadow Flower.

Good evening Folks,

Well it is nearly the weekend once  again,  yeah!   Hope your week has been good.   I have taken down all the Christmas decorations today and the house looks rather bare lol!   all packed away until Christmas later this year !     I know this Winter hasn't been too bad so far but I must say I am looking forward to the Spring,  when all new life begins over again.    My card tonight was made for Sue and Harvey of Imagination Crafts in March of 2014 for a Create & Craft show.   I have used one of their panel stencils  - Meadow Flower and of course my favourite product - Sparkle Medium.

      
Lay the panel stencil onto the patterned card and spread the Sparkle Mediums over the design using  the metal spatula, the Lavender and  Antique Rose on the flower head and the Golden green on the stem and leaves.

    
When dry, trim the card down slightly and then matt this onto some lilac and then pink card.   Matt this onto a green base card.

This is a very quick, pretty and an effective card to make when you have little time to spare.     Hope you all enjoy a peaceful, relaxing weekend.    Many thanks for stopping by my blog, hope you have enjoyed your visit.    I will be back very soon with some 'sneaky peeks' of my creations, made for Imagination Craft's shows this weekend on the Hochanda T.V. Channel.

                                                                  Love and rainbows,

                                                                   Hugs   Jennifer xx.


Monday 2 January 2017

Friends are the Flowers in the Garden of Life.

Hi there Followers, Friends and Visitors,

Happy New Year to you all, I hope you have a happy, healthy and prosperous year ahead.   We woke up to a very heavy frost today, which has not given at all during the day!  at  least we have no snow, which is a bonus but there is still time lol!

I thought I would share my  first card of the New Year by using Imagination Craft's summer blossom stencil, which is one of my favourites, as it can be used in so many different ways.    I made this for Sue and Harvey of Imagination Crafts in August 2016.

Working on a 7" square white base card, matt a smaller piece of black card onto it.

    
Using a Versamark pad, stamp the 'Friends...' sentiment onto the centre of the black card and heat emboss using the gold embossing powder.

Take a slightly smaller piece of white paper and lay the blossom stencil onto it.   Draw around the design using a fine liner black pen.   At each side of the design, make the flowers half size (ie; move the stencil so only part of the flower is showing, making more space in the centre, so as not to cover over the heat embossed sentiment.)

        
Remove the stencil and draw a line around the inside of the outline on each petal.   Fill in this line with black oblongs, with white areas in between, around each petal, using a black pen.

    
Colour the blossoms with coloured pencils.   Add dots of Antique Gold Starlight paint on each of the  flower stamen.   When dry, cut around the inside edge of the design and fix to the base card using double sided sticky tape and add some sticky foam pads under the petals to raise them up slightly.

    
Put a piece of white card in an embossing folder with a small pattern and emboss.   Die-cut a butterfly using the Memory Box die from this card,  then paint with the antique gold Starlight paint and glue to the card front.  

   
Add a gold  ribbon bow to the top left corner.     Well that's this card finished, hope you like it.    Thank you so much for taking the time to visit my blog, and if you have kindly left me a comment, thank you again.   Take care of yourselves and I will be back soon.

                                                                 Love and rainbows,

                                                                   Hugs   Jennifer xx.