Followers

Monday 29 October 2018

'Village Christmas Bauble.'

Hi there Lovelies,

Hope you are all managing to keep warm during this very cold spell of weather.   Bitterly cold here but bright and sunny, which helps lol!  log fire up the chimney!    Thanks once again for your lovely comments on my last blog and all the visits, really appreciate them.

Today I have a Christmas card to share with you which I made for Sue & Harvey of Imagination Craft's, for their shows on the Hocjand T.V. Channel at the end of June 2018.   I decided to steer away from the traditional Christmas colours for this one and use silver, blues and lavender, some of my favourite colours, the other being duck egg blue and teal.

   
Matt and layer a smaller square of lavender card onto the 7" x 7" white base card.   Cut a smaller square of white card and colour with the light blue and light purple Mixed Media Spray Inks.   Give it a quick spray or two of the Silver Shake & Gilt, just to add a slight shimmer to the background.

When dry, lay the snowflakes stencil onto the card and dab some Versamark through the design, using some cut 'n' dry foam.   Remove the stencil and heat emboss, using some white embossing powder and a heat gun.   Matt this onto the base card.

Cut or die-cut a circle from the silver satin card, large enough for the village scene will fit onto it.   Lay the bauble stencil onto it and spread the  Midnight Ice & Blue Ice Sparkle Mediums over the design, using a metal spatula.   Remove the stencil and leave to dry.   Fix this to the base card.

     
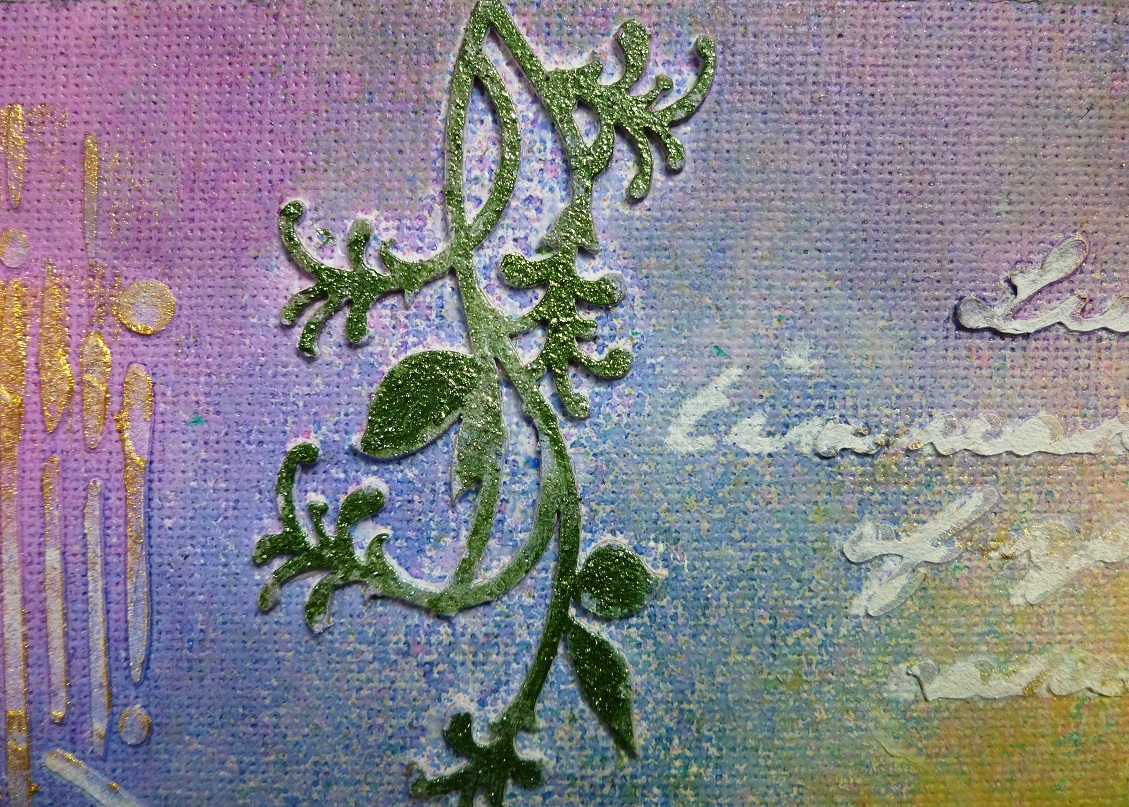
Lay the stencil onto a spare piece of white card and spread the Midnight Ice over the leaves and berries only.   Cut these out and 3D these onto the original images using silicone glue.

    
Glue a bow to the top of the bauble.    Glue three blue gemstones to the top right and bottom left corners.


Die-cut three large and three small snowflakes from white card, using the Tattered Lace dies.   Colour them with the Blue Ice Sparkle Medium, then glue these to the top left and bottomright corners of the base card.


Well the card is now finished except of course, for an insert.   Hope you like it.   The Imagination Craft's items I have used in the making of this card, can be purchased from  www.crafterscompanion.co.uk             Thank you for stopping by my blog, I do hope you've enjoyed your visit.    Catch you all again soon.

                                                             Love and rainbows,

                                                              Hugs    Jennifer xx.


Sunday 28 October 2018

Laughter Makes Everything Better.

Hello Everyone,

These weekends seem to go by so quickly !   How did your weekend go?   hope you all enjoyed yourselves whether you had a busy, exciting weekend or a quiet one and are ready to begin another
new week.

Thank you all once again for visiting and commenting on my last blog, I really appreciate them.   You are all so lovely and  encouraging.     The card I have for you tonight was made using one of Imagination Craft's beautiful Art stamps, the large poppy seed heads   This is one of my most used stamps, I just love it.   This can be purchased from www.crafterscompanion.co.uk


Make a square base card using cream linen card.   Matt and layer a smaller square of black card onto the base card.

Cut another smaller square of the cream linen card and colour with the Ultramarine and Dark Brown Brusho Crystals, spritzing the crystals with a little water, letting the colours mingle and run a little, until you are happy with the results.

   
When this is dry, stamp the poppy seed heads onto the bottom  left of the card using a black ink pad.

        
Stamp the sentiment onto the top right corner, again using black ink.  

   
Glue three tiny black gems to the top left and bottom right corners.


Matt this card onto the base card and the card is finished, a very quick card to make.

  
Well that's me for the moment, hope you enjoy your visit to my blog and thank you once again.   Look after yourselves until my next blog.

                                                                   Love and rainbows,

                                                             Crafty Hugs,   Jennifer xx.


Tuesday 23 October 2018

Just a Note to Say.......

Hello there, I'm back again.    Hope you all enjoyed your weekend, we had a quiet one, I do think we all need a quiet one every now and again lol!   to recharge the batteries.

Tonight I am sharing a card with you which I made in October 2018.   For this card I used a stamp which was given free  with The Craft Stamper Magazine some time ago.   I do like the simplicity of this stamp.   I have also used Imagination Craft's orange Mixed Media Spray ink,  texture stamp and Script  Art stamp, which can be purchased from  Imagination Crafts.


Make a square base card from white card stock.   Cut a smaller piece of white card and stamp the 'script' across the centre using a black ink pad.

Add some walnut stain Distress ink around the edges of this piece of card.  Next colour a piece of white card with the orange spray ink.   When dry, add some splashes of water by flicking the water with your fingers or a brush.   Leave for a few seconds, then blot with some kitchen roll, to remove some of the ink.

Die-cut three ovals from the orange card.   Stamp the 'Cow Parsley' design onto each oval, using a black ink pad.

   
Add some highlights to the Cow Parsley images, using a white pen.   Rub walnut stain around the edges of the ovals, followed by a little black soot Distress ink.   Add some white dots around the top and bottom edges of each oval.


Stamp the 'Just a note...'  to the top left and the 'Happy Birthday' to the bottom right corners, once again in black ink.   Matt this onto the base card.

   
Glue the three ovals to the base card, using silicone glue for the middle oval, just to lift it above the other two.

Using the left-over orange coloured card, stamp the crackle effect stamp onto it, using black ink.

   
Cut this into two triangles  and glue one in the top right corner  and the other in the bottom left and the card is now finished, except of course for an insert.


Thanks for stopping by my blog, appreciate each and every comment and visit.   Enjoy the rest of your week and I will be back again soon.

                                                                Love and rainbows,

                                                                Hugs   Jennifer xx.


Friday 19 October 2018

My Rainbow Butterflies 10" x 12" Canvas.

Hi there Lovelies,

It is time again for me to share another of my projects.   This time I have chosen my rainbow butterfly canvas which was made for one of  Imagination Craft's  shows on the Hochanda T.V. Channel  at the end of August 2018.     Before I get started, I would like to thank you all for taking the time to visit and comment  on my last  post, they are all appreciated by me.   I do hope you enjoy your visits.


(1)    Spread white structure pasete through the designs from both stencils -A4 butterfly stencil & A4 dragonfly stencil)  using a metal palette knife.   Leave this to dry.


( 2)   Decide which pieces of Art Cutz you want to have on your canvas,   I used 'trailing flowers,'   'Butterflies,'  'Chicken wire,'  'Crackle' and  'Flowers.'
 
( 3)   Paint all the Art Cutz pieces  with White Rusty Patina and leave to dry.

      
( 4)   Glue the Art Cutz in position on the canvas.


( 5)   Using the yellow Mixed Media Spray ink and the pink, blue, green and white Fashion Spray inks, colour the canvas.

( 6)   Lay the stencils back in position on the canvas and stipple a small amount of Rich Gold Starlight Paint over the top of the structure paste, using a stencil brush.

    
( 7)   Stipple white Gesso over parts of the design through the stencil.

( 8)   Paint the Art Cutz with the Rich gold, Hibiscus, Green and Dried Rose  Starlight Paints.


( 9)   Paint the main butterfly with watered down Rich Gold Starlight Paint, then rub with a little Hickory Smoke Distress ink.


(10)   Rub some Hickory Smoke and Black Soot around the edges of the canvas, using a blending tool or piece of cut 'n' dry foam.

Well that is my canvas finished.   I was quietly pleased with the results.   Decorating a canvas is quite relaxing as you can just do what pleases you, it is your way of expressing your thoughts and ideas.

    
See you all again soon, happy crafting and have a wonderful, relaxing weekend.

                                                              Love and rainbows,

                                                               Hugs   Jennifer xx.


Sunday 14 October 2018

Beautiful Blue Poppies.

Hi their Peeps,

Hope you've all had a good weekend, whatever you have been doing.   We've just had a quiet one, as the weather has not been too good.   Thank you for commenting and visiting my last post, much appreciated.

I would like to share another card I have made, using the gorgeous Stampendous Poppy stamp set, which I used to make a card on the 6th. September 2018 and is on my blog.      I have used different colours, altered the position of the poppy buds, added an extra leaf and used a different design of Imagination Craft's Magi-Cutz to stand the vase of flowers on.    The Magi-Cutz can be purchased from   www.crafterscompanion.co.uk  and is called 'chickenwire.'    Hope you like this one.   I just love this poppy stamp, the petals are so beautifully shaped, so I thought I'd make some blue poppies, I may even make another card and colour the next poppies, yellow lol!

 
Make a base card from a sheet of white A4  card stock and trim a quarter of an inch from one long edge , then fold in half portrait style.   Matt and layer a smaller piece of black card onto the base card.

Take a smaller piece of white card and using the masks supplied with the stamp set, stamp the vase, poppies and one leaf in bottom left, using a black ink pad.   Stamp the poppies a further three times, plus one extra leaf.


Colour with alcohol pens and 3D them onto the original images.   Stamp the vase once more, colour and 3D that onto the original image.


3D the poppy buds, using silicone glue to give some dimension to the card.


Cut a small piece of the Magi-Cutz chickenwire, paint it with black Gesso and when dry, fix it below the base of the vase.


Using Hickory Smoke, add some shadows around the image.

Colour around the edges of the card with Broken China, Stormy Sky and  finally with a little Black Soot Distress Inks.

    
Using a black ink pad, stamp the sentiment by Woodware in the top left corner.


Matt and layer this onto the base card, then add small amounts of the lime green Stickles Glitter Glue to the buds, leaves and flower centres.


Well that's me for now my friends, have a good week,    catch you all again very soon.

                                                                  Happy Crafting,

                                                                Love and rainbows,

                                                                Hugs   Jennifer xx.


Wednesday 10 October 2018

Believe in the Magic.

Good afternoon Lovelies,

Hope you are all enjoying this beautiful day we are having, make the most  of it, as it is not set to last.    Well, we certainly can't complain as the weather has been amazing this year so far lol!  but hey, that could change very quickly!      I would like to welcome my newest follower,  sorry not sure of your name, as I've lost track of the last person to follow me but thank you so much for following me and I hope you enjoy your visits.   Maybe you could leave me a comment, then I will know  who you are lol!

This afternoon I would like to share a card with you, using one of my favourite images (and there are many lol!)   from Lavinia stamps.   I adore fairies, pixies, elves  and anything to do with them, as you may already have guessed that lol!


Make a square  base card using black card stock.   Matt a smaller square of white card onto the black base card.

Trim a smaller square of white card.   Colour this by gently tapping  the small pots of Brusho powders onto a work mat,  I used purple, ultramarine, turquoise, yellow and emerald green.     For those of you who may not have used Brusho's before, you only need tiny amounts, as the colours are very strong.   Next spritz the powders with water and lay the white card face down onto the colours.   Lift off and leave to dry naturally or with a heat gun if you are an impatient crafter like me!


Stamp the flower sprig (which was given free in a stamp set with Simply Cards & Papercraft magazine - Issue 178)  a few times in the bottom right corner, using a black ink pad,  stamping again without re-inking for the branch in the distance.

   
Punch out or die-cut  ten tiny flowers from black card.   Shape them a little then glue them onto the flower sprigs.   Add a tiny dot of Platinum Stickles Glitter Glue to the centre of each flower.

Stamp Sky the pixie sitting on one of the sprigs, using a black ink pad.

    
Stamp the sentiment in the top left corner, again using a black ink pad.   Matt and layer this  onto the base card and the card is finished.

       
I do hope you like this card and thank you for taking the time to stop and look at my blog.   Take care of yourselves and I will be back again soon, hope you will be too.

                                                                Love and rainbows,

                                                    Happy Crafting,    Hugs   Jennifer xx.


Sunday 7 October 2018

Sent on the Wings of Butterflies.

Hello again  Friends, Followers and Visitors,

Hope you are enjoying your weekend break.   Thank you all for your visits and comments on my last post, I do like to hear what you think.

Today I have another card to share with you.    Once again I have used butterflies, I just love to use them on my cards,  they're just  so pretty.   I have used Imagination Craft's fabulous Starlight paints to get the beautiful sheen, I just love to use these paints and there are so many beautiful colours to choose from.   The butterflies are made using a Crafter's Companion stamp, from their Flutterby Collection.   I have also used a swirls embossing folder by Cuttlebug,  Distress Oxide and a Memory Box butterfly die.   O.k. down to business lol!  let's get started shall we?


Matt a smaller square of blue card onto a white  square base card.   Take a rectangle of black shiny card (mine was from Imagination Crafts) and colour it dabbing the Cracked  Pistachio Distress Oxide down onto a craft mat,  then spritzing with water and then a quick spray of Imagination Spray & Gilt - Gold.   Lay the rectangle  face down onto the colours.   Lift up and leave to dry.   Fix this down the centre of the base card.

       
Stamp the postcard onto some spare white card, using a black ink pad (this stamp was given free in a set, with a  craft magazine, sorry cannot remember which magazine), adding the word 'LOVE' where the stamp should be.   Fix this on an angle on top of the rectangle.

    
Colour  some white  card with the Hibiscous & Rich Gold Starlight paints, then stamp out five butterflies, using a black ink pad.   Cut these butterflies out.

Take some black card and put into the swirls embossing folder and emboss.   Die-cut two butterflies from this, using the MB die.   Colour these with the Rich gold Starlight paint, leaving some of the black card showing.

      
                                                Glue three butterflies to the top left corner.

    
                                                      and three to the bottom right corner.

From  the fifth large butterfly, cut two corner shapes and glue one in the top right and the other in the bottom left corners.

   
                                          Glue two blue heart gems to the top right of the card.

Glue a small piece of swirl, cut after die-cutting, using the Tonic frame die and glue to the bottom left of the postcard.

   
Well that's this card finished, I do hope you like it.   I have taken the photo below on an angle so  

     
you can see the beautiful sheen of the Starlight paints.    That's all from me for the moment, have a good week all and take care of yourselves.

                                                                 Love and rainbows,

                                                     Happy Crafting, Hugs   Jennifer xx.