Followers

Thursday, 23 September 2021

'Framed Beauty.'

Hi there Lovelies,

Hope this post finds you all well.   The weekend is creeping up on us once again.   Where do the days go to lol!!

I have another card to share with you which was made for the Create & Craft shows earlier this month, when David Watt launched the gorgeous 'Beautiful Ladies' Collection, an amazing set of rice papers with either gold or silver foiling on them, which unfortunately does not show up well on my photos.   This card has silver foiling on.

Cut out the section of the rice paper with the lady in the frame, keeping the right-hand edge straight but leaving enough extra rice paper to bend around the back of a piece of card and the bottom edge.

 Fix this to some extra white card using the Cadence Decoupage Glue, bending and gluing the excess rice paper to the back of the piece of white card.   Leave this to dry.   Cut away the small label on the left of the frame and keep for later.

When dry, cut away any excess white card from the shaped edges which are not bent to the back of the card.


Lay the mixed media stencil onto the 8"x8" white base card, judging approximately, where the lady in the frame will eventually, be when fixed to the right-hand side of the base card, then spread the Cadence Dora Perla Silver Relief Paste through the 'crackle' design, using a metal spatula.


Remove the stencil and leave the image to dry.


Glue the main image of the lady and the frame onto the right-hand side of the base card, lining up the edge with the edge of the base card but not sticking down the bottom left of the frame just yet.


From the sheet of rice paper, roughly cut out the bottom left corner with the edging and roses on, then fix this to some spare white card using the decoupage glue..

When dry, cut this out, add some sticky foam pads behind the roses,.  glue to the bottom left of the base card, tucking part of the border under the bottom of the frame, then stick down the roses onto the frame.


 Trim the label and glue to the top left of the base card using sticky foam pads.


Cut out the rosebud from the rice paper and glue to a piece of white card, again using the decoupage glue and when dry, trim away any white card, then fix this to the top left of the frame using sticky foam pads.  


Well, that's all for now my friends,  I'll be back again soon with another card.   Take care of yourselves and stay safe.  Happy crafting.

                                                              Love and rainbows,

                                                              Hugs   Jennifer xx.


Monday, 13 September 2021

'A Touch of Gold.'

Hi there Lovelies,

Hope you had a good weekend whatever you were doing.   We had a quiet, relaxing one.    Today I would like to share another card I made for  The Create & Craft T.V. shows on Saturday 11th. Sept. 2021, when David Wait launched the gorgeous 'Beautiful Ladies' collection.   These rice papers are sumptuous, with gold and silver foiling and beautiful colours.


Cut a piece of white card 8" x 8" to fit the front of an 8" 8" white base card.

Paint this with the Cadence Light Sage Hybrid  acrylic paint.


 From the sheet of rice paper, cut out the image of the lady and glue this onto some spare white card, using the Cadence Decoupage Glue.

When this is dry, trim around the design, cutting away any excess white card.   Lay the stencil onto the green painted card and using a stencil brush, stipple the Cadence Dora Metallic Paint - Zinober Gold through the design.


Remove the stencil and pop it into some water along with the stencil brush, this makes them easier to clean.   


 Rub some Antique Gold around all four edges of the painted green card, followed by a little black ink.   Glue this card to the 8" x 8" white base card, making sure they are lined up perfectly.


 Fix the image of the lady to the front of the card using sticky foam pads and a little Mixed Media Glue.   Colour a small piece of white card with the Cadence Antique Gold,  Hybrid Metallic Paint and when dry, rub some black ink through the number '32' design from the stencil.   Cut this out and glue to the top left of the card and hey presto...the card is finished.


The photos below are taken at an angle to show the beautiful gold foiling on the rice paper.


Thank you for stopping by my blog, I do appreciate all your visits and your comments.   Until next time, take good care of yourselves.

                                                                   Love and rainbows,

                                                                    Hugs  Jennifer xx.


Friday, 10 September 2021

'Fashions of the 1880's.'


 Hello Lovelies,

I'm back again with one of my cards, made using Imagination Craft's gorgeous new collections - 'Beautiful Ladies..'   David Wait will be launching this new collection on the Create & Craft T.V. Channel tomorrow, Saturday the 11th, September at  9am. and 8.15pm.   I do hope you will tune in.   The A3 rice paper designs have gold or silver  foil in places, really beautiful when the light catches them.


Cut a piece of white card to fit the front of an 8"x8" white base card.   Mix together the Cadence Hybrid Acrylic paints - Fuchsia and warm orange to make a peachy colour, then paint the piece of white card with it.

When dry, lay the mixed media stencil from the collection, onto it then, using a stencil brush, stipple the Cadence Antique Gold Hybrid Metallic paint through the design.   Remove the stencil.


 From the Beautiful Ladies A3 rice paper, cut out the top half of three of the ladies, cutting it larger than you need, so you have some extra paper to bend around to the back of a piece of card and fix it with glue.

Cut a piece of white card seven and a half inches by five inches and using the Cadence Decoupage Glue,  fix the rice paper to the piece of card, bending the extra paper to the back of the piece of card and securing with the glue.


When  dry, matt this  onto a slightly larger piece of gold mirror card and then onto the peach painted card.


Fix this card card to an 8"x8" white base card, using double sided sticky tape and a little mixed media glue.

From the rice paper cut out the words - 'Godey's Fashions' and 'For May 1880.' 

 Glue these to white card using the decoupage glue, bending the extra paper to the back of the white card and securing with the glue.


Matt these onto pieces of gold mirror card, cut slightly larger than the words.   Fix these to the card front.


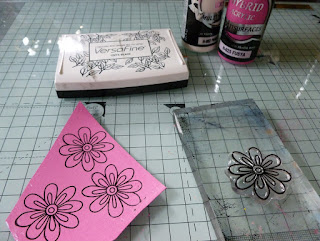
Paint some white card with the Fuchsia, adding a small amount of white to tone down the colour a little.  When dry, stamp 4 large flowers, using the stamp from the collection onto the fuchsia card, using a black ink pad.


Cut them out and glue them to the card front.   Punch out 4 small circles from gold mirror card and glue one in the centre of each flower.


The card is now finished.   Thank you for visiting my blog, very much appreciated.   Take care of yourselves and I will be back again with another card, made using this gorgeous collection. 

Please don't forget to join David Wait  if you can, in the morning at 9am. when he launches this gorgeous collection.   Catch you all again soon.

                                                                   Love and rainbows, 

                                                                   Hugs  Jennifer xx.


 .


Thursday, 9 September 2021

'Music of the Flowers.'

 Hello Lovelies,

I'm back again with another card made for the Imagination Craft's shows on the 6th. and 7th. September 2021, when David Wait launched the wonderful 'Flower Power' Collection.   This is a great collection and was a delight to work with.   The designs have brought back at lot of memories of this era, for many  people.

Thank you all once again for taking the time to visit my blog and leaving such lovely commentts.


Cut a 7" square of white card.   Cut out the section of the rice paper you wish to use, cutting it slightly larger than the piece of card.


Using the Cadence decoupage glue, fix the paper to the piece of white card, bending the extra paper to the back of the card and secure it with the glue, making sure there are no creases or air bubbles on the front.


Cut out the flowers from the second sheet of the same design rice paper, the butterflies and the peace and love.    Glue these to some spare white card using the decoupage glue.

When dry, cut them out, cutting away any excess white card and fix these to the original images on the 7" background card.   

Using a black Versafine pad, stamp the girl and heat emboss with clear embossing powder.   


Colour her with alcohol pens and cut her out, leaving a fine white border around her.   Fix her in position on the background card using silicone glue.


Colour a small piece of white card with the Cadence Hybrid Glitter Fuchsia Paint and when dry, stamp the large flower from the stamp set onto it, using a black ink pad.   Cut it out, add a touch of the Dora metallic kiwi green paint to the flower centre, then a squeeze of the lemon yellow coloured pearl to the very centre of the flower.   Fix the flower behind the decoupaged flowers, using silicone glue.   Fix the background onto an 8"x8" scalloped white base card.


Stamp the word  ' COOL' in black ink onto some white card, trim it and glue to the background card.   Stamp the heart three times onto white card.   Colour with alcohol pens, then cut out the different sizes of the heart, leaving a tiny white border around them and decoupage them using silicone glue.   Fix this to the background card.


 Trim around the 'Peace and Love' I added a little of the Cadence Dora Kiwi green metallic paint around the edges with my fingers before fixing it to the background.


The card is now finished, I do hope you like it, I know I have enjoyed making it.   Thank you for stopping by my blog.   I will be back soon with another card from a new collection.

Take care of yourselves until next time.

                                                                 Love and rainbows,

                                                                  Hugs   Jennifer xx.