Followers

Wednesday, 19 August 2020

'Flight of the Butterflies.'

Hello Everyone,

Hope you've had a good start to your week and you managed to tune in to Create & Craft yesterday, to see Mandy doing her fabulous demonstrations and the design team's fabulous samples.   I'm busy working on new samples for Imagination Craft's next shows, a quick turnaround lol so I'd better get my skates on lol!  not much time between shows.   Just love it when my 'happy post' arrives....can't wait to get started!

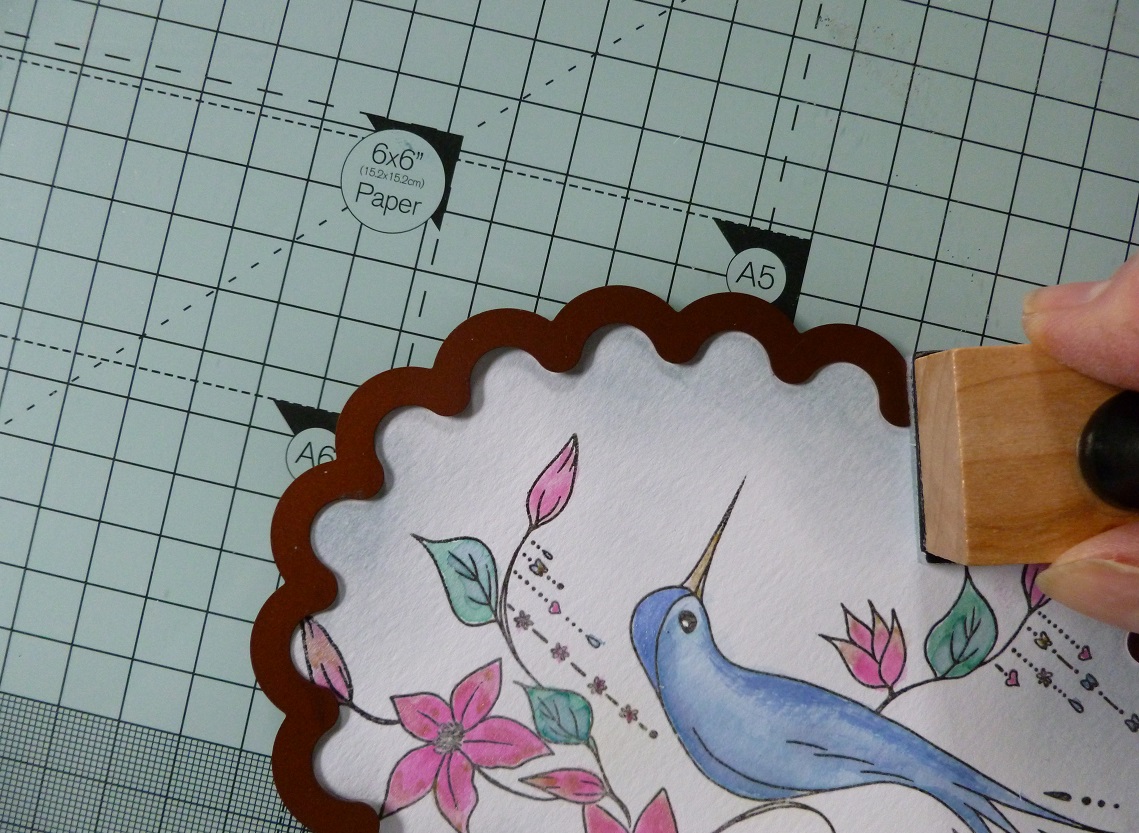
Today I'd like to share another of my sample cards made for yesterday's shows, using the Tumbling Blossoms collection.   This one used the fabulous Sparkle & Twinkle, one of my favourite products.


Matt a 7"x7" piece of wine coloured pearl card onto an 8"x8" ivory base card.take an oblong piece of white card and colour using the Cadence matt acrylic paints - Carmine, Lavender blue, Green land and Ecru and blend the colours on the card.


Next, stamp the right-hand half of the church window (from the Secret Garden stamp set) onto the coloured card using a  'Stonewash' Adirondak ink pad.


Spray the back of the butterflies panel stencil with a little of  the Cadence stencil spray and lay onto the coloured, stamped panel card.


Using a stencil brush, stipple some of the Lavender blue paint through the butterfly design, remove the stencil and leave the image to dry.


Using the paint left on the brush, rub this around the edges of the oblong card.   Take a piece of white card six and three quarter inches square and lay the Deco branch panel stencil onto the right-hand side of the white card and secure with the blue stencil tape.   Spread the Diamond Blue Sparkle & Twinkle over the stencil, using a metal spatula.   Remove the tape and stencil and leave the image to dry.


Repeat this on the left-hand side also, but remember to 'flip' the stencil over if you want them to match.    Matt  and layer this onto a slightly larger square of wine red coloured pearl card.

                                   Next matt and layer this onto the 8"x8" ivory base card.


                                                                                                                                                                       Using some white card to make some more butterflies to overlay the original stamped image, lay the stencil on the card  and spread the Diamond blue Sparkle & Twinkle through the 2 large butterflies and one tiny butterfly, the Gold through 2 smaller and one tiny butterflies and the Diamond through the 4 smaller ones - total.....10 butterflies.

                                                                                                                                                                     Cut out the butterflies and glue to the original images on the oblong piece of card.   Glue this panel onto a slightly larger piece of wine coloured pearl card.


                                                                                                                                                                                                       Glue this oblong panel to the centre of the ivory base card. 

                                                                                                                                                                                          Glue a wine/gold edged ribbon bow to the top left corner and the card is finished. 


That's all from me for the moment but I will be back again with another sample from the Tumbling Blossoms stencil collection.    Until then be safe, well and happy.   See you all again soon.

                                                              Love and Rainbows,                                                                                                                                Hugs  Jennifer xx.                               


Monday, 17 August 2020

Lovely Lupins.

Good evening once again Lovelies,

How are you all, staying safe and well I hope.   Thank you for your lovely comments and visits on my last blog post, most  appreciated.

Tonight I have a 'sneaky peek' for you at one of my sample cards made for the Imagination Craft's shows tomorrow, Tuesday 18th August at 10.30am. and again at 5.15pm. on the Create & Craft T.V. Channel.   I do hope you can tune in.


Matt and layer a seven inch square of black card onto an eight by eight inch ivory base card.   Cut a slightly smaller square of ivory card and lay the flower stem stencil onto the right-hand side of the card.     I covered the rest of the base card with some copy paper  just in case of 'painty' fingermarks or an accidental paint spill lol......it does happen lol! and is very annoying.)


Using stencil brushes, stipple the Cadence clover green acrylic paint through the stem and the leaves on the stencil.   Then add the orange with a touch of the yellow on top, for the flowers.


Remove the stencil and copy paper, then matt this onto the black matt on the base card.


Die-cut two stamen using the die from the 'Modernista' collection, the 'Modern Elements die-set.'     Paint them with the Cadence 'Extra Gold' gilding paint and cut each one in half  in exactly the  same  place,  keep the other  two halves for another project. 


                                                                                                                                                                       Glue one at the top and one at the bottom on the left-hand side of the card.

From black card, die-cut a circle five and a half inches in diameter.   Lay the Lupin stencil onto the left-hand side of the black circle and stipple the Cadence gilding metallic  paints through the design.  For the flowers, begin with the Copper at the base of each Lupin, followed by the Antique Gold and lastly the Extra Gold at the top, blending the colours as you go.   Add the green metallic paint to the leaves and the stems.         


Remove the stencil.   Cut down through the circle and using a stencil brush and a small amount of the Antique Gold paint, lightly brush around the edges of the semi circle.    Glue the flower side of the circle to the base card.

Using a black ink pad, stamp the quotation onto some copper coloured paper and then matt onto a slightly larger piece of ivory card and then onto a slightly larger piece of black card.   Fix this to the base card using silicone glue or sticky foam pads.    This quotation is a stamp from the 'Secret Garden' collection.


Add a small gold ribbon bow just above the quotation and three orange crystal gems to the card front.

That's this card finished, hope you like it.   I do like this stencil as it can be used as a Lupin as I have done, or Wisteria, Laburnum tree flower, or it could also be used as a Kniphofia plant, more commonly known as a Red Hot Poker plant.   I have to say, I haven't seen one of those for many years.     It  can also be  used upright or hanging down, so versatile.    Please try to tune in if you can,  to see our Mandy demonstrating just what can be achieved using these fabulous products.   Take care and stay safe until my next blog when I will show you another sample made for tomorrow's shows.

                                                                  Love and rainbows,

                                                                   Hugs   Jennifer xx.


Friday, 14 August 2020

'A Bird in the Lilac Bush.'

 Hi their Lovelies,

How are you all, well I hope.   Well here we are again, another weekend !  don't they arrive so quickly lol!  just seems the new week has begun and the weekend is upon us once again!   Not that I'm complaining of course,  just wish time would slow down a little lol.

Today I have a card to share with you which was made for   Sue Baker of Imagination Crafts, for her shows on the Create & Craft T.V. Channel in July 2019.   I have used stamps from the very beautiful 'Birds & Blossoms' Collection,  Cadence metallic paints,  Spray inks.   Chalk paints and Imagination Craft's  Sparkle & Twinkle.   Distress inks.  

Using a 7"x7" white base card, stamp 2 heart drops in each corner of the base card, using a black ink pad.

Take a five and a half inch square of white card and colour it with the Dusty Concord, Milled Lavender and Evergreen Bough distress inks, using a blending tool.

Using the Dusty Concord distress ink, stamp the single lilac flower head around the card, stamping some of the images off the edge of the card.


When dry, dry brush'  the MDF Chalk Paints sage green & Lilac, over the top of the stamped card to 'knock back' the colour a little.

When that is dry, stamp the main lilac branch across the centre of the coloured card, using a black ink pad.   Colour the lilac flowers with the Cadence light purple Mixed Media Spray Ink, mixed with a little water and a paintbrush.

Paint a spare piece of white card with the Cadence  blue/green metallic paint and when dry, stamp the main image again, using a black ink pad.

                                                                                                                                                                      From this , cut out the leaves, branches and the flourishes.   Glue the flourishes, leaves and branches to the original images using silicone glue under each leaf.


Stamp the 'Friends...' sentiment in black in the top right corner.   Add dots of the Aqua Sea Sparkle & Twinkle to each individual lilac flower of the main image.


                                                    Matt this onto the  white base card.

Cover the left-over piece of blue/green painted card with the Aqua Sea Sparkle & Twinkle and when dry, punch out 5 small hearts.   Glue one in each corner of the white base card and the other beneath the sentiment.

Stamp the pair of birds from the lilac stamp set onto spare white card using black ink.   Colour the bird on the right of the image with Promarker pens.   Cut out that bird (we won't be using the other bird, keep that for another project).      Stamp out this image once more, colour and cut out the wing only.

                                                                                                                                                                                                           Glue the wing to the main bird image using silicone glue.                               


                                         Fix the bird onto the lilac branch using silicone glue.

Well, that's the card finished, hope you like it.   Take care of yourselves and stay safe.   Have a wonderful  chilled out weekend and I'll be back again soon with some sneaky peeks at my samples for the Imagination Craft's next papercraft show coming up soon.

                                                                 Love and rainbows,

                                                                  Hugs   Jennifer xx.

.


Thursday, 6 August 2020

Beautiful Bluebird.

Hello Everyone,

Hope you are all keeping safe and well.    Thank you all once again for your comments and visits on my last blog post, I really do appreciate them.

Today I have a card I made for Sue Baker of Imagination Crafts, for her shows on the  Create & Craft T.V. Channel in 2019.   I have used their very beautiful 'Birds & Blossoms' Collection.   This is such a pretty set. 

   
Take a six and a quarter  inch square of white card.    Spread a small amount of each metallic paint (Blue rose,  Green Blue,  Gold rose &  Gold aqua)  onto a glass worktop and lay the white card down on top of the paints and give it 'a wiggle' then lift off.   Leave the paint to dry.

  
When dry, spread the three Sparkle & Twinkle colours (Jade, Aqua sea & Sugar mouse) over the painted card, using a metal spatula, then leave to dry.   When dry, matt this onto a slightly larger square of  black card.

   .
Matt and layer this onto the 7" x 7" white base card.   Fix a strip of black card three inches by six and a half inches down the centre of the base card.

Punch out 19 small black circles and glue three to each corner of the coloured card, keeping the other 7 for later.
Take a piece of watercolour paper and using a black ink pad, stamp the bird on the flower stem, onto it.    

Using the scalloped oval die, die-cut  around the image and leaving the die still in position, colour around the bird with the weathered wood distress ink, using a blending tool.  Paint the flowers with the spun sugar and the leaves with the evergreen bough  distress. inks.

        
Paint the bird with chipped sapphire and faded jeans distress inks.   Paint the top of the bird's head with the gold aqua paint, adding a touch  down the body of the bird.   Colour the beak with some watered down Inca gold finger wax. 


Colour some white card with spun sugar distress ink and when dry, put a coat of gold rose over it.   Stamp the flowers and buds once again using a black ink pad.

Cut out the flowers and buds,  3D and glue to the original stamped images, using silicone glue.   Colour another piece of card in the same way but use the blue rose metallic ink.  Stamp 1 small and 1 large flower onto it with a black ink pad, cut out, 3D and glue to the bottom right corner, adding some silicone glue under each petal.  .     

  Glue a small black circle to each of the 4 flowers.
   
Colour the beak with with watered down Inca gold finger wax.    Glue the remaining 3 black circles to the right-hand side of the scalloped oval.

 Well that's all for now folks, I'll be back again quite soon.   Thanks once again for visiting and commenting on my posts.   Have a good weekend when it comes around.

                                                                Love and rainbows,

                                                                 Hugs   Jennifer xx.