How fast has this week gone again lol! where do these days go! one minute it is Sunday, the next it is the weekend once again! We woke up to a layer of snow this morning, it looked really pretty but boy was it chilly lol! It hasn't really snowed again today but it will be below freezing during the night, so I think it is time to put our winter duvet on the bed lol!
My samples for Imagination Craft's next shows on the Hochanda T.V. Channel later this month were posted yesterday and have been received by Sue today, so I can relax a little until my next challenge lol. I will let you all know the dates and times of their shows nearer the time and I will of course be sharing some sneaky peeks of my samples closer to the date.
My card tonight was made back in September 2012. I will be showing you the die-cuts etc., and how you can make more than one card by just changing the positions of the different components. This blog will be rather heavy on photographs, so please forgive me for that lol!
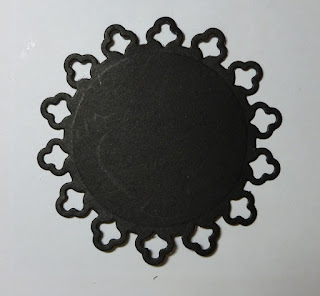
Above are the component parts used to make this card. Now on how to make it.
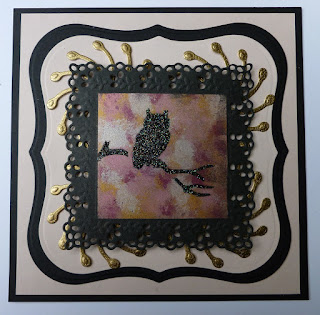
Make a base card from black card stock. Matt a piece of pink paper onto the black card, leaving a small border showing. From a piece of black card, die-cut and emboss the labels one (the large square in the second photo). Using black card again, die-cut the ironwork accents circle. Cut this in half and glue one half to the back top left of the black labels one and the other to the back of the bottom right.
Glue the black label to the pink paper on the base card.
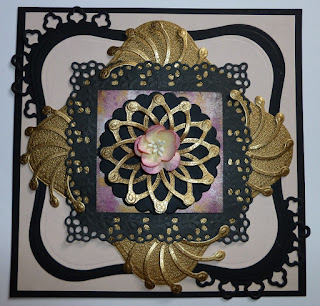
Cut out and emboss another labels one die but this time from gold card and fix this to the base card in a diamond fashion.
Take a small piece of acetate, cut to fit the centre of the fancy black square and cover with Versamark and brush with pink, deep pink, peach and gold mica powders.
Lay the acetate with powdered side down and lay the owl and the branch from Imagination Craft's 'dusk til dawn' stencil
onto it and spread the black stars Sparkle Medium over the design, using a metal spatula. Remove the stencil and leave the image to dry. Fix this to the centre of the black fancy square. Punch out some tiny black circles and glue to the pink paper, next to each corner of the black square. Glue a rose to the bottom right corner of the acetate. Glue a small black circle to each corner of the acetate. Phew! well that is this card finished. Below are more cards which can be made using the same components, just putting them in different positions.

I feel sure if I thought about it a bit more, there are more ways in which to re-arrange these parts to make more cards. Thanks for stopping by my blog. I shall be back very soon, until then have a great weekend.
Love and rainbows,
Hugs Jennifer xx.


Absolutely stunning Jennifer, amazing all the different designs you can layout with the same dies.
ReplyDeleteIn the 0s up here and a light sprinkle of snow,I guess it's winter, Kate x
Hi Kate, I guess it is lol! no more snow today to speak of thank goodness. Stay warm and snug.
DeleteThanks for your lovely comment.
Hugs Jennifer xx.
These are fabulous Jennifer, love the different designs. Enjoy your weekend.
ReplyDeleteHugs
Linda xxx
Hi there Linda, many thanks.
DeleteHugs Jennifer xx.
This is just gorgeous,love the design.xxx
ReplyDeleteHi there Doreen, many thanks, glad you like it.
DeleteHugs Jennifer xx.