Followers

Friday, 29 January 2021

'Whispers in the Shadows.' From Imagination Craft's - 'Over the Sea to Skye' Collection.

 Hello Lovelies,

Thinking of you all and hoping you are safe and well.   Tonight I would like to share another of my sample cards, made for the  Imagination Craft's shows on the Create & Craft T.V. Channel earlier this month.   This collection is called 'Over the Sea to Skye.'      Once again, lots of photos but not much text lol!

Thank you for all your visits and comments on my last blog post, I do appreciate each and every one.


Cut out the section of the rice paper with the Church window on it.   Leave the left and bottom edges cut straight but slightly larger than a piece of white card, cut  seven and a quarter inches square.   Cut around the stonework on the top right, down the right side and the lamp.   Put this to one side for the moment.

 
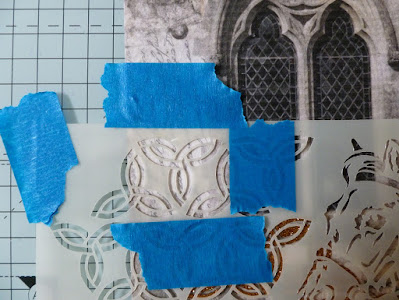
Take the square of white card seven and a quarter inches square and using the Cadence  acrylic, paints, paint the top right hand  corner with the  amber and warm orange.   When this is dry, lay the text from the stencil onto the painted area.   Keep this in position with the blue masking tape and spread the Sparkle and Twinkle over the text using a metal spatula.   Remove the stencil and leave image to dry.


  When this is dry, fix the cut rice paper to the white card, using the Cadence decoupage glue, turning the extra rice paper around the edges, to the back of the card and securing with the glue.   


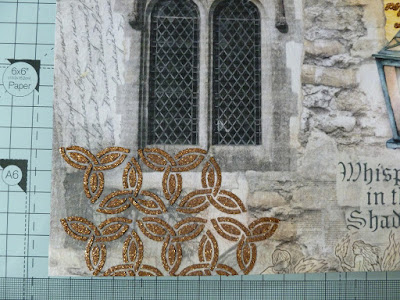
Lay the Celtic design from the stencil onto the bottom left of the card, just below the window and spread the Sparkle & Twinkle through the design using a metal spatula.   Remove stencil and leave the image to dry.


When this is dry, re-position the stencil and spread the Sparkle and Twinkle up the left hand side of the window, matching the design, so the design continues up the left side of the Church window.


Remove stencil and leave to dry.   Add some black soot distress ink lightly around all four edges of the card, using a blending tool.  


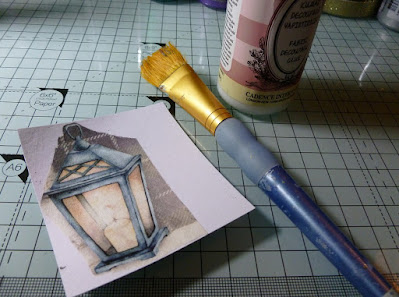
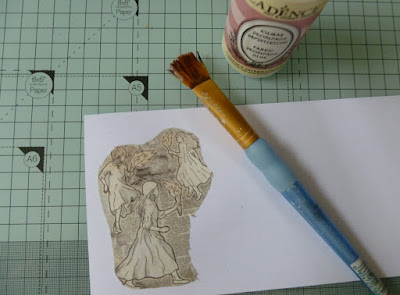
 Roughly cut out the ghosts and the lamp from the second piece of the same design rice paper and using the decoupage glue, fix them to some spare white card.   When they are dry trim around each design, shape a little with your fingers and glue the ghosts in a circle around the window and  the lamp to the original image on the card, using silicone glue to add some dimension to the card.


Well that's all from me for the moment but I will be back soon.   I'm working on some samples for Imagination Craft's next show on the Create & Craft T.V. Channel, coming up soon.     Hope you will visit again soon.

                                                               Love and rainbows,

                                                                Hugs   Jennifer xx.


Tuesday, 26 January 2021

'Bees and Blossoms.'

Hi there Followers, Friends and Visitors,

Today I would like to share another card with you, which I made for the Imagination Craft show earlier this month, when the beautiful  Vintage Florals collection  (Mandy's first signature collection) was launched.    This card features a fabulous die-cut bee from the collection.


Cut out the section of rice paper with the blossoms on and using the decoupage glue, fix this to a square of white card, bending the excess rice paper to the back of the white card and securing on the back with the glue.


When this is dry, lay the window design from the A4 stencil onto the left of the background.   Using the spatula, mix some white Structure paste with a little of the Cadence spring green Style Matt Paint, then spread over the window design and the leaf scroll to the right of the window.


 Remove the stencil and leave the image to dry.                                                                                  


When this is dry, rub a little Cadence white gold finger wax over the surface of the image.


Fix this card to a slightly larger piece of  red card and then matt onto the 8" ivory base card.

From the second sheet of the same rice paper design, roughly cut out the flower section and fix this to a piece of white card, using the decoupage glue.


When this is dry, carefully cut out the flower design and the single rose head. 

Using a black inkpad, I stamped the text in the bottom right corner and  I then fixed the flowers to left hand side of  the base card using a mixture of silicone glue and sticky foam pads and the single rose head  to the bottom right.

Stamp two small bees, using the stamp from the collection, onto some spare ivory card using the Encore gold pigment pad and heat emboss with gold embossing powder.   I stamped four, two to keep just in case of small accidents (such as accidentally cutting off a feeler or leg lol!......it does happen !).   Happy to say 'not painful to the bee !  lol.


Carefully cut out two bees and glue them to the top right of the base card, using silicone glue.   Die-cut the large bee from the die- set from ivory card.


Next, stamp the bee onto the die-cut using the gold pigment pad and heat emboss with the gold embossing powder, using a heat gun, as previously for the small bees.    

Glue the two smaller bees to the top right of the base card and the larger bee just below the smaller ones, using silicone glue.


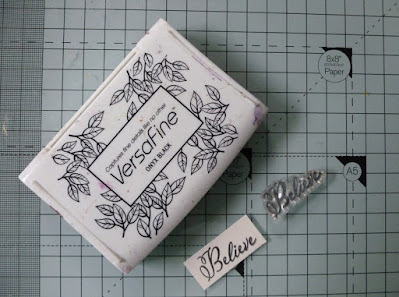
 Stamp the word 'Believe' onto a piece of ivory card using a black inkpad and trim to size.   Glue this to the card front using sticky foam pads.


Below are a couple of photographs taken at an angle to show the dimension of the card.


Well my friends, that is all from me for the moment, hope you like this card.   I will be back soon with another card, made using the very beautiful 'Over the Sea to Skye' Collection, so I'll see you then.  In the meantime please stay safe and well and thank you for your comments and visits to my blog, as always, very much appreciated.

                                                               Love & Rainbows,

                                                 Crafty Hugs to you all.    Jennifer xx.


Thursday, 21 January 2021

'The Key to Kindness.'

Good afternoon Lovelies,

Hope you are all well and safe.   Today I would like to share one of my sample cards with you, which was made for the Imagination Craft's show on the Create & Craft T.V. Channel this lunchtime.   Mandy launched her gorgeous new  Vintage Florals  Signature Collection and boy was it popular!  not really surprised as it is a beautiful collection and her demonstrations were great as always.  


Cut a seven and a quarter inch square of white card and using the Cadence dark purple Style Matt paint, colour around all four edges. (no need to colour the whole card, as most of it will not be seen). 


Cut a slightly smaller square of white card and paint the edges of it with the mauve paint.   Matt this smaller square onto the larger square. 


Next cut a slightly smaller square of white card, then cut out the section of rice paper you want for the background and feather all four edges.


Fix this to the centre of the square white card,  using the Cadence decoupage glue.   Matt this onto the purple and mauve matts.


 Next lay the acanthus leaves design from the stencil onto a spare piece of white card and spread the expanding relief paste through the design, using a metal spatula.  


Remove the stencil and leave the image to dry.   


When this is dry, paint over the card and the image with the mauve paint.   Heat the design with a craft heat gun and the design will expand and bubble up.   Stop heating when you are happy with the results.


Rub some white gold finger wax over the raised design then cut it out, cutting a small piece from the design as below.

Die-cut a delphinium, using the smaller of the two dies and paint it with the spring green paint adding a touch of the Dora emerald metallic paints.   Glue this to the bottom right of the base card.


Glue the smaller piece of the expanding paste embellishment to the top left of the card, using some mixed media glue and the larger, to the bottom right corner.


Paint a small piece of white card with the mauve paint and when dry, stamp two small butterflies onto it, using a black ink pad.   Cut them out and glue to the card front, adding some silicone glue under their wings.


 Stamp the words 'Spirit'  'Kindness' and 'Shine' onto some white card with black ink, then trim each word and fix to the card front with sticky foam pads........and 'voila,'  the card is finished.


Below is a angled view showing the dimension of the design.

Thank you for your comments and visits to my last blog post, very much appreciated.   I will be back soon with another card to share with you.   In the meantime, take care and do stay safe.

                                                                 Love and Rainbows,

                                                             Crafty Hugs   Jennifer xx.