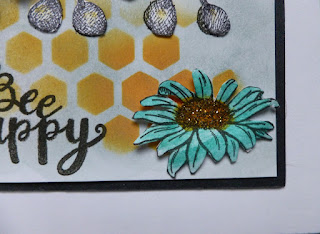
Hope this post finds you all well but if you are feeling under the weather, I do hope my happy little bees will cheer you up. This is one of the stamps I came across whilst tidying my stamp boxes. This is a very old wooden stamp and I just love these little fellas lol! aren't they cute. Sorry I cannot tell you the make of this stamp, as the name has worn off (through being used so often lol!). The 'Bee Happy' sentiment and flower stamps came free with a craft magazine some time ago. The background was done using distress inks and Imagination Craft's 'Honeycomb' stencil and 'Rich gold' Starlight paint.
Before we begin, I would like to welcome my latest Follower Ayoti Mittra, I do hope this is correct as I have lost track a little....so apologies if I have got this wrong, anyway, thank you for following my blog, much appreciated. O.k let's get started, enough chit chat, let's get on with the card lol.
Make a square white base card and matt a smaller square of black card onto it. Take a smaller square of white card and colour it with the weathered wood Distress ink.
Lay the Imagination Craft's 'Honeycomb' stencil onto the coloured card and rub some 'Spiced marmalade' Distress Oxide through the design using a blending tool or a piece of cut 'n' dry foam. Remove the stencil.
Stamp the bees across the centre of the card, using a black inkpad. Fix this card to the base card.
Stamp the bees once again onto a spare piece of white card and colour with the Marvey le' Plume pens.
Cut the bees out and 3D them onto the original stamped image, using silicone glue.
Stamp 'Bee Happy' on the bottom of the coloured card, using a black inkpad.
Stamp three flowers onto some spare white card, again using a black inkpad and colour with the pens.
Cut out and glue one on the top centre and the other two, either side of 'Bee Happy.'
Add some Stickles Copper glitter glue to the centre of each flower.
Add some watered down Rich Gold Starlight paint to the wings, feelers, noses and bodies of the bees. (don't have the paint too thick, or you will obliterate the stamped image).
Well, that's this happy little card finished, I do hope these little fellas bring a smile to your faces, I know they do me lol! Take care of yourselves until my next blog. Happy crafting. Thank you all for your comments and visits.
Love and rainbows,
Hugs Jennifer xx.


A lovely bright and sunny card, unlike the weather here today. Hope you are well xx
ReplyDeleteYour little bees just make me smile.
ReplyDeleteHugs Diane
Gorgeous Jennifer, I do love these cute bees.
ReplyDeleteHugs
Linda xxx
A great little card! Just LOVE those bees!
ReplyDelete