Matt a slightly smaller square of black card onto a 7 " x 7" white base card, then a slightly smaller square of turquoise blue card onto the black matt.
Cut a slightly smaller square of white card and using the Fiskar's circle cutter, cut out a five and a half inch diameter circle from the square of white card. I used my circle cutter because I do not have a large plain, circle die.
Stamp the clock pointers in the centre of each side of the square, using a black ink pad.
Take another square of turquoise blue card, the same size as the white card with the aperture. Lay the stencil onto it and mix some Cadence cameo metallic paint, with a touch of the copper, through the brick design, using a stencil brush. Remove the stencil and leave the image to dry (which will not take long).
Matt the aperture onto the stencilled turquoise blue card and then onto the base card.
Stamp the steampunk basque onto some black card, using a Versamark pad and heat emboss with silver embossing powder.
Using the basque die from the collection, die - cut the basque. Glue this to the right-hand side of the base card using silicone glue.
Die-cut the hanging chains from black card and colour using the Cadence silver finger wax.
Glue this to the top left of the card.
Stamp the word 'Brave' onto a piece of white card using a black ink pad. Round off the corners with a corner rounder punch. Rub some black ink around the edges of the label. Glue this on top of the chains, using silicone glue.
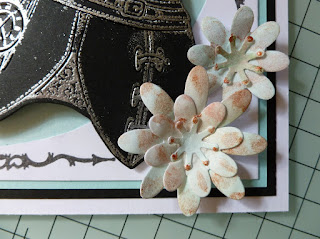
Colour some white card with the light blue and pale pink MDF paints and from this, punch out 3 large flowers and five smaller ones, plus 5 stamen.
Colour parts of the petals with watered down Cadence copper metallic paint. 3D. the large flowers, adding the stamen to the centres.
Glue 2 large and 1 small flowers in the bottom left corner.
Glue 1 large and 1 small in the bottom right corner.
Finally, glue the last small flower to the top of the basque and the card is now finished.
Hope everyone has a good week and thanks again for your visits and comments, each and every one is appreciated. Take care of yourselves and I will be back again quite soon.
Love and rainbows,
Hugs Jennifer xx.


A great steam-punk card Jennifer. Hope you are well, love and hugs xx
ReplyDeleteThis is fabulous, I love the layers.
ReplyDeleteHugs
Linda xxx