Followers

Friday, 26 June 2020

'Magical Place.' Encaustic Art Card.

Good afternoon Lovelies and a beautiful one it has turned out to be, after a very dull start lol!    The sun is shining once again but it is not quite so hot as it has been recently.   Today I would like to share a card I made way back I think lol , in 2007.   The background to this scene was made using my encaustic iron and waxes, which I purchased from Michael Bossom many years ago.  The fairy stamp was purchased from him too.   I really must get my waxes etc., out again as they have been forgotten about over the years and I really love using them, so very satisfying, anyway, less of the chat Jennifer lol!   let's see the finished card.   Here she is in her magical place, hope you like it.

           
I began with a piece of encaustic wax white A5 card which has a smooth, shiny surface so the melted wax stays on the surface.   I melted some grey, dark blue, white and silver waxes onto my up turned encaustic iron, then ran the iron across the card.   Worked the wax a little until I was satisfied with the results.   At this stage my imagination took over.......should I make this into an icy wonderland with penguins or white bears ? or maybe a fairy ?   I love all three but decided it had to be a fairy.    I stamped her onto the background using a Black Stazon pad.


I painted a small piece of vellum with some radiant pearl paint, then stamped her wings only onto it.  I then cut them out and fixed them to the original image of the fairy.


This was trimmed down to approx. two and a half inches by four and a quarter.   This was then matted and layered onto a slightly larger piece of white card.

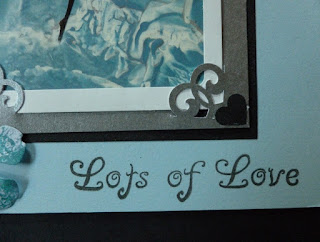
I cut out a larger piece of metallic silver card and using the EK Success corner punch, punched each corner.   The white card and the encaustic design was eased into each of the punched  corners.

This was then matted onto a slightly larger piece of black card and fixed to the centre of an A4 light blue card, folded in half, portrait style.

 
I punched 4 small hearts  from black card using my punch which I still have after all these years lol!
I glued one to each corner of the silver metallic card.

Next I stamped  'Happy Birthday' to the top of the card and  'Lots of Love' to the bottom using a black ink pad.


All that remained to be done was to make three flowers from some white paper coloured with some blue distress ink, then die cut  using a Memory Box die, (if I remember rightly lol, it was some time ago !).      Glue two to the bottom left and the third to the top right.


Thought I would show you the card on an angle as you can see the silver wax shining in the light.


Well that's all from me  for the moment, until my next blog.   Stay safe and keep well but above all....be happy !   Ooops lol! forgot to say 'thank you' for all your lovely comments and visits to my last blog, I do love to hear from you.   Take care.

                                                                  Love and rainbows,

                                                                    Hugs   Jennifer xx.


Monday, 22 June 2020

'Sharing the Magic.'

Hello there Everyone,   Hope you all enjoyed your weekend wherever or whatever you were doing.  I was looking through my files  at all the cards I have made over the years - and there are many lol!  so
I decided to show you one I made way back in about  2007.  

           
I made a base card from a piece of A4 light cream card, trimmed a half inch from one of the long edges, then folded in half.   Using a corner stencil design, (sorry cannot remember the make as it was so long ago now!)  I used an embossing tool and mat to emboss through the design onto each corner of the base card.


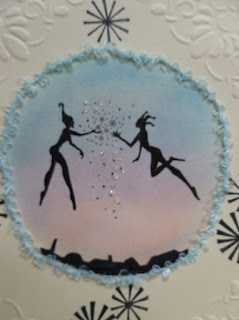
 I cut out a 3 inch circle from a piece of copy paper and lay the negative left over after cutting out the circle, onto the centre of the base card, approximately an inch and a half from the top of the base card.  I then coloured it with a piece of cut 'n' dry foam and the Big and Juicy, Gumdrop ink pad.   I then stamped the very pretty elves stamp from Lavinia Stamps onto the centre of the coloured circle, using a black ink pad.

                                                                                                     
I added a few dots of glue between the elves and sprinkled a little fine holographic glitter and removed the excess glitter.   I then took a black pen and drew some rooftops at the bottom of the circle.

      
I then stamped eight star shapes using one of my wooden stamps (again, sorry not sure whose stamp it was,  and after looking through all my stamp boxes, still cannot not find it, just so many lol!!!) using a black ink pad.

   
I put a little glue around the edge of the coloured circle and added some pretty blue, looped fibre thread around the circle.

   
Finally I glued a small black, punched circle to each corner of the base card.   When I made this I don't think embossing folders were around then, so any embossing had to be done with an embossing tool on an embossing matt lol!   but there was something very satisfying seeing the end result lol!   Well that's all from me for the moment, so cheerio all until my next blog and take good care of yourselves and be happy.

                                                                Love and rainbows,

                                                                 Hugs   Jennifer xx


Thursday, 18 June 2020

'Seize the Day.'

Hello Everyone,

As it is a little time since I last blogged, I  thought I would share another card with you.   Thank you all so much for your lovely comments on my 'Oily Owl' steampunk card.    I would also like to mention my newest follower, Purple Nannie.   Welcome to my blog  and I hope you enjoy your visits.  For this card I have used the beautiful image of a face from the Imagination Craft's 'Mixed Media Textures' collection, which was launched  in May this year.      I just love her face   I decided to leave her .image unpainted but have some colour on the background,  I felt she didn't need painting as she has so much expression  in her face already, so I left it very simple.  I have used the 'chicken wire' die from the 'Modernista'  collection on the background of the base card.    The roses are painted with  Emerald and Dried Rose Metallic Starlight paints.   The base card is a 7" x 7" pearl green/lavender card, which changes colour when moved, hence the colours I have used on the background.

   
Using the chicken wire die, die-cut the image twice.   Cut these randomly into four separate pieces and glue one in each corner of the 7" x 7" base card.

   
Cut a square of white card and stamp the face image onto the centre, using a black ink pad.   Stamp this image once again onto a piece of copy paper and trim around the image.   This will act as a mask when the distress inks are added to the background, keeping the face clear of ink.

  
Lay the mask onto the original image and hold in place whilst you add the coloured background.   Using a blending tool or a piece of cut 'n' dry foam, blend the Dried Marigold, Lucky Clover and Seedless Preserves Distress inks around the mask, until you are happy with the results.   Remove the mask.

         
Matt this onto a slightly larger square of white card and then onto a slightly larger piece of black satin card.

  
Matt this onto the base card, on top of the chicken wire die-cuts.


Stamp the text in the bottom right corner of the coloured card, using a black ink pad.


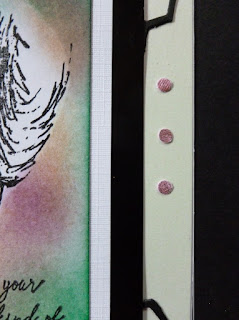
Punch out 4 small circles from white card and glue one in each corner of the coloured card.     Colour 2 small pieces of white card , one with the emerald and the other with the dried rose metallic paints.   When dry, punch out 6 pink and 6 green circles.   Glue the green circles to the top and bottom of the base card and the pink to the left and right - hand sides.


From the leftover  pink and green card, make 1 green and 1 pink rose.   Make a third rose from white card.    I used a quilling tool to roll up the roses  but using your fingers is equally effective, adding a little glue to hold together so it doesn't unroll.


Glue the roses to the bottom left corner of the base card.

    
Stamp the words 'Carpe Diem,' (seize the day) onto a piece of white card using a black ink pad. 

      
Trim around the words and add a little black ink around the edges.

  
Glue this to the top left of the coloured card.


Well that's this card finished my lovelies,   I do hope you like it.   Take good care of yourselves, stay safe and keep well.    I'll be back again quite soon.

                                                                Love and rainbows,

                                                                 Hugs   Jennifer xx.


Wednesday, 10 June 2020

'Oily the Owl.'


Hi there Friends, Followers and Visitors,

Hope you are  keeping safe and well during this difficult time in all our lives.   Today I would like to share a card I made for Imagination Crafts Shows on the Create & Craft T.V. Channel, which featured the fabulous 'Dark Angel Collection.'   I happen to love owls and this one is no exception, just  slightly different from the norm lol! he's just so cute!  love him!    Please bear with me, as there are quite a few photos but I do want to show you the different stages, this card is a bit more time consuming but I think, well worth that extra  time....hope you're still with me at the end of this post lol!    Lots of photos but not much text you'll be pleased to hear!

 
Trim a piece of white card to five and three quarter inches square.   Colour the card with the light sage and bordeaux Cadence acrylic paints, brushing in a vertical manner.


When dry, matt this onto the 7" x 7" white base card.   Add some small amounts of copper metallic paint brushed on in one or two places.

   
Colour a piece of white card with a mixture of the brilliant gold and the cameo metallic paints.


When dry, stamp half of the hinge 4 times onto the coloured card using a black ink pad.   (Put a piece of masking tape over the half hinge you don't want stamped, then remove the tape after inking up the stamp).

                   
Cut out the hinges and glue one in each corner of the base card.

     
Cut out a 4 inch circle and paint it with the light sage paint, then a few brushstrokes of watered down malahit metallic paint.   

            
When dry, matt this onto the centre of the base card.   Paint some white card with the malahit and die-cut  4 cogs from this using the dies from the collection.   Cut each cog in half and glue 4 of the halves to the outside edges of the pink/green matt.   Using the left-over coloured card after cutting out the hinges, stamp 12 nail heads onto it, cut each one out and glue them evenly around the inside edges of the matt.


Cover a piece of white card with white structure paste, leaving a rough finish and when dry, die-cut a
3inch scalloped circle from it.   Glue this to the larger green circle.

Die-cut l small and l large set of leaves  from the left over coloured card after cutting out the hinges and add some peridot finger wax to each leaf.  


Stamp the owl onto some grey metallic card, 6 times using a black ink pad.


Paint the owls with watered down brilliant gold and copper paints.   Cut out the owls and 3D him.


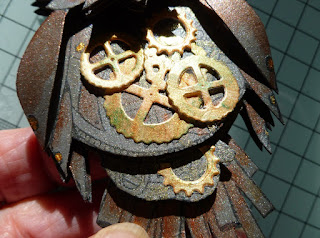
Die-cut a variety of small cogs and paint them gold.   Glue to the owls chest and glue one on top of each eye.


Stamp the beak once and colour gold, cut out, then glue onto the owl using silicone glue.   Fix the owl to the scalloped circle on the base card, adding the two leaf stems behind him, adding some silicone glue beneath each leaf.

  
Well I think that's everything covered lol!  phew!   if you are still with me...thank you for your patience, I do hope you think it was worth it lol!   Below is a photo showing the 3D layers of the image.


Thank you for visiting my blog and for your lovely comments, much appreciated as always.   Take good care of yourselves, stay safe and well.   I'll be back again soon.

                                                               Love and rainbows,

                                                              Crafty Hugs Jennifer xx.