I began with a piece of encaustic wax white A5 card which has a smooth, shiny surface so the melted wax stays on the surface. I melted some grey, dark blue, white and silver waxes onto my up turned encaustic iron, then ran the iron across the card. Worked the wax a little until I was satisfied with the results. At this stage my imagination took over.......should I make this into an icy wonderland with penguins or white bears ? or maybe a fairy ? I love all three but decided it had to be a fairy. I stamped her onto the background using a Black Stazon pad.
I painted a small piece of vellum with some radiant pearl paint, then stamped her wings only onto it. I then cut them out and fixed them to the original image of the fairy.
This was trimmed down to approx. two and a half inches by four and a quarter. This was then matted and layered onto a slightly larger piece of white card.
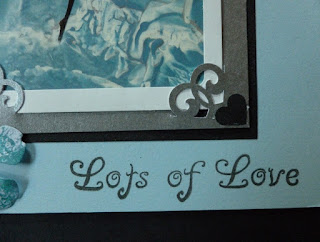
I cut out a larger piece of metallic silver card and using the EK Success corner punch, punched each corner. The white card and the encaustic design was eased into each of the punched corners.
This was then matted onto a slightly larger piece of black card and fixed to the centre of an A4 light blue card, folded in half, portrait style.
I punched 4 small hearts from black card using my punch which I still have after all these years lol!
I glued one to each corner of the silver metallic card.
Next I stamped 'Happy Birthday' to the top of the card and 'Lots of Love' to the bottom using a black ink pad.
All that remained to be done was to make three flowers from some white paper coloured with some blue distress ink, then die cut using a Memory Box die, (if I remember rightly lol, it was some time ago !). Glue two to the bottom left and the third to the top right.
Thought I would show you the card on an angle as you can see the silver wax shining in the light.
Well that's all from me for the moment, until my next blog. Stay safe and keep well but above all....be happy ! Ooops lol! forgot to say 'thank you' for all your lovely comments and visits to my last blog, I do love to hear from you. Take care.
Love and rainbows,
Hugs Jennifer xx.


Stunning card Jennifer, loving the background which showcases the fairy beautifully.
ReplyDeleteHugs
Linda xxx
Wow Jennifer, what a magical card design and love the colors.
ReplyDeleteHugs Diane
Gosh Jennifer this is stunning, what a brilliant technique. The wax makes the most fantastic patterns and the colours are gorgeous. The fairy image is so pretty, so very magical, Kate x
ReplyDelete