Hope you are all safe and keeping well during this very worrying time. Thank you for your visits and lovely comments on my last blog. I think it is time for me to share another card with you all. Sorry I haven't blogged for a while but we have been trying to catch up with all the gardening jobs that were waiting to be done, whilst the weather has been good. Today is beautiful and sunny but boy is it chilly lol! so having a quiet day to myself lol! whilst hubby is in the vegetable garden. Today's card was made in June 2019 for Sue of Imagination Crafts, for their shows on the Create & Craft T.V. Channel. The products I have used are part of the 'Birds & Blossoms' Collection. Below is the card I am sharing with you today.
Matt and layer a 6" square of black card onto a 7" x 7" white base card. Take a slightly smaller square of white card and dry brush some blue, sage green and pink MDF chalk paints over the centre of the piece of card.
Stamp the main image - ie., the cup and saucer and bird onto the centre, using a black ink pad.
Stamp the 'friends'... sentiment above the cup and saucer, again using a black ink pad.
Stamp the main image again onto a spare piece of white card. Paint the cup and saucer with watered down light blue mixed media spray ink.
Paint the rim and handle of the cup with watered down Cadence Inca gold finger wax and the spoon with watered down silver finger wax, the bird with the Cadence Dora gold aqua metallic paint. Cut out the image.
Colour another piece of white card with the gold aqua and the blue rose metallic paints and when dry, stamp the bird onto it using a black ink pad.
Cut out the bird and glue to the main image, using silicone glue.
Below is what the bird looks like when the light shines on these gorgeous metallic paints.
Stamp the butterfly twice onto spare white card using a black ink pad.
Paint them with the light blue spray ink and watered down Inca gold finger wax.
Cut them out and 3D them onto the main image. I made 3 but only need 2 (1 spare in case of accidents.).
Colour a piece of white card with watered down green finger wax and stamp the rose and leaves part of the image. Cut this out (you now have green leaves and a green rose!).
Colour a further piece of white card with the blue rose and gold rose paints. Apologies for the slightly blurred photo, I must have jerked the camera lol!
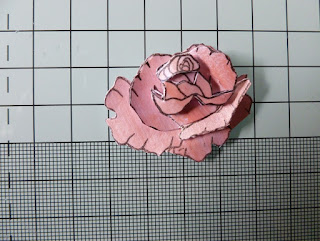
Next stamp the rose and leaves part of the main image onto the pink card with black ink, 6 times, cut out and 3D onto the green rose image, (not using the pink leaves !)
Glue the 3D cup onto the original stamped image on the painted base card and matt onto a slightly larger square of black card.
Colour the cup and saucer with well watered down light blue spray ink. Matt this onto the white base card.
Glue three light blue pearl gems to the bottom right corner.
Well that's all from me for the moment. Happy crafting, stay safe and well. Thanks again for stopping by my blog. I'll be back again soon with one of my new samples I am working on for Imagination Craft's next show, which will be very soon.
Love and rainbows,
Hugs Jennifer xx.


What a gorgeous card Jennifer, the bird image and colours are beautiful, beautifully designed. I love everything about it.
ReplyDeleteWe had snow yesterday and the temperature has plummeted, woolies are still out, stay safe, Kate x
Such a pretty card - love the subtle colours. Not very nice here in Liverpool today - cold and a bit damp! Hope you are well - stay safe xx
ReplyDeleteThis is fabulous Jennifer, I love the beautiful step by step and wonderful layers on your card.
ReplyDeleteHugs
Linda xxx
Fabulous design Jennifer, love the dimension and use of metallic paints.
ReplyDeleteHugs Diane